Instagram Reels Explained: From Basics to Pro-Level
Instagram Reels have taken the social media world by storm, offering content creators, brands, and users a dynamic way to tell stories and share moments. If you’ve been scrolling through the endless reel of creativity but haven’t yet joined the trend, you might be missing out on an opportunity to boost your presence and engage with your followers. This guide will walk you through how to create Instagram Reels, from brainstorming ideas to posting your first Reel, and everything in between.
What Are Instagram Reels and Why Should You Use Them?

Instagram Reels are bite-sized video segments ranging from 15 to 30 seconds, ideal for sharing interactive content. The creative tools available for TikTok videos are also applicable to Reels updates on Instagram.
Here are a few reasons why Reels can make a difference on your Instagram:
- More Discoverability : Instagram promotes Reels heavily on the Explore page, which helps your content get discovered by a wider audience.
- Higher Engagement : Reels tend to generate more likes, comments, and shares than regular posts, thanks to their engaging format.
- Showcase Creativity and Personality : Reels give you the freedom to experiment with trends, transitions, and storytelling.
- Grow Your Audience : By jumping on viral trends and hashtags, you can attract new followers while keeping existing ones entertained.
Step 1: Plan Your Content
Before you hit the record button, take a step back and think about your goals. Planning ahead ensures that your content is engaging and aligns with your message.
Ask Yourself These Questions:
- Who is your audience? Are you appealing to fitness enthusiasts, tech lovers, or fashionistas? Tailor your tone and style to resonate with them.
- What message are you trying to convey? Whether it’s educating, entertaining, or selling, having clarity in your message is crucial.
- Are there trends you can use? Scrolling through recent Reels can give you an idea of hashtags, audio tracks, or visual styles trending on Instagram.
Once you have your answers, outline your video idea.
Step 2: Open Instagram and Access Reels
Creating a Reel is simple, and it all starts from the Instagram app.
Here’s How to Get Started:
- Go to the Instagram App : Open the Instagram app on your phone.
- Access the Reels Feature :
- Tap the “+” icon on the top right corner of your screen.
- From the “Create” menu, select Reel from the available options.
Now you’re inside the Reels camera, ready to create your masterpiece!
Step 3: Record or Upload Video Clips
Recording Clips Live:
- Press and hold the Record button to capture your video clips.
- Use the slider bar to adjust how long you’d like each clip to be.
- Instagram allows you to start and stop while recording multiple clips, making it easy to nail down transitions.
Uploading Existing Clips:
If you’ve pre-recorded content:
- Tap the Gallery icon on the bottom left.
- Choose your desired clip(s), trim as necessary, and upload.
Step 4: Add Music and Audio
Music is an essential part of any Reel. It sets the tone, matches transitions, and makes your video more engaging.
Adding Music:
- Tap the Audio icon (music note) on the left-hand menu.
- Browse Instagram’s collection of trending songs, search for specific tracks, or use the Saved tab for songs you’ve bookmarked.
- Choose the segment of the track that matches your clip’s vibe.
You can also use original audio by speaking in your video or uploading clips with an existing soundtrack.
Step 5: Use Creative Editing Tools
Instagram provides several creative tools to make your Reels stand out. Here’s what to consider as you polish your video:
Filters and Effects:
- Tap the Sparkle Icon to access various AR effects and filters.
- Experiment with filters like “Vintage Film” or add sparkles for a whimsical look.
Adjust Speed:
Use the Speed Tool (1x, 2x, 3x, etc.) to slow down or speed up your clips. Great for syncing to music!
Align Tool:
When recording multiple clips, use the Align Tool to create seamless transitions.
Text and Stickers:
- Place animated text and stickers across your video. Use Instagram’s built-in fonts to emphasize key points.
- You can also add hashtags and GIFs to boost discoverability and engagement.
Get creative by combining effects like slow-motion transitions with eye- catching stickers.
Step 6: Preview and Finalize Your Reel
Once your clips are ready, tap Preview to watch your creation and ensure everything flows smoothly.
Things to Double-Check:
- Is your audio synced properly?
- Are your edits smooth and consistent?
- Did any typos sneak into your text overlays?
You can make adjustments before moving forward.
Step 7: Add Captions, Hashtags, and Post
Finally, it’s time to share your masterpiece with the world!
Write a Caption:
- Keep it engaging, concise, and actionable (e.g., “Don’t miss these summer swimwear tips!”).
- Throw in a question to encourage comments (e.g., “Tell us your favorite look!”).
Include Hashtags:
Use a mix of trending and niche hashtags to increase visibility. Examples include #InstagramReels, #HowToReel, or #YourBrandName.
Add a Cover Photo:
Select a frame from your Reel or upload a custom image.
Post It:
Once you’re ready, hit Share , and voila, your Instagram Reel is live!
Tips for Creating Successful Instagram Reels

- Start Strong : Hook your viewer within the first 3 seconds with a bold statement or attention-grabbing visual.
- Be Authentic: Users love genuine, relatable content. Don’t try to over-polish; sometimes simplicity wins.
- Experiment : Try different formats, like tutorials, storytelling, or day-in-the-life videos.
- Engage with Your Audience : Reply to comments and interact with users who share your content. Building community fosters loyalty.
Final Thoughts
Creating successful Instagram Reels can be a fun, creative way to engage with your audience and increase your reach. By following these tips and experimenting with different styles, you can create compelling content that resonates with your followers and attracts new ones. Remember to stay true to your brand and keep an open mind when it comes to trying new things. With consistency and authenticity, you’ll be on your way to mastering the art of Instagram Reels in no time!
On this page
What Are Instagram Reels and Why Should You Use Them? Step 1: Plan Your Content Step 2: Open Instagram and Access Reels Step 3: Record or Upload Video Clips Step 4: Add Music and Audio Step 5: Use Creative Editing Tools Step 6: Preview and Finalize Your Reel Step 7: Add Captions, Hashtags, and Post Tips for Creating Successful Instagram Reels Final ThoughtsRelated Articles

How to Create Instagram Reels: A Step by Step Guide

The 7 Best Social Media Management Tools in 2025: Elevate Your Online Presence

The 7 Best Social Media Management Tools in 2025: Elevate Your Online Presence

How to Simplify Marketing: The 12 Best AI Tools for Social Media Management

Step-by-Step Guide to Adding Captions to Instagram Reels

Step-by-Step Guide to Adding Captions to Instagram Reels

The Ultimate Comparison: Hootsuite vs. Buffer for Social Media Success
The 8 Best AI Tools for Social Media Management in 2025 to Streamline Your Strategy

The Ultimate Comparison: Hootsuite vs. Buffer for Social Media Success

Elevate Your Strategy with the Best Content Marketing Tools of 2025

Top Tips for Designing Eye-Catching Video Presentations on Any Device

The 8 Best Content Marketing Tools in 2025 to Elevate Your Strategy
Popular Articles
Which Are the Best Android Note-Taking Apps in 2025?
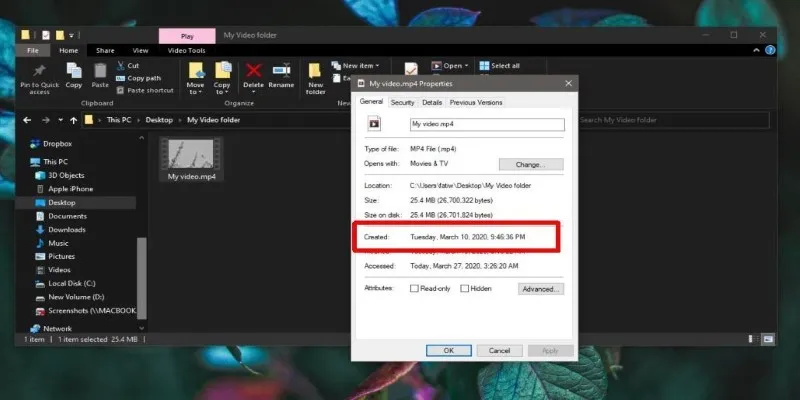
The Ultimate Guide to Changing Creation Dates for Files on Windows

Google Adds AI Scam Detection to Android Phones for Safer Usage

8+ Cool jQuery Plugins for WordPress to Supercharge Your Website
Boost Your Productivity: The 10 Best Google Docs Add-Ons You Need

These Five New Features Make X DMs More Like a Messaging App You'll Love
Best Tools to Convert MP4 to DivX with High Quality

How to Fix Corrupted Videos on Windows: A Step-by-Step Guide
Top 5 GIF-Making Apps for Android to Create Hilarious GIFs

How Can You Connect Every Step of the Customer Journey with Teamleader Focus?

Top Note Taking Apps for iOS Devices This Year

 mww2
mww2