 mww2
mww2
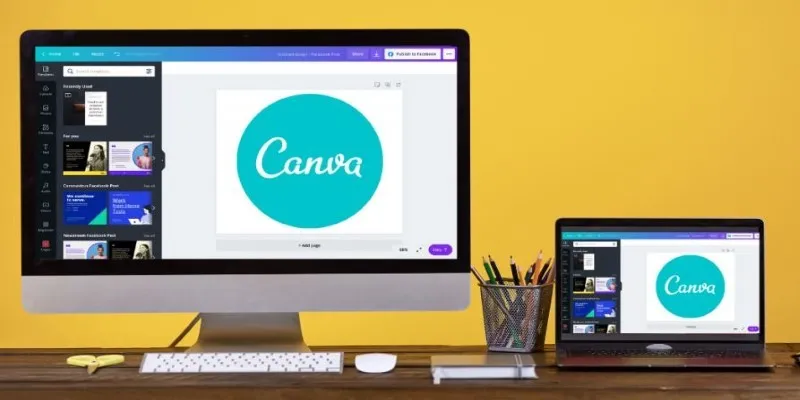
Canva Slideshow Made Easy: Design with Templates and Add Audio
Slideshows have become an essential tool for storytelling, whether you’re presenting in a meeting, creating educational content, or designing engaging social media posts. But a slideshow without sound risks losing its full potential to captivate your audience. Luckily, Canva, the design tool loved by millions, allows you to create stunning slideshows with custom audio tracks seamlessly. This guide will walk you through how to craft a polished Canva slideshow with audio from start to finish.
Why Add Audio to Your Canva Slideshows?

Adding audio to slideshows elevates the entire viewing experience. Audio tracks can:
- Enhance engagement: Background music or narration keeps your audience more attentive.
- Set the tone: The right track can evoke emotions, amplify storytelling, or emphasize your key message.
- Differentiate your slideshows: While many presentations rely solely on visuals, pairing them with sound helps your slideshow stand out.
Whether you’re creating a video presentation for your business, a classroom lesson, or an animated pitch for social media, Canva’s audio capabilities provide the tools to give your slideshow that extra edge.
How to Create Canva Slideshows with Audio Tracks
Follow these step-by-step instructions to learn how to design and enhance your Canva slideshows with audio tracks.
Step 1: Open Canva & Choose the Right Template
- Log in to your Canva account. If you don’t have one yet, create an account for free at https://www.canva.com.
- On the homepage, use the search bar to type “Presentation” and hit enter. Canva will display a wide range of templates designed for slideshows.
- Choose a template that fits your project. For example:
- Educational Slideshow: For lessons or how-to guides.
- Marketing Pitch Deck: For professional pitches.
- Fun & Casual Design: Ideal for personal or social media projects.
You can start with a blank canvas, but Canva’s curated templates make it easier to get a head start with professional designs.
Step 2: Customize Your Slides
- Add Your Content: Replace template placeholders with your text, images, and elements. Canva has an extensive library of fonts, free stock photos, and icons to choose from.
- Design Layouts: Adjust layouts to suit your message. Use Canva’s grid and alignment tools to keep everything neat and visually appealing.
- Animate Your Slides (Optional): Click on “Animate” at the top bar to add creative animations like fades, slide-ins, or bounces for dynamic transitions between slides.
Step 3: Add Your Audio Track
Once your slides are ready, it’s time to bring them to life with sound.
- Access the Audio Library: Click on the “Elements” tab in the left-hand menu, then scroll down and select “Audio.”
- Browse Canva’s Audio Tracks: You’ll find a variety of music tracks organized by mood, genre, or occasion (e.g., happy, cinematic, upbeat).
- Upload Your Own Audio (Optional): If you have a custom audio file (like recorded narration or a specific song), you can upload it by going to the Uploads tab and selecting Audio.
Choose an audio track that complements your project’s goals. For example:
- Use soothing instrumentals for professional presentations.
- Select upbeat tunes for social media slideshows.
Step 4: Sync Audio with Your Slides
To create a cohesive slideshow, it’s important to sync your audio track with your slides:
- Drag your selected audio file into your timeline at the bottom of your screen.
- Adjust the audio duration to match the number of slides. Canva allows you to trim longer audio clips if needed.
- Use the “Preview” button to test how well your visuals align with the audio. Tweak transitions and duration to ensure harmony between sound and visuals.
An ideal length for social media slideshows is typically under 60 seconds. For presentations or classroom materials, focus on clarity rather than speed.
Step 5: Add the Final Touches
- Text-to-Speech Option: Canva lets you transform written text into voiceovers, ideal for tutorials or guides.
- Transitions and Effects: Add smooth transitions to your slides to ensure visual and audio flow.
- Review Your Project: Watch your slideshow from start to finish one last time to spot any errors or timing mismatches.
Step 6: Export and Share
Once you’re satisfied with your finished slideshow, it’s time to save and share it.
- Click the “Share” button at the top right corner of Canva.
- Choose your export settings:
- For videos (with audio), select MP4.
- For presentations (without automatic play), choose PDF.
- Adjust quality settings if necessary (1080p is recommended for most projects).
- Hit Download to save your slideshow to your device, and it’s ready to share across platforms!
Best Practices for Creating Canva Slideshows with Audio

- Choose High-Quality Audio: Poor sound quality can detract from even the best visuals. Opt for clear and professional tracks.
- Keep It Simple: Avoid overcrowding your visuals with too much text or unnecessary elements. Clean designs ensure your audience focuses on the content.
- Balance Volume: Ensure your audio enhances rather than overpowers your message. Adjust the volume in Canva or with external editing tools if needed.
- Add Audio to Specific Slides: Carefully consider which slides should have audio. Not every slide needs it, so use it strategically for maximum impact.
- Consider Background Noise: If recording voiceovers or using live audio in your slideshow, be mindful of background noise. Choose a quiet location or use a microphone to minimize distractions.
- Match Audio with Slide Transitions: The timing of your audio should match the visuals on each slide. This creates a seamless flow and keeps your audience engaged.
Conclusion
Crafting Canva slideshows with audio tracks can elevate the quality and impact of your presentations. By following a step-by-step approach, you can ensure that your content is both visually appealing and audibly engaging. From planning your slides to strategically incorporating audio and refining the timing, every detail contributes to the overall message you aim to convey. With the tips and techniques outlined in this guide, you have the tools needed to create professional and effective slideshows that captivate your audience.
Related Articles

Step-by-Step Guide to Creating Canva Slideshows with Audio

Top Tips for Designing Eye-Catching Video Presentations on Any Device

Top Online Graphic Design Tools for 2025: Canva, Figma, and More
Transform Your Presentations with These Free PPT Template Tools
Top Online Graphic Design Tools for 2025: Canva, Figma, and More

Mastering Video Content: How to Edit and Post on Pinterest

Discover the 9 Best Tools for Modern Web Design in 2025

Step-by-Step Guide to Making a Video Essay That Inspires

How to Effortlessly Combine MP4 Videos on Your Desktop

How to Create Instagram Reels: A Step-by-Step Guide

3 Easy Ways to Create a Stunning Memory Video on Your iPhone

Top 5 Video Stabilization Tools for Professional-Quality Footage
Popular Articles

How to Embed a YouTube Video in PowerPoint with Confidence: A Complete Guide

Top Food Community Apps for Recipe Sharing
Top 5 VOB to MP4 Converters to Make Your DVDs Digital
Best Android Emulators to Run Mobile Apps on PC

Build an Amazing Product Tour with SlideDeck 2

Easy Ways to Automatically Upload Zoom Recordings to Google Drive

How to Convert and Transfer Videos to Your iPad Air from a Mac
Step-by-Step Guide to Making a Video Essay That Inspires

Which Are The Best Database-Powered App Builders for Seamless Development?

Best Code Editor Apps in 2025 for Fast, Clean Coding

3 Must-Have Digital Asset Management Mobile Apps for Streamlined Workflow
