 mww2
mww2
Quick and Simple Way to Convert MP4 to Windows Movie Maker
Windows Movie Maker is a beginner-friendly tool for video editing, but it doesn’t support MP4 files due to codec issues. Don’t worry—it’s easy to fix! Converting MP4 files to a compatible format like WMV is simple with the right tools. This guide will show you which formats work, how to convert files, and the best tools to do it quickly and safely.
Why Doesn’t Windows Movie Maker Support MP4?
MP4 is one of the most commonly used video formats due to its versatility and high-quality compression. However, Windows Movie Maker only supports specific formats like WMV (Windows Media Video), AVI, and sometimes MPEG formats.
The issue lies in the codecs used within the MP4 format. If the codecs don’t align with those supported by Windows Movie Maker, the videos simply won’t work. This limitation might feel frustrating at first, but a quick file conversion will solve the problem.
Supported Formats for Windows Movie Maker
Before you start converting your MP4 files, it’s helpful to know which formats work seamlessly with Windows Movie Maker. Stick to these options to ensure compatibility:
- WMV (Windows Media Video): The most reliable format for Windows Movie Maker.
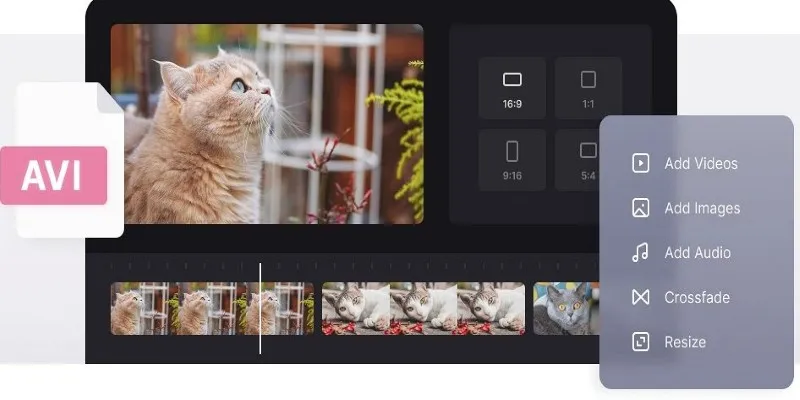
- AVI (Audio Video Interleave): Another supported format commonly used for video editing.
- MPEG (Moving Picture Experts Group): Suitable for exporting or importing less complex projects.
Among these, WMV is often the best choice because it integrates flawlessly with Movie Maker.
How to Convert MP4 for Windows Movie Maker
Now that you know what format you need, here’s how to convert your MP4 files for use in Windows Movie Maker. Follow these simple steps:
Step 1: Choose a Video Conversion Tool
To convert an MP4 file, you’ll need a reliable video converter. Here are some excellent tools you can trust:
- HandBrake (Free): A user-friendly, open-source converter available for both Windows and Mac.
- Any Video Converter: Offers a free and paid version with an intuitive interface.
- Freemake Video Converter: A free tool with advanced features (includes a watermark in the free version).
- Movavi Video Converter: Paid software that’s fast and packed with features.
Download and install the video converter that works best for your needs.
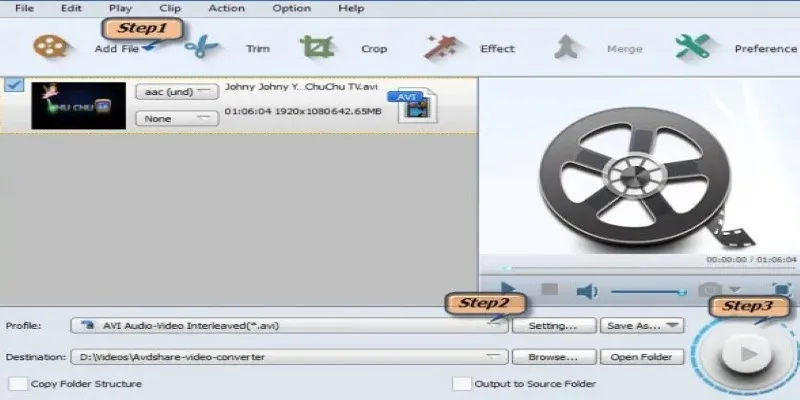
Step 2: Add the MP4 File to Your Converter
Launch your chosen video converter and locate the “Add File” or “Import File” button. Click it to upload your MP4 video to the program. Some converters may allow you to drag and drop the file directly into the application.
When converting multiple MP4 files, batch processing tools can save you time by handling all files simultaneously, streamlining the process and eliminating the need for individual conversions.
Step 3: Select the WMV Format
After loading your file, navigate to the “Output Format” or “Save As” section. Select WMV as your preferred format to ensure full compatibility with Windows Movie Maker and enjoy seamless video editing without any hassle.
You may also have options to adjust the output file’s resolution, bitrate, and frame rate. If your file size isn’t a concern, keep the original quality settings to maintain the best possible video appearance.
Step 4: Start the Conversion Process
Press “Convert” or “Start” to begin. Processing time varies based on your video size and computer performance. Sit back and let the process handle the rest efficiently!
Once the conversion is complete, the tool will save the new file on your computer. Note the location of the file for easy access when importing it into Windows Movie Maker.
Step 5: Import the Converted File into Windows Movie Maker
With the file now in WMV format, you’re ready to add it to your project:
- Open Windows Movie Maker.
- Click the “Add videos and photos” button.
- Locate and select your converted WMV file.
- Click Open to import it into your timeline.
Your MP4 video is now ready for editing in Windows Movie Maker.
Best Practices for Successful Conversions
To ensure a smooth experience every time you convert MP4 files for use in Windows Movie Maker, keep the following tips in mind:
-
Choose High-Quality Tools: Always choose reliable video converters to protect your device from malware, viruses, or unwanted software. Prioritize trusted tools to ensure safe downloads and a smooth, hassle-free file conversion experience.
-
Verify Format and Codec Support: Make sure to export in a fully compatible format, such as WMV, to ensure a smooth and successful process without any compatibility issues.
-
Maintain File Organization: Organize your original MP4 files and converted versions in clearly labeled folders to make locating and managing your media files quick, efficient, and hassle-free.
-
Optimize for Size Limits: If your original MP4 file is very large, consider reducing the resolution during conversion to work more efficiently within Movie Maker.
Benefits of Converting MP4 for Windows Movie Maker
Converting MP4 for compatibility with Windows Movie Maker isn’t just about overcoming a technical limitation. It comes with additional benefits:
-
Preserves Quality: Ensuring proper video conversion is key to maintaining sharpness and quality throughout the entire editing process, helping your final project look polished, professional, and ready for any platform.
-
Streamlined Editing: Compatible formats remove the frustrations of lagging, errors, or missing audio, letting you focus on the creative side of video production.
-
Broader Sharing Options: WMV files are highly compatible with Windows-based systems, making them ideal for easy sharing and distribution. Their smaller file size ensures faster uploads, downloads, and seamless playback on Windows platforms.
Conclusion
The ability to convert MP4 for use in Windows Movie Maker unlocks endless possibilities for storytelling, sharing cherished memories, or creating standout projects for work and school. And if you’re looking to take your video editing skills further, consider upgrading to advanced software tools once you’re comfortable with Movie Maker’s basics. Remember, great videos start with the right tools and a little creativity. Try out these conversion steps today and bring your vision to life!
Related Articles

LightCut 2025 Review: The Best Video Editor for Android and iPhone

Free Video Editing Software for Mac OS X: 10 Excellent Choices

Top Live Video Mixing Software for Creators
10 Best Free Video Editing Tools to Make Social Media Videos Stand Out

PowerDirector: A Fast and Accessible Video Editing Tool for Everyone

What is HitFilm Express? A Beginner's Guide for Mac Users

From Video to Audio: 10 Top MP4 to MP3 Converters in 2025

Effortless Steps to Convert and Upscale Video to 4K Resolution
Customize Your iMovie Videos with Stunning Filters
Top Video Editing Tools with a Wide Range of Free Sound Effects
How to Edit and Merge GoPro Videos on Your Windows PC
Top Free Software to Convert MKV to AVI for Windows Users
Popular Articles

5 Excellent Alternatives to Fraps for Screen Recording

Convert XCF to JPG: The 7 Best Methods You Need to Know

Step-by-Step: How to Add Voice Search Capability to Your WordPress Site

4 Top-Rated Affordable Reporting Software to Simplify Your Data Analysis

A Comprehensive Guide to E-Commerce Platforms: Shopify, WooCommerce, and More

Enhance Customer Engagement Anywhere with Respond.io
How to Join AVI Files on Windows and Mac for Free
9 Reliable Ways to Make Videos Play on Motorola Xoom
Convert TS Files from VCD to AVI Easily and Keep the Quality
Best Free Tools to Convert DAT Files to 3GP Format

Easy Ways to Screen Record Snapchat Stories & Snaps
