mww2
mww2
2 Easy and Free Solutions for Picture-in-Picture Video Editing
Video content reigns supreme, and picture-in-picture (PiP) videos are an excellent way to elevate your storytelling. Whether you’re crafting tutorials, product demos, or engaging social media content, PiP enables you to display multiple perspectives simultaneously, enhancing viewer engagement and comprehension. This guide unveils the top two free methods to create impactful PiP videos, complete with easy-to-follow instructions.
What is Picture-in-Picture Video?

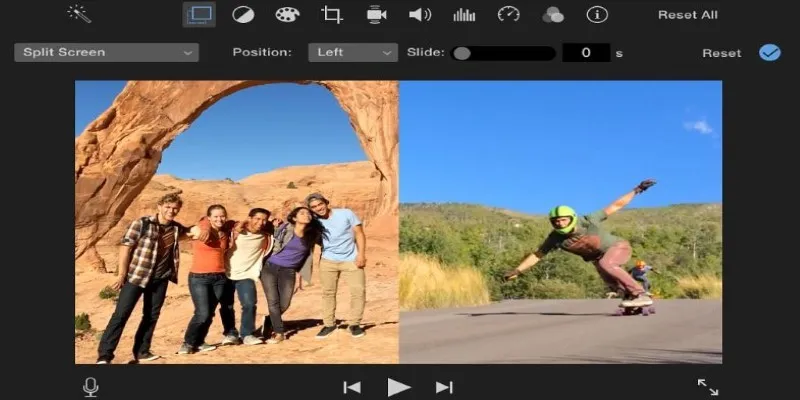
Picture-in-picture is a video editing technique where a smaller video plays within a larger main video frame. It’s commonly used for tutorials, video reactions, gaming streams, and webinars. The smaller inset video can showcase a webcam feed, supplementary footage, or any secondary content, enriching the viewer experience by adding context and interactivity.
Some common use cases for PiP include:
- Online educators incorporating their video feed into a PowerPoint lesson.
- Gamers streaming gameplay with commentary in a corner of the screen.
- YouTubers reacting to a video while keeping their face visible.
Method 1: Using CapCut (Free Video Editing App for Mobile and Desktop)
CapCut is a completely free video editing app available for mobile devices and desktops. Renowned for its intuitive design and robust features, CapCut is a favorite among content creators worldwide, particularly for picture-in-picture editing.
Follow these steps to create captivating PiP videos in minutes using CapCut on your smartphone or desktop:
1. Download and Install CapCut
- Visit the CapCut official website or download the app from your device’s app store.
- Launch the app and sign up (if you haven’t already).
2. Start a New Project
- Tap “New Project” to import your main (background) video, which will serve as the larger video frame.
- Trim your video if necessary to keep the timeline manageable for editing.
3. Import the Secondary (PiP) Video
- Tap “Overlay” in the menu.
- Upload the secondary video or image that will appear as the inset.
4. Position and Resize the PiP
- Drag the inset video to adjust its position and size on the screen. You can place it in the corner or any area that fits your style.
- Use the “Mask” or “Crop” tools to adjust the shape of your inset video (e.g., circular, rectangular) if needed.
5. Adjust Details (Optional)
- Apply background blur or add shadows to seamlessly blend the PiP with your main footage.
- Use animated transitions to introduce the PiP effect dynamically.
6. Save and Export
Tap the export button, select your desired video resolution (e.g., 1080p), and save it to your device.
CapCut simplifies the PiP creation process without requiring technical expertise. It’s ideal for beginners who need a user-friendly video editor with professional-grade tools.
Method 2: Using Shotcut (Free Video Editing Software for Desktop)
For more advanced editing on desktop, Shotcut is an open-source video editing software offering powerful PiP capabilities. Shotcut is entirely free and supports Windows, Mac, and Linux, making it an accessible option for creators at any experience level.
Follow these steps to create impressive PiP videos using Shotcut:
1. Download and Install Shotcut
- Visit the Shotcut website and download the software for your operating system.
- Open Shotcut and select “Start a New Project” to begin.
2. Import Your Main Footage
- Drag your main video file into the Shotcut timeline.
- You’ll see your background video in the main editing window.
3. Add the PiP Video to a New Track
- Create a new video track by clicking the “+” button above the timeline.
- Drag your inset video into the new track. This automatically layers the secondary video over your main clip.
4. Adjust and Resize the PiP Video
- Select the inset video track and go to the “Filters” panel.
- Add a “Size and Position” filter to resize your inset video and position it anywhere on the screen.
- Drag the edges of the video to crop and tailor it to your vision.
5. Enhance the PiP Video
- Use other filters available in Shotcut (e.g., “Opacity” or “Blur”) to stylize and integrate the PiP video effectively.
- Add borders, shadows, or custom animations for a professional touch.
6. Preview, Save, and Export
- Use the preview option to ensure everything looks perfect.
- Once satisfied, click “Export,” choose the resolution settings, and render your PiP masterpiece.
Shotcut offers unmatched flexibility for PiP creation, making it a reliable choice for content creators who want to fine-tune their edits.
Tips for Stunning Picture-in-Picture Videos

- Match Color Grading: Ensure the lighting and colors of your PiP video align with your main footage for a seamless visual experience.
- Maintain Aspect Ratios: Use the same aspect ratio for your videos to prevent cropping or distortion.
- Engage Viewers: Add animated text or motion graphics to emphasize key points alongside your PiP effect. Tools like Canva can complement CapCut and Shotcut for such enhancements.
- Test Audio Balance: If both videos have audio, adjust the volume levels to ensure clarity. You can mute the PiP video if only the main video’s audio is relevant.
Final Thoughts
Free tools like CapCut and Shotcut make professional video editing accessible to everyone. Whether you’re a budding content creator, small business owner, or social media influencer, these platforms eliminate the need for expensive software or subscriptions, allowing you to focus on creativity instead of costs. By now, you’re equipped to create polished picture-in-picture videos using either CapCut or Shotcut. These free tools empower you to elevate your content like a pro without spending a dime.
Related Articles

LightCut 2025 Review: The Best Video Editor for Android and iPhone

Magisto: The Simplified Approach to Video Editing for Quick and Effective Content

KineMaster Video Editing App Review: A Mobile-Friendly Powerhouse

PowerDirector: A Fast and Accessible Video Editing Tool for Everyone

What is HitFilm Express? A Beginner's Guide for Mac Users

CapCut, WeVideo & More: Tools That Simplify Video Editing

9 Free Tools to Speed Up a Video Online (No Downloads Needed)

Top 5 Free Video Enhancers to Instantly Boost Video Quality

WeVideo: A Browser-Based Video Editor That Actually Makes Life Easier
VideoShow Review: A Mobile Editor for Quick, Casual Projects
Top 4 Vertical Video Editors to Edit Vertical Videos Quickly
Convert MXF Files Without Quality Loss: 5 Tools for Mac
Popular Articles
5 Hassle-Free Ways to Edit MTS Videos Using Final Cut Pro

Top Pay-Per-Click (PPC) Tools to Enhance Your Ad Spend

Maximize Efficiency: Discover the 6 Best Task Apps for iPhone

Top Dictation Software to Try in 2025 for Seamless Speech-to-Text Conversion

How to Declutter Your Digital Workspace: A Complete Guide to Boost Productivity
Microsoft To Do automation can simplify your daily planning

Top 5 Ways to Automate Google Analytics for Better Efficiency

Best Browser-Based IDEs for Web Developers

The Best DocuSign Alternatives in 2025 for Simple, Secure E-Signatures
A Guide to Putting Two Videos Side by Side in Adobe Premiere Pro

KeePass 2.58 Enhances Security Features and Improves User Control