 mww2
mww2
Discover the 5 Best Screen Recording Software for Mac Users
Screen recording is an indispensable tool for content creators, educators, and business professionals. The right screen recording software can significantly impact the quality and effectiveness of your tutorials, presentations, or technical troubleshooting. Fortunately, macOS offers both built-in solutions and third-party applications that cater to both basic screen capture needs and advanced video editing requirements.
Why Choose the Right Screen Recorder?

A great screen recorder can:
- Save you time and effort with intuitive interfaces and efficient workflows.
- Enhance the quality of your videos with features like HD recording, audio integration, and editing options.
- Ensure smooth collaboration by supporting multiple file formats or easy file sharing.
- Streamline specific tasks, such as integrating annotations for educational content or optimizing frame rates for gaming.
1. QuickTime Player (Built-In Option)
The built-in screen recording function in your Mac, QuickTime Player, is the most accessible option for users. While primarily a media player, it also offers an intuitive screen recording feature.
Key Features:
- Record your entire screen or a selected portion.
- Option to include audio from a connected microphone.
- Minimalistic interface with no setup required.
How to Use:
- Open QuickTime Player and go to File > New Screen Recording.
- Choose your recording area and microphone settings, then click the record button.
QuickTime’s simplicity makes it an excellent starter tool if you don’t need advanced features.
2. ScreenFlow
ScreenFlow is an all-in-one screen recording and video editing tool designed for professionals. Its intuitive software is a favorite among content creators for its powerful editing features.
Key Features:
- Record your screen in high resolution.
- Advanced editing tools, including annotations, transitions, and text overlays.
- Supports recording from multiple sources, including cameras, microphones, and external devices.
- Add callouts to highlight specific parts of your recording.
How to Use ScreenFlow
- Download and install ScreenFlow on your computer.
- Open the software and select “New Recording” to start a new recording session.
- Choose which sources you want to record from, such as your screen, camera, or microphone.
- Configure your recording settings, including resolution and frame rate.
- Start recording by clicking the red record button.
- Use the hotkeys displayed on-screen to pause or stop the recording at any time.
- Once you have finished recording, click “Stop” to end the session.
- Your recorded footage will automatically appear in the ScreenFlow editor for editing.
3. Snagit
Snagit is a comprehensive screen capture and recording tool developed by TechSmith. Its simplicity and editing capabilities make it ideal for creating polished visual content quickly.
Key Features:
- Capture screens or record videos, easily switching between tasks.
- Add annotations, text, and callouts to clarify or enhance visuals.
- Option to record system and microphone audio simultaneously.
- Save videos in multiple formats or share directly to platforms like Slack, email, and Google Drive.
How to Use Snagit
- Download and install Snagit onto your computer or device.
- Open the program and familiarize yourself with the interface.
- To capture a screenshot, click on the “Capture” button or use the keyboard shortcut (default is “Print Screen”).
- Use the crosshairs to select the area you want to capture, then release to take the screenshot.
- Use the editing tools to enhance your screenshot by adding text, annotations, or callouts.
- To record a video, click on the “Record” button or use the keyboard shortcut (default is Ctrl+Shift+R).
- Select the area of your screen you want to record and click “Start Recording.”
- Use the editing tools to add text, annotations, or other effects to your video.
- When you’re finished recording, click on the “Stop” button or use the keyboard shortcut (default is Ctrl+Shift+S).
- Save your screenshot or video in your desired format and location.
4. OBS Studio
If you’re looking for a powerful, free, and open-source tool, OBS Studio is your go-to option. While it’s widely known for live streaming, OBS also offers robust screen recording functionality for advanced users.
Key Features:
- Customizable recording layouts and extensive configuration options.
- Supports recording from multiple input sources, including webcams and microphones.
- Stream and record in HD.
- Highly flexible with support for plugins and scripts.
How to Use OBS Studio for Screen Recording:
- Download and Install OBS Studio: Visit the official OBS Studio website and download the version compatible with your operating system. Follow the installation instructions provided.
- Set Up a Scene: Open OBS Studio and create a new scene by clicking the “+” button under the “Scenes” panel.
- Add Sources: Add your input sources, such as your display, webcam, or audio devices, by clicking the “+” button under the “Sources” panel and selecting the appropriate options.
- Configure Settings: Go to the “Settings” menu to adjust your recording quality, output format, and storage location for the recordings.
- Start Recording: Once everything is set up, click the “Start Recording” button to begin capturing your screen.
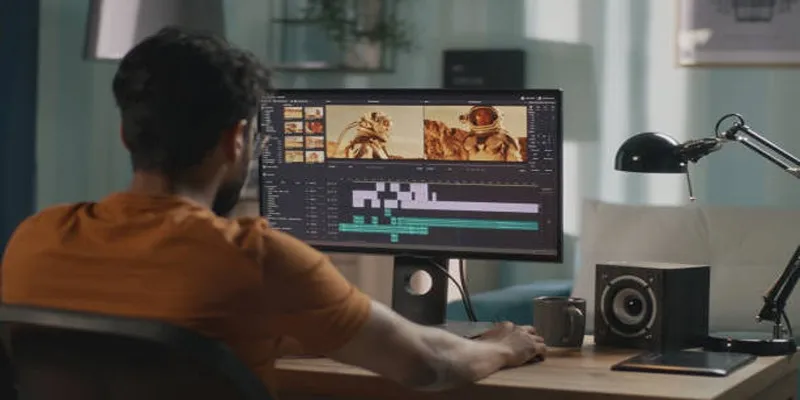
5. Camtasia

Camtasia by TechSmith offers a premium blend of screen recording and video editing for professionals. Known for its visual tutorials, Camtasia is a great option for educators and corporate trainers.
Key Features:
- Record and edit within the same platform.
- Add animations, transitions, and quizzes to video recordings.
- Export recordings directly to platforms like YouTube, Vimeo, or a private LMS.
- Integrates drag-and-drop functionalities for seamless editing.
How to Use Camtasia:
- Launch Camtasia and select “New Project” to begin.
- Use the “Record” button to capture your screen or import pre-recorded footage.
- Drag your recordings into the timeline to start editing.
- Add transitions, effects, or notes using the tools on the side panel.
- Export your completed video in your preferred format or share it directly to platforms.
Conclusion
Screen recording has come a long way, with tools available for practically every use case and budget. Whether you need to create sleek marketing tutorials or capture complex gaming setups, these five Mac screen recording tools will get the job done. Want to streamline your workflow and elevate your content game? Give one of these tools a try and see the difference!
Related Articles

Best Tools to Record Streaming Content on Chrome Browser

Lag-Free Screen Recording on Mac: 5 Tools You Need

Top 6 Screen Recorders for Firefox to Simplify Your Workflow
5 Best MP4 Screen Recording Tools for Capturing Videos on Your PC

2025's Top Screen Recording App Review: iTop Screen Recorder

The 8 Best To-Do List Apps for Android in 2025

Top 8 Screen Recorder Apps for Effortless Video Recording

Offline Loom Alternatives: The Best 5 Tools for Screen Recording

Top FTP Software for Mac Users: Free and Reliable Options
Offline Loom Alternatives: The Best 5 Tools for Screen Recording

Top Ways to Record Gameplay on Nintendo Switch Without a Capture Card
Icecream Screen Recorder Review: Features, Pricing & Alternatives
Popular Articles

10 Essential Martech Tools for Building a Smart Martech Stack for Startups

Top Tmux Wrapper Tools for Improved Terminal Management in 2025

Simple Guide to Converting and Editing Videos for BlackBerry Phones

Slack vs. Discord: Choosing the Right Tool for Your Workspace

Top Online Graphic Design Tools for 2025: Canva, Figma, and More
Microphone Not Working in Online Learning Platforms? Try These Fixes
A Step-by-Step Guide to Quickly Combine Video Clips in iMovie

Best Methods to Downscale HD Videos to SD with High Speed

How to Display Custom Taxonomy Terms in WordPress Sidebar Widgets: A Guide

Improve Your Connectivity: 5 Best WiFi Analyzer Apps

The 6 Best Construction Management Software Options to Streamline Your Projects
