mww2
mww2
How to Make a Screen Recording on Mac Using Built-In and Third-Party Tools
Screen recording on a Mac isn’t just for tech enthusiasts or educators. It’s a handy tool for anyone, whether you need to save a video call, demonstrate a bug, create a tutorial, or document a process. Fortunately, macOS, including the latest versions like Sequoia and Sonoma, offers several built-in and third-party options for screen recording. Each method has its unique advantages, allowing you to choose the one that best suits your needs.
How to Make a Screen Recording on Mac
Using macOS’s Built-In Screenshot Toolbar
For those using macOS Mojave or later, the built-in screenshot toolbar is the quickest way to record your screen. Simply press Shift + Command + 5, and a small toolbar will appear at the bottom of your screen. This toolbar provides options for recording the full screen or a selected portion. Once you start recording, it captures quietly in the background without disrupting your work. To stop recording, press Command + Control + Esc or click the stop button in the menu bar.

After recording, a thumbnail appears in the corner for a few seconds. You can click it to trim, save, or share the clip. If you don’t interact with it, the video automatically saves to your desktop, unless you’ve changed the save location. This method is straightforward and sufficient for most everyday needs.
Recording with QuickTime Player
QuickTime Player, another built-in option, offers more control, especially if you want to adjust settings or add voice-over to your recording. Open QuickTime Player, navigate to File > New Screen Recording, and a small control window will appear. Here, you can choose to record the entire screen or just a portion of it. There’s also an option to enable microphone input for narrating during the recording.
The clean interface makes it an excellent choice for users who prefer minimal distractions. When you’re done, click the stop button in the menu bar. QuickTime automatically opens the file so you can play, trim, or save it as needed.
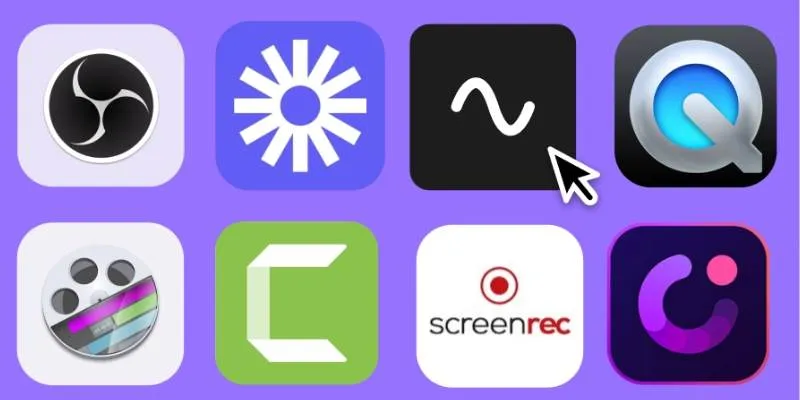
Recording with Third-Party Apps: ScreenFlow and CleanShot X
If you require advanced features like recording system audio, creating GIFs, capturing keystrokes, or adding annotations, third-party apps like ScreenFlow and CleanShot X are worth exploring.
ScreenFlow allows you to record the screen, camera, mic, and system audio simultaneously. It also includes a full editing suite, eliminating the need to switch between tools. CleanShot X focuses on speed and efficiency, offering a clean UI, quick access to tools, and features like hiding desktop clutter, setting a timer, or adding a background. While these apps aren’t free, they are ideal for frequent screen recording with advanced needs.
Using Keynote’s Screen Recording Feature
Few people realize that Apple’s Keynote app includes a screen recording feature, mainly designed for presentations. However, you can use it to capture yourself giving a talk or explaining something over slides.
Open a presentation, go to the Play menu, and select Record Slideshow. This brings up a simple interface for recording your voice and navigating through your slides, with optional screen recording. Though limited to the Keynote environment, it’s perfect for educational or business presentations.
Recording iPhone or iPad Screen via Mac
This method is slightly different but very useful for recording your mobile device’s screen using your Mac. Connect your iPhone or iPad via USB, then open QuickTime Player on your Mac. Go to File > New Movie Recording, and next to the record button, click the dropdown arrow. Your device will appear under Camera.
Select it, and your phone’s screen will be displayed on your Mac. Hit record to capture your mobile screen. This is ideal for app demos or troubleshooting videos, and the quality is usually excellent.
Using OBS Studio for Advanced Control
OBS Studio is a free tool primarily used for live streaming, but it’s also great for screen recording. It allows you to select which part of the screen to capture, add multiple layers like webcam feeds or overlays, and set up keyboard shortcuts for better control. While it may seem overwhelming at first, once set up, it’s reliable and flexible. You can record in high resolution, choose file formats, and manage audio sources more effectively than most built-in tools. It’s often favored by gamers, educators, or anyone seeking more production control.

If You’re Using a Dual Monitor Setup
macOS handles screen recording across dual monitors efficiently. The native Screenshot Toolbar and QuickTime allow you to select which screen to record, or you can set it to capture both. However, not all third-party tools support this feature by default, so it’s wise to test your setup before embarking on a lengthy recording session.
Tip: If you want to record both screens simultaneously as two separate files, you’ll need to open two instances of the recording tool or use an app like OBS Studio, which supports multi-source recording.
Conclusion
Screen recording on macOS Sequoia and Sonoma doesn’t require special skills or hardware. The built-in options are easy and reliable, while third-party apps or system-level tricks offer additional features for specific tasks. Whether you’re working with a single screen or multiple devices, there’s a method that fits your requirements. Ultimately, it comes down to how polished you want the result and how much control you need during the recording process. Hope you find this guide helpful!
Related Articles

5 Best Mac Screen Recording Tools to Elevate Your Recording Game

How to Play a DVD on Your Laptop: 2 Simple Ways to Watch Your Movies
Discover the Top 8 Screen Recording Software in 2025

Lag-Free Screen Recording on Mac: 5 Tools You Need

Best Tools to Record Streaming Content on Chrome Browser

How to Activate Subtitles on Plex for a Better Viewing Experience
How to Change MOV to MP4 on Mac in 2025: 5 Reliable Methods
Mastering Green Screen Effects with Windows Movie Maker

8 Best To-Do List Apps for Mac in 2025

5 Best MP4 Screen Recording Tools for Capturing Videos on Your PC

Top 6 Screen Recorders for Firefox to Simplify Your Workflow

Master the Green Screen Feature in iMovie 11: A Step-by-Step Guide
Popular Articles

The Best 4K Ultra HD TVs from LG, Samsung, VIZIO, Sony, and Seiki

Streamline Your Workflow with These Powerful Social Media Platforms

Which Are The 6 Best Electronic Signature Apps to Sign Documents Online in 2025

Get Started with Free PSD Templates: A Designer’s Guide

7 Top-Rated Affordable Graphic Design Software to Boost Your Creativity

The Best AI Chatbots in 2025 to Power Conversations and Save Time

How to Record Your Gameplay on PC Like a Professional: Essential Tools & Tips for 2025

Step-by-Step Guide to Adding Music in iMovie

Enhance Customer Support with Affordable Help Desk Software

Mastering MPEG to GIF Conversion: Tips and Tools You Need
How to Use Kizoa Online Video Maker: A Complete Beginner's Guide