mww2
mww2
Top 8 Screen Recording Apps for Professionals and Beginners
Screen recording has become an essential tool for remote work, online education, and content creation. Whether you’re creating a tutorial, recording a webinar, or capturing gameplay, the right screen recorder app can make a world of difference. With so many options on the market, it can be overwhelming to find the one that perfectly suits your needs. This blog post is here to guide you through the top 8 screen recorder apps that make video recording effortless.
What to Look for in a Screen Recorder

It’s important to understand what makes a screen recorder worth considering. Here are some key features to look for when choosing a tool:
- Ease of Use: The interface should be straightforward, allowing you to start recording quickly without fiddling around with settings.
- Editing Features: Some screen recorders come with built-in editing tools, so you can trim, annotate, or enhance videos post-recording.
- High-Quality Output: Look for apps that support HD or even 4K recording for professional-grade videos.
- Compatibility: Ensure the app works seamlessly with your device and operating system.
- Price: Many tools are free but offer premium features for a subscription fee; choose one that fits your budget.
1. OBS Studio
The free screen recording software Open Broadcaster Software Studio (OBS) serves professionals as their preferred choice. Professional users choose Open Broadcaster Software (OBS) Studio because it allows screen recording together with live streaming while offering extensive customization options.
How to Set Up OBS Studio for Screen Recording
- Download and install OBS Studio from the official website.
- Open the application and go to the Settings menu.
- Configure the video and audio settings to match your preferences.
- Add a new Scene and include a Source (e.g., Screen Capture).
- Click Start Recording to begin capturing your screen.
2. Camtasia
Camtasia unites screen recording functions with detailed editing tools to become an exceptional system for developing refined professional videos.
How to Use Camtasia for Screen Recording
- Download and install Camtasia from the official TechSmith website.
- Open Camtasia and click on the New Recording button in the toolbar.
- Select the area of your screen you wish to capture. You can choose between full screen, a specific window, or a custom portion of your screen.
- Configure your audio settings by enabling system audio or connecting a microphone for voice-over narration.
- Once ready, click the Record button to start capturing your screen.
- After recording, click Stop Recording , and your footage will automatically open in the Camtasia editor.
3. Loom
Loom is the go-to screen recorder for professionals who need quick, shareable videos. It’s widely used for remote team communication and project updates.
How to Use Loom
- Download and install the Loom application from their official website.
- Open Loom and sign in or create a new account.
- Choose your recording preferences, such as screen only, camera only, or both.
- Click the Start Recording button to begin capturing your screen or video.
- When finished, click Stop Recording , and your video will be instantly uploaded to your Loom library for easy sharing.
4. Screencast-O-Matic
Screencast-O-Matic is a versatile tool that allows users to record their screen, add voiceovers, and edit videos. It’s widely used in educational settings due to its affordability and lightweight interface.
How to Use Screencast-O-Matic
- Download and install Screencast-O-Matic from their official website.
- Open the application and select whether to record your screen, webcam, or both.
- Adjust the recording area and settings as needed.
- Press the Record button to start capturing.
- Once finished, save or upload your video directly to the desired platform.
5. Bandicam
Bandicam is renowned for its ability to record high-quality videos, making it a favorite for gamers and technical users.
How to Use Bandicam
- Download and install Bandicam from their official website.
- Open the application and click on the Settings button to adjust any desired settings such as video quality, recording area, and audio sources.
- Select whether to record your screen, webcam, or both by clicking on the respective icons in the main window.
- Press the Record button or use the designated hotkey (default is F12) to start recording.
- To stop recording, press the same hotkey or click on the Stop button in the main window.
- Once finished, save or upload your video directly to a platform of your choice.
6. ShareX
ShareX is an open-source screen recorder packed with features, ideal for users who don’t want to spend money but need robust functionality.
How to Use ShareX
- Download and install ShareX from its official website.
- Open ShareX and navigate to the Capture tab.
- Choose the type of screen or region you want to record, then click on the Start button.
- Use the designated hotkey (default is Print Screen) to start recording.
- To stop recording, press the same hotkey or click on the Stop button in the main window.
- Save or upload your video directly to a platform of your choice.
7. Snagit
Snagit is a polished tool designed to help professionals easily create instructional videos and screenshots.
How to Use Snagit
- Open Snagit and select whether you want to capture an image or record a video.
- Click on the Capture button and choose the area of your screen to capture.
- Edit your capture using Snagit’s built-in tools, such as annotations, text, or effects.
- Save your work or share it directly through Snagit’s sharing options.
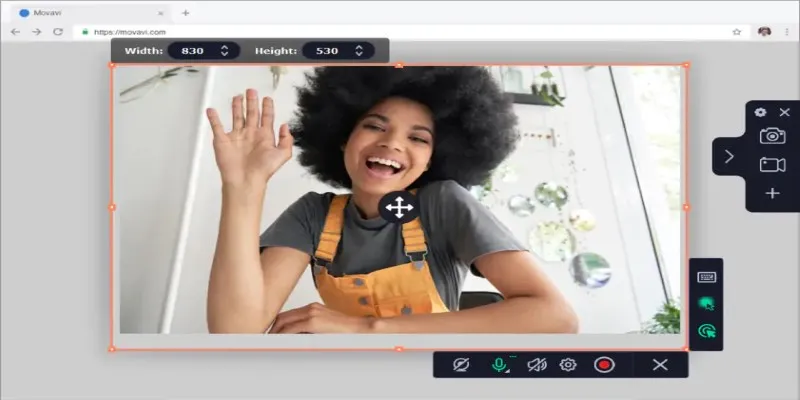
8. Movavi Screen Recorder

Movavi Screen Recorder is a great choice for users who want a straightforward recording tool without excessive complexity.
How to Use Movavi Screen Recorder
- Download and install Movavi Screen Recorder from their official website.
- Open the program and choose whether you want to record your entire screen or a specific area.
- Adjust the recording settings, such as audio source or frame rate, based on your preferences.
- Click the REC button to start recording and perform the actions you want to capture.
- Once finished, click the Stop button and preview your footage.
- Save the recording in your desired format or share it directly from the software.
Final Thoughts
Investing in a screen recorder that fits your needs can transform the way you create and share video content. Whether you’re a teacher creating lessons, a gamer sharing achievements, or a professional delivering presentations, the right screen recorder can make your workflow far more efficient. Take advantage of free trials and test the apps that catch your attention. By experimenting with different tools, you’ll find the one that complements your style and requirements.
Related Articles
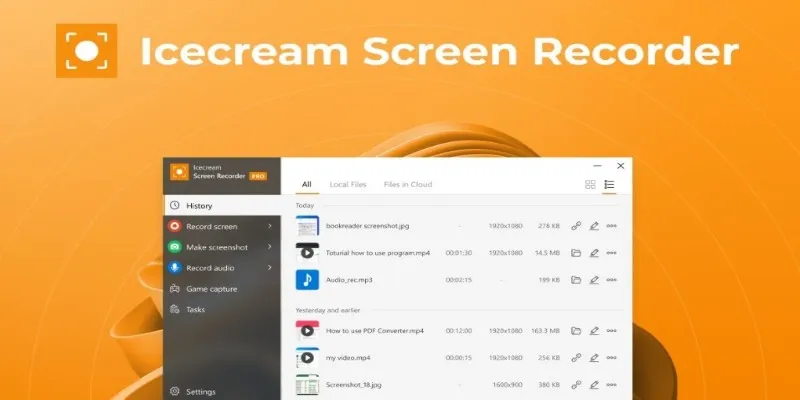
Icecream Screen Recorder Review: Features, Pricing & Alternatives
2025's Top Screen Recording App Review: iTop Screen Recorder

Offline Loom Alternatives: The Best 5 Tools for Screen Recording
Offline Loom Alternatives: The Best 5 Tools for Screen Recording

Easy Ways to Screen Record Snapchat Stories & Snaps
Easy Ways to Screen Record Snapchat Stories & Snaps
Free WMV Screen Recorders to Use on Your Computer
8 Easy-to-Use WebM Recorders for Windows PC Users
8 Best MOV Recording Software for Windows Users
Free Online Screen Recorders with Simple and Fast Export Options

Lag-Free Screen Recording on Mac: 5 Tools You Need
Record Your Screen: 10 Best GIF Creator Tools
Popular Articles

Explore the Leading Open Source and Free Online Hotel Software Today

Step-by-Step Guide: How to Add Social Media Icons in Your WordPress Sidebar

Top Tools and Tips for Making Multi-Screen Videos on Windows and Mac
Identifying AdBlock Users on WordPress Sites

Spotting AI-Generated Content: The Best Detectors You Need to Know
Make Your Own Music Videos: 8 Best Musically Makers
AI Highlight Video Makers: Top 3 Tools to Capture Best Moments
Best Animation Software for Creative Work in 2025

The Best Large Language Models in 2025 That Are Changing How We Work
What is Business Process Management? A Comprehensive Guide to BPM
Top Free and Online MP4 to GIF Converters You Should Try