A Beginner’s Guide to Repairing Pixelated Videos on Windows
Are you struggling with pixelated or grainy videos on your Windows device? This can be a frustrating issue, especially when you want to enjoy your favorite videos with clear quality. Fortunately, there are simple steps you can follow to fix this problem. Whether it’s due to compression, low resolution, or playback settings, this guide will help you improve your video clarity quickly and easily.
Causes of Pixelated and Grainy Videos
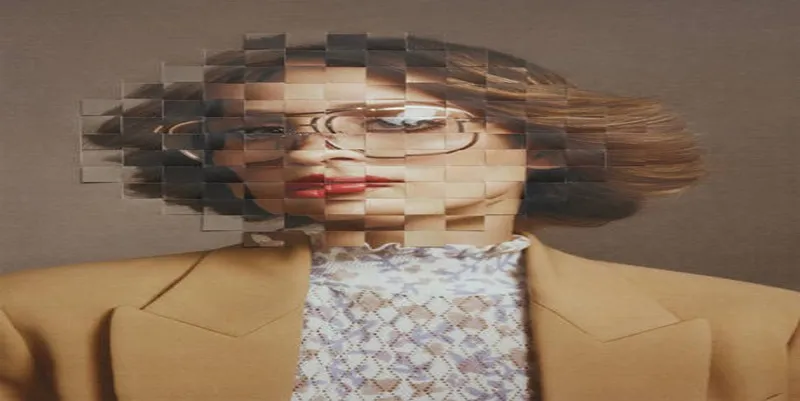
Pixelation and graininess generally result from issues such as:
- Low Resolution: Videos with a low resolution (like 240p or 360p) naturally appear pixelated when viewed at larger sizes because there aren’t enough pixels to maintain clarity.
- Compression Artifacts: Videos uploaded to or streamed from platforms like YouTube undergo compression. Excessive compression can degrade the quality, leading to artifacts, blurriness, or grain-like distortions.
- Poor Lighting During Recording: If a video is shot in low light, the camera may struggle to pick up details, resulting in a grainy effect.
- Hardware and Playback Issues: Outdated or underperforming hardware can sometimes fail to render videos properly, causing pixelation during playback.
- File Corruption: Video files can become corrupted due to improper downloads or interruptions during file transfers, affecting playback quality.
Step 1: Verify Your Video Resolution
The simplest issue to address is resolution. If your video is pixelated, check the resolution first. To do this:
- Right-click on the video file and select Properties > Details.
- Look for Frame Width and Frame Height to determine the video resolution.
If it’s a low-resolution video, try scaling down the playback size to match the video’s original dimensions. This prevents unnecessary stretching.
Step 2: Update Your Video Player and Codecs
Outdated players or codecs can cause playback issues, including pixelation. Follow these steps to update:
- Upgrade Windows Media Player: Check for updates in the Microsoft Store or download a modern player like VLC Media Player.
- Install Codec Packs: Download and install a trusted codec pack, such as K-Lite Codec , to ensure smooth playback for various file formats.
- Switch Players if Necessary: VLC Media Player, for example, is excellent for rendering high-quality video, and it often resolves playback issues where Windows Media Player falls short.
Step 3: Repair Corrupted Video Files
If the video file is corrupted, specialized tools can come to your rescue. Programs like Wondershare Repairit, Stellar Repair for Video, or EaseUS Repair Video can automatically detect and fix file corruption.
Steps to use a repair tool:
- Download and install a video repair tool (choose one with good reviews).
- Select the corrupted file within the tool.
- Follow the options provided to repair the video.
Most tools also offer a preview feature, allowing you to check the results before saving the repaired file.
Step 4: Use Noise Reduction Tools for Grainy Videos
Graininess often becomes noticeable when videos are shot in low light. Here’s how to fix it using popular video editing software:
Adobe Premiere Pro:
-
1. Import your video into Premiere Pro.- Use the Lumetri Color Panel to adjust exposure and contrast.
- Apply the Median Filter through the Effects panel to reduce graininess.
Davinci Resolve (Free Option):
-
1. Import your clip into a new project.- Apply the Noise Reduction tool in the Color workspace.
- Tweak the Threshold and Smoothing settings until the grain fades.
Even free editing tools like iMovie and Shotcut have basic noise-reduction functionalities that can improve grainy video.
Step 5: Fix Compression Artifacts
Compression artifacts (such as pixelation from heavy compression) might appear in videos downloaded from online platforms. While you can’t entirely reverse compression, you can enhance the video quality using upscaling tools or AI- based software. Methods include:
- Topaz Video AI : This sophisticated software uses AI to upscale low-quality videos to higher resolutions while minimizing compression artifacts.
- HandBrake: Re-encode your video to a higher bitrate using this free software. Increasing the bitrate improves visual clarity.
Step 6: Adjust Playback Settings
Sometimes, playback settings on your device cause video issues. Adjust these settings to improve quality:
- Open your video player and look for Settings or Preferences.
- Increase the Buffer Size or enable High-Quality Playback.
- If you’re experiencing issues in VLC Media Player, go to Preferences > Input/Codecs and set the Default Cache Value higher.
Step 7: Re-download or Re-record (If Necessary)
If none of the fixes work and the video is still pixelated or grainy:
- Try downloading the video again if possible. Interrupted or incomplete downloads can corrupt files.
- If it’s a personal recording, consider re-recording with proper lighting and using a camera with higher video resolution capabilities.
How to Prevent Pixelated and Grainy Videos

Here are a few tips to ensure sharp video quality in future projects:
- Record in High Resolution: Shoot videos at a minimum of 1080p. If possible, opt for 4K recording for better detail.
- Ensure Adequate Lighting: Natural or professional lighting setups minimize graininess during recording.
- Use Stable Connections for Uploading or Transferring Files: Prevent interruptions during file uploads or downloads to avoid file corruption.
- Store Files Securely: Use reliable external drives or cloud storage services to keep your files safe.
Final Thoughts
Pixelated and grainy videos don’t have to ruin your day. With the simple steps outlined above, you can restore clarity to your videos and ensure optimal viewing or editing experiences. Whether you’re troubleshooting playback issues or enhancing video quality with professional tools, these tips will have your footage looking its best in no time. If you’re passionate about video editing or often work with digital media, investing in tools like Topaz Video AI or Adobe Premiere Pro can truly elevate your content.
On this page
Causes of Pixelated and Grainy Videos Step 1: Verify Your Video Resolution Step 2: Update Your Video Player and Codecs Step 3: Repair Corrupted Video Files Step 4: Use Noise Reduction Tools for Grainy Videos Step 5: Fix Compression Artifacts Step 6: Adjust Playback Settings Step 7: Re-download or Re-record (If Necessary) How to Prevent Pixelated and Grainy Videos Final ThoughtsRelated Articles

LightCut 2025 Review: The Best Video Editor for Android and iPhone
CapCut, WeVideo & More: Tools That Simplify Video Editing

How to Effortlessly Combine MP4 Videos on Your Desktop
Effortless Steps to Convert and Upscale Video to 4K Resolution
Top 4 Vertical Video Editors to Edit Vertical Videos Quickly
How to Change Video Frame Rate: 5 Best FPS Converters

Upgrade Your Videos: 7 Smart AI Enhancers

AVCLabs Video Enhancer AI: Is It Really Worth Your Trial?
Top 5 Video Stabilization Tools for Professional-Quality Footage

How to Easily Edit and Trim Videos on Your Android Devices

The 10 Best AI Video Tools in 2025 to Create Smart Content Fast

Best Tools: 4 Video Players for Frame-by-Frame Analysis
Popular Articles
Signing Documents Made Simple: Create a Digital Signature with Adobe
Best Video Management Tools to Organize Your Library
Unlock the Power of Free Tools for Professional Diagram Design

MTS Files Explained: What They Are and How to Convert Them

Top Transcription Tools in 2025 That Get the Job Done

5 Best Tools to Make Instagram Slideshow Videos Effortlessly

HubSpot vs. Pardot: Choosing the Best Marketing Software for Your Needs

Affordable eCommerce Software: Top 6 Solutions for Your Online Store

Creating Space-Saving Archives in WordPress

Export SQL Query Results to Excel with These Free Online Tools

Turn Photos into Memories with Mac Photo Slideshows and Music
 mww2
mww2