mww2
mww2
Essential Guide to Recording VR Gameplay with Stunning Quality
Virtual reality gaming offers a revolutionary approach to entertainment by completely transforming the interactive experience. VR gameplay captivates gamers with its compelling environments, stunning graphics, and unique gaming experiences. However, recording VR gameplay poses specific challenges that require top-quality definitions and smooth presentation for viewers. This guide presents the top options and techniques for capturing HD-quality VR gameplay.
Why Record VR Gameplay?

VR has revolutionized gaming, offering an entirely new way to engage with digital worlds. Recording VR gameplay helps in several ways:
- Sharing Experiences : Post gameplay videos on platforms like YouTube or Twitch to connect with other VR gamers.
- Educational Content : Create tutorials or walkthroughs to help others level up.
- Preserving Moments : Save your favorite in-game moments to relive the excitement.
- Creating Content : Build a following by sharing your unique experiences and insights.
When recording VR gameplay, the goal is to capture smooth, high-resolution footage without impacting your system’s performance.
Best Software for Recording VR Gameplay
The right software plays a pivotal role in recording VR gameplay. Here’s a breakdown of the top tools designed for high-definition recording:
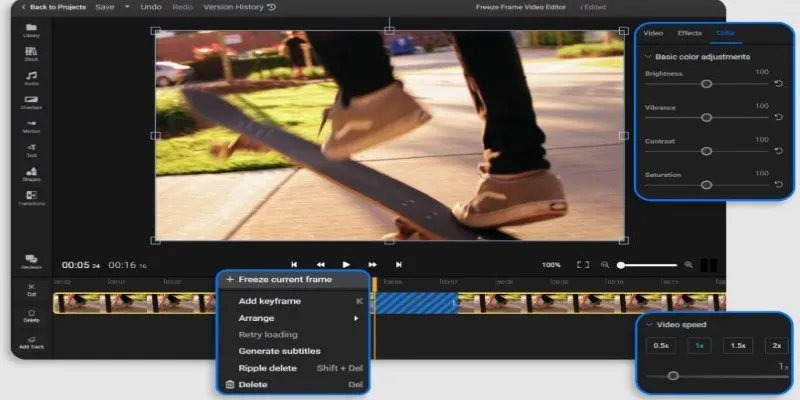
1. OBS Studio
OBS Studio is a popular choice among gaming and streaming communities. It offers open-source tools for high-definition streaming and recording, along with live broadcasting capabilities, tailored for VR gaming needs.
Key Features:
- Multisource recording allows you to capture gameplay along with audio or webcam footage.
- Advanced settings for resolution, bitrates, and frame rates ensure smooth, high-quality videos.
- Compatibility with most systems (Windows, macOS, Linux).
Steps to Record VR Gameplay Using OBS Studio
- Install and launch OBS Studio on your computer.
- Set up a new scene by clicking the “+” icon in the Scenes section.
- Add your VR gameplay source by selecting “Game Capture” or “Display Capture” from the Sources section.
- Configure the settings for resolution, bitrate, and frame rate under the Settings menu.
- Start recording or streaming by clicking the “Start Recording” or “Start Streaming” button.
2. NVIDIA ShadowPlay (GeForce Experience)
If you’re using an NVIDIA GPU, the built-in ShadowPlay feature is a fantastic option for VR game recording. It’s designed to work seamlessly without affecting system performance.
Key Features:
- Supports 4K recording at 60 FPS.
- Minimal performance impact thanks to hardware acceleration.
- Instant replay, so you never miss memorable moments.
Steps to Use NVIDIA ShadowPlay for VR Recording
- Open NVIDIA GeForce Experience and log in (if required).
- Go to the “Settings” menu and enable “In-Game Overlay.”
- Launch your VR game and press the default shortcut (Alt + Z) to open the overlay menu.
- Select “Record” and adjust the settings as needed, such as resolution and frame rate.
- Start recording and immerse yourself in the VR experience!
3. Oculus Mirror
For Oculus VR headset users, Oculus Mirror lets you record gameplay while adjusting image quality on the fly.
Key Features:
- Removes distortions typically introduced by VR lenses.
- Captures gameplay in real-time from your headset display.
Steps to Use Oculus Mirror for Recording
- Open the Oculus software on your PC.
- Navigate to the installation folder and find “OculusMirror.exe.”
- Launch the program to display your VR view.
- Use screen recording software to capture the Oculus Mirror view while you play.
4. XSplit Gamecaster
XSplit Gamecaster is another recording and streaming tool tailored for gamers, offering both free and premium plans.
Key Features:
- Beginner-friendly interface for effortless setup.
- Picture-in-picture modes for webcam overlays.
- Multiple aspect ratio support, great for VR recordings.
Steps to Record VR Gameplay with XSplit Gamecaster
- Download and install XSplit Gamecaster on your PC.
- Launch the application and log in with your account.
- Select your VR game or application as the source.
- Customize your settings, such as resolution and frame rate, for optimal recording.
- Start recording by clicking the record button while playing your VR game.
5. Fraps
Fraps is a lightweight software designed for basic recording and benchmarking. Though limited in features, it’s great if you’re new to recording VR gameplay.
Key Features:
- Real-time FPS counter to monitor game performance.
- Simplified settings for quick recording.
Steps to Record VR Gameplay Using Fraps
- Download and install Fraps from the official website.
- Open Fraps and configure the settings for video capture, such as frame rate and output folder.
- Launch your VR game and ensure Fraps is running in the background.
- Press the assigned hotkey to start recording your gameplay.
- Press the hotkey again to stop recording when finished.
Techniques for High-Definition VR Recording

Recording software is only part of the equation. Here are some techniques to ensure your VR recordings are smooth, high-quality, and headache-free:
Adjust System Settings
Recording gameplay, especially in VR, is a resource-intensive task. Optimize your system to ensure smooth recording:
- Lower graphics settings slightly in-game to balance performance and quality.
- Close unnecessary background applications to free up CPU and memory resources.
- Update your GPU drivers regularly for the best performance.
Use the Right Resolution
Match the resolution settings of your recording software with your VR headset’s native resolution. This ensures no detail is lost during playback.
Resolution standards for popular VR headsets:
- Oculus Quest 2: 1832 x 1920 per eye.
- HTC Vive Pro 2: 2448 x 2448 per eye.
- Valve Index: 1440 x 1600 per eye.
Ensure a Smooth Frame Rate
A consistent frame rate is crucial for a comfortable viewing experience. Capture at least 60 FPS, but aim for 120 FPS if your system and software support it.
Optimize Bitrate
Higher bitrates improve video quality but demand more storage and processing power. For high-definition VR gaming, aim for:
- 16 Mbps to 22 Mbps for 1080p.
- 35 Mbps to 50 Mbps for 4K.
Record Audio Separately
VR games often come with ambient audio and spatial sound that enhance the experience. Use software that captures these without distortion or glitches. Consider using a dedicated microphone for commentary or live reactions.
Use a High-Performance Computer
VR recording requires robust hardware to handle the load. Below are baseline specs for smooth performance:
- Processor: Intel Core i7 or AMD Ryzen 7.
- GPU: NVIDIA GeForce RTX 3070 or equivalent.
- RAM: 16GB or more.
- SSD Storage for faster read/write speed.
Consider Green Screens for Immersive Content
Many VR content creators use green screens to add themselves into gameplay footage. Tools like OBS and XSplit Gamecaster have built-in chroma key features to make this possible.
Final Thoughts
High-definition VR game recording combines creativity, technical know-how, and the right tools. By choosing software like OBS, ShadowPlay, or Oculus Mirror and implementing techniques like optimizing your frame rate and resolution, you’re well on your way to creating smooth, immersive content. Explore the tools and systems mentioned in this guide, and start sharing your VR adventures with the world!
Related Articles

Step-by-Step Guide to Recording Steam Gameplay Without Lag
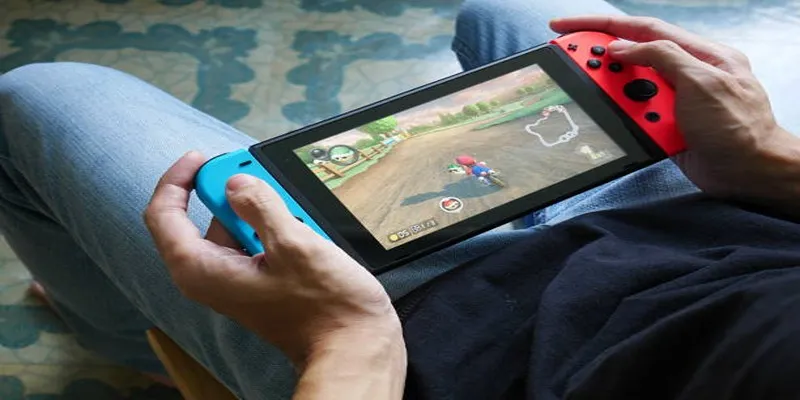
Top Ways to Record Gameplay on Nintendo Switch Without a Capture Card
8 Best MOV Recording Software for Windows Users

Elevate Your Strategy with the Best Content Marketing Tools of 2025

Offline Loom Alternatives: The Best 5 Tools for Screen Recording
Writesonic vs. Jasper
The 8 Best Content Marketing Tools in 2025 to Elevate Your Strategy
Offline Loom Alternatives: The Best 5 Tools for Screen Recording
Step-by-Step Guide: 4 Ways to Put Two Videos Side by Side

Top 8 Screen Recorder Apps for Effortless Video Recording

8 Easy-to-Use WebM Recorders for Windows PC Users

Step-by-Step Guide to Making a Video Essay That Inspires
Popular Articles

Step-by-Step Guide to Adding Music in iMovie

A Beginner’s Guide: How to Install and Setup Yoast Comment Hacks for WordPress

The Best 5 PDF Editing Tools Compared for Fast and Easy File Changes

Proton Mail vs. Gmail: Which is the Best Email Service for You

Best Free Ways to Convert DAT Video Files into VOB Format

The Best Methods to Convert Videos to MP4, MP3, and Other Formats

The Best Team Collaboration Tools in 2025: Revolutionize Your Workflow
Enhance Your Meeting Productivity with Fireflies.ai Automation
Top Antivirus Tools for Reliable Protection in 2025

Best and Most Efficient Ways to Convert FLV

Efficient Text Separation Techniques for Excel and Google Sheets