 mww2
mww2
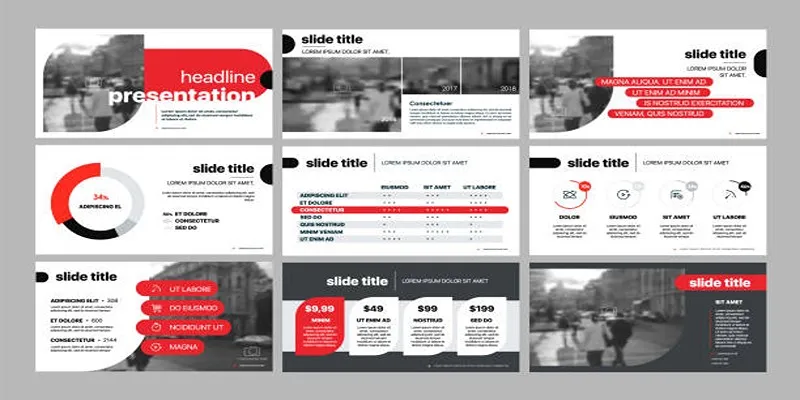
How to Create Video Presentations from PowerPoint with Your Voice
Recording a PowerPoint slideshow as a video with narration can add a layer of professionalism and clarity to your presentations. Whether you’re creating a training module, an expressive pitch, or an educational video, knowing how to seamlessly transition your slides into a polished video format is a valuable skill. Fortunately, PowerPoint makes the process straightforward! This guide will walk you through simple methods to record your slideshow as a video, complete with narration and timings.
Why Record PowerPoint Videos with Narration?

Recording your PowerPoint presentations and adding narration offers numerous benefits, including the ability to:
- Save time and scale communication: Share presentations without hosting live meetings. Perfect for asynchronous learning or remote work.
- Enhance learner engagement: Visual storytelling paired with a voiceover is far more immersive than plain slides.
- Boost presentation accessibility: Narration makes presentations more inclusive for those who struggle to interpret visual information alone.
- Improve retention: Explaining concepts verbally alongside slides increases information retention for viewers.
Method 1: Use PowerPoint’s Built-In Recording Tools
PowerPoint’s built-in recording feature is the most straightforward way to create a video with narration. Follow these steps to guide you through the process:
Step 1: Prepare Your Slide Deck
Ensure your slides are finalized before you begin recording. Check for typos, missing images, and formatting errors. Adding speaker notes at this stage as a reference for your narration is a good idea.
Step 2: Access the Recording Tool
- Open your finished PowerPoint presentation.
- Navigate to Slide Show on the ribbon menu.
- Click Record Slide Show. You can start recording from the beginning or from the current slide.
Step 3: Record Your Presentation
- Once the recorder opens, you’ll see your slides on the screen along with recording options.
- Click the Record button and start narrating each slide as you move through your presentation.
- You can also pause recording to collect your thoughts or restart a particular slide.
Keep these tips in mind during recording:
- Speak clearly and at a natural pace.
- Stay mindful of slide transitions and timing your speech accordingly.
- Avoid background noise to ensure quality audio.
Step 4: Save Your Recording as a Video
- Once you’ve narrated all slides, click File > Export > Create a Video.
- Choose the video resolution, such as 1080p for HD quality.
- Select “Use Recorded Timings and Narrations” and click Create Video.
- Save the video file to your desired location.
And just like that, you’ve created a professional video presentation!
Method 2: Record Using Screen Recording Software
If you’re looking for additional customization options, you can use a screen recording tool to record your PowerPoint and narration. Popular screen recording tools like OBS Studio, Camtasia, or Snagit are excellent alternatives to PowerPoint’s built-in recorder. Most tools offer robust editing features which you might find helpful.
Steps to Use OBS Studio for Recording PowerPoint Presentation
- Download and install OBS Studio from the official website.
- Open OBS Studio and set up a new Scene by clicking the + icon in the “Scenes” box.
- Add a Source by clicking the + icon in the “Sources” box, then select Display Capture to capture your screen.
- Adjust the recording settings, such as resolution and frame rate, to match your preferred quality.
- Start your PowerPoint presentation in Slide Show mode.
- Press Start Recording in OBS Studio to begin capturing your presentation and narration.
- When finished, click Stop Recording and save your video file.
Steps to Use Camtasia for Recording PowerPoint Presentation
- Open Camtasia and select New Recording from the start screen.
- Choose the PowerPoint window or your full screen as the recording area.
- Configure your microphone and system audio settings for narration and sound.
- Start your PowerPoint presentation and press the Record button in Camtasia.
- Once done, click Stop to end the recording and edit the video in Camtasia’s built-in editor if needed.
- Export the final video in your desired format and resolution.
Method 3: Cloud Services for Added Flexibility
If you’re using cloud-based platforms like Google Slides, you can still create presentation videos with narration through third-party services like Loom or Canva. These platforms offer seamless cloud integration and additional features for recording and editing.
How to Use Loom
- Install the Loom extension on your web browser.
- Open your presentation slides in Google Slides and start the slideshow.
- Click on the Loom extension icon and select “Capture.”
- Select whether you want to record your entire screen, a specific application or tab, or just your webcam video.
- Press “Start Recording” to begin capturing your presentation while narrating it at the same time.
- Once you’re finished with your recording, click “Finish Recording” and then choose the option to either save it locally or upload it directly to Loom’s cloud storage for easy sharing.
How to Use Canva for Recording Presentations
To use Canva for recording presentations, follow these steps:
- Open Canva and log in to your account.
- Select a presentation template or create a new design for your slides.
- Click on the “Present and Record” option in the top-right corner of the screen.
- Set up your camera and microphone, ensuring they are working properly.
- Press “Start Recording” to begin presenting and narrating your slides.
- Once completed, stop the recording and download the video or share it directly using Canva’s link-sharing options.
Tips for a Polished Presentation Video
Want your video to stand out? These tips will help elevate your PowerPoint videos with narration:
- Use a Quality Microphone: A good microphone will enhance the clarity of your voice and prevent distracting noises.
- Practice First: Run through the presentation a few times before hitting record to ensure smooth delivery.
- Add Visual Cues: Use animations, highlights, or a built-in laser pointer to direct attention where needed.
- Keep It Concise: Respect your audience’s time by keeping your presentation focused and to the point.
- Include Captions: Consider adding captions or subtitles to improve accessibility. Many video editing tools allow you to do this easily.
Conclusion
Recording videos with narrated slides transforms dry presentations into engaging storytelling tools. Whether you’re creating instructional content, marketing collateral, or educational materials, you’ll find that a polished video presentation can set you apart. Try these simple methods today to turn your slide decks into impactful videos.
Related Articles

9 Free Tools to Speed Up a Video Online (No Downloads Needed)

Magisto: The Simplified Approach to Video Editing for Quick and Effective Content

LightCut 2025 Review: The Best Video Editor for Android and iPhone

Best Free Video Splitters to Cut Your Clips Like a Pro

How to Easily Upload 4K Videos Recorded on Your Sony PMW

Top 10 Video Players for Windows and Mac in 2025

How to Use Kizoa Online Video Maker: A Complete Beginner's Guide

Top Video Editing Tools with a Wide Range of Free Sound Effects

The Best Video Conferencing Software for Teams in 2025: A Comprehensive Guide

Free Video Editing Software for Mac OS X: 10 Excellent Choices

Top Video Editors for Android – Best Alternatives to iMovie

Simple Guide to Converting and Editing Videos for BlackBerry Phones
Popular Articles

Top 5 Video Stabilization Tools for Professional-Quality Footage

The 8 Best Agile Project Management Software Tools for Streamlined Workflow
Top 5 Video Stabilization Tools for Professional-Quality Footage

The Ultimate Guide to Converting iPhone Videos to MP4
Using QuickTime to Play Videos in Slow Motion: A Comprehensive Guide
How To Add An Advanced Search Box In WordPress Using Facetious: A Guide

Discover the 4 Best Journal Apps for Organizing Your Thoughts

Explore Mistral's OCR API With AI-Powered Document Understanding

Simplify Your Life in 2025 with These Top Calendar Apps for iPhone

The 10 Best Campaign Management Software Tools in 2025 for Effortless Marketing Success

The 15 Best Lead Management Software and Tools to Boost Your Business in 2025