mww2
mww2
Running Out of iPhone Storage? Shrink Your Videos in Minutes
Recording high-quality videos on an iPhone feels effortless until you check your storage space. Then it’s not so fun. iPhone videos—especially in 4K or high frame rate formats—can be huge. They eat up storage, slow down file transfers, and make sharing over email or messaging apps a struggle. Luckily, there are several effective ways to shrink video size without damaging quality too much. Let’s have a look at a few of them!
How to Reduce iPhone Video Size
Record in Lower Resolution or Frame Rate
The easiest way to reduce file size starts before you even hit record. iPhones are capable of shooting in 4K at 60 frames per second. That’s a lot of data. However, you may not always want that kind of detail, particularly if the video is going to social media or as a message.

Go into Settings > Camera > Record Video, and you’ll see different options. Dropping from 4K to 1080p instantly saves a huge chunk of storage. Lowering the frame rate from 60fps to 30fps also helps. For most situations, 1080p at 30fps is more than good enough, and the file size is much more manageable. Just be sure to set it before filming—the change doesn’t apply to clips you’ve already recorded.
Trim or Cut Unnecessary Parts
Not all video reduction has to come from changing quality. Sometimes the best thing is just to shorten the video. Cut out anything you don’t need. Dead air, extra seconds at the beginning or end, and even pauses in the middle—get rid of them.
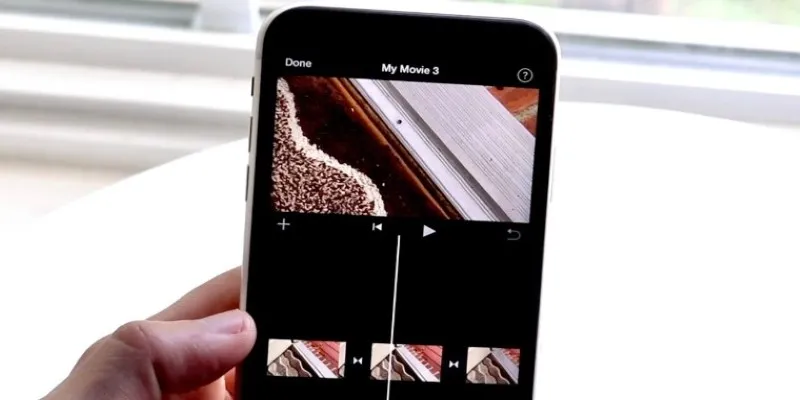
Open the video in the Photos app, tap Edit, and you’ll see a timeline that you can drag to trim. You can also use the iMovie app to split the video and cut out specific sections. Every second you cut helps shrink the file, and trimming doesn’t affect quality. You’re just removing parts.
Use iMovie to Export in Smaller File Sizes
If you want more control than the Photos app gives, iMovie is a good option. It’s free, comes pre-installed on most iPhones, and gives you export settings that include file size control. Open iMovie, import your video, and export it by tapping the Share icon. When prompted, pick an export resolution—choose 720p or 540p instead of the default 1080p or 4K. iMovie will re-encode your video in that size. It’s a quick way to shrink large videos without diving into third-party apps. This method works well for people who want to reduce the size but still maintain decent clarity for online sharing or basic viewing.
Use Third-Party Apps for Compression
Several free apps on the App Store specialize in video compression. They give more control than iMovie and are simple to use. Apps like “Video Compress” or “Compress Videos & Resize Video” let you choose resolution, bitrate, and other settings. Typically, you open the app, import the video, and then select from a list of compression levels. Some allow you to manually adjust resolution and bitrate sliders. The app then re-encodes the video and saves a new version in your Photos.
These apps are useful when you want consistent compression settings across multiple videos. They don’t just shrink the file—they reprocess it, which often cuts down size drastically while keeping acceptable quality.
Turn Off HDR for Smaller File Sizes
iPhones with HDR (High Dynamic Range) support automatically enable it in videos. This creates richer color and contrast, but it also means bigger files. HDR video uses a format called Dolby Vision, which increases file size even if the resolution stays the same.

To turn it off, go to Settings > Camera > Record Video, then toggle off HDR Video. The difference in size between a 4K HDR clip and a 4K non-HDR clip can be significant. If you’re not shooting for cinematic quality and just want to save space, keeping HDR off is a smart move.
Use HEVC Format Instead of H.264
Apple’s newer video format, HEVC (High Efficiency Video Coding), stores video at a smaller size without much quality loss. If you have an iPhone that supports it (most recent models do), it’s usually the default, but it’s worth checking.
In Settings > Camera > Formats, make sure “High Efficiency” is selected. This enables HEVC. If it’s set to “Most Compatible,” your iPhone will shoot in H.264 instead, which produces larger files. HEVC compresses better, so a 10-minute 1080p clip could be half the size of its H.264 counterpart. Just keep in mind that some older devices or platforms might not support HEVC, though this is becoming less of an issue over time.
Transfer to the Computer and Compress There
Sometimes the iPhone isn’t the best tool for the job. If you’ve got access to a computer, you can move your video over and use a desktop app to compress it. Tools like HandBrake (free) let you fine-tune resolution, bitrate, and format.
This is helpful when the video is very large or you want more control than mobile apps offer. Just transfer the video to your computer using AirDrop, iCloud, or a cable, then open it in the app and export with smaller settings. It takes a little more effort, but compression on a computer gives you the highest level of control, especially if you’re working with multiple videos or longer clips.
Save in the Cloud Instead of Local Storage
If your main concern is freeing up iPhone space rather than reducing the video itself, you can upload your videos to a cloud service and delete them from the phone. iCloud, Google Drive, Dropbox, and OneDrive all support video storage. Most offer automatic upload settings.
This doesn’t reduce the file size, but it gets the video off your phone. And if you only need to share it occasionally or keep it for records, storing it online can be a simple fix. Just make sure you have a good Wi-Fi connection when uploading.
Conclusion
Reducing iPhone video size doesn’t have to mean sacrificing quality—or spending money. You’ve got several options, from changing camera settings before recording, trimming clips, and using built-in tools, to taking advantage of third-party apps and desktop software. It all depends on what you need: smaller files for storage, easier uploads, or faster sharing. Try a few of these, and you’ll find the ones that match your workflow best.
Related Articles

LightCut 2025 Review: The Best Video Editor for Android and iPhone
Explore the 10 Best Video Editing Software for Creators
How to Upscale Video Resolution and Reduce Noise: 10 Effective Methods

Top Live Video Mixing Software for Creators

Best Free Video Splitters to Cut Your Clips Like a Pro

How to Make Your Videos Look Stunning: 3 Simple Ways to Optimize Video Quality

How to Effortlessly Create a Video Collage on Your iPhone

9 Free Tools to Speed Up a Video Online (No Downloads Needed)

How You Can Quickly Speed Up Videos on Your iPhone
Different Ways to Repeat and Loop a Video on iPhone

Magisto: The Simplified Approach to Video Editing for Quick and Effective Content

Easy Ways to Record PowerPoint Slideshows as Videos with Narration
Popular Articles
Easy Steps to Convert MP4 for Use in Windows Movie Maker

The 9 Best Competitor Analysis Tools to Level Up Your Business Strategy
Recovering Deleted Files in Notion: Step-by-Step Guide In 2025

Best Tools to Convert MTS to WMV Without Losing Quality

Essential AI Sales Tools to Elevate Your Sales Strategy

The Best Video Conferencing Software for Teams in 2025: A Comprehensive Guide

Step-by-Step Tutorial for Live Blogging in WordPress
Recording Samepage Meetings Using Tools You Already Have
Adobe Premiere Rush on Desktop: Where Simple Editing Meets Smart Design

How to Show Last Visited Posts in WordPress: An Ultimate Guide For Beginners
Simple Ways to Resolve Audio Video Delay: A Beginner’s Guide