mww2
mww2
A Beginner's Guide to Compressing Files on Your Mac
Compressing files on a Mac is more than just a space-saver; it’s a strategy to streamline your digital life, speed up transfers, and keep everything neatly bundled. Whether you’re a seasoned Mac user or a newcomer, mastering file size reduction can significantly enhance your daily workflow.
From organizing work documents to sending large videos, compression is crucial. The best part? You don’t need to be a tech expert to get started. This guide will walk you through everything you need to know about file compression on macOS—sans the jargon and hassle.
Why Compress Files on Mac?
Many users rarely consider the impact of clicking “Save” or “Download,” but as files accumulate, so does the clutter. This clutter eats into storage, slows down backups, and complicates file transfers. Compressing files tackles these issues by reducing file size, making them easier to archive, share, and store. Beyond space-saving, compression aids organization—allowing you to send multiple files as a single package. Plus, smaller files mean faster uploads to cloud services and emails.
macOS simplifies this process with built-in tools, eliminating the need for third-party apps. However, for those seeking more control over compression formats or levels, third-party software offers additional capabilities. Whether you’re managing documents, photos, videos, or large folders, understanding the best method for your needs is key.
There’s also an added layer of data security. While compression doesn’t inherently encrypt files, many tools offer password protection as an option, securing your data from prying eyes.
Built-in Compression Tools on macOS
macOS offers a straightforward built-in compression tool. If you’ve ever right-clicked a file or folder and noticed the “Compress” option, you’ve found it. This feature creates a .zip archive, compatible with all major operating systems, including Windows and Linux, ensuring seamless file sharing.
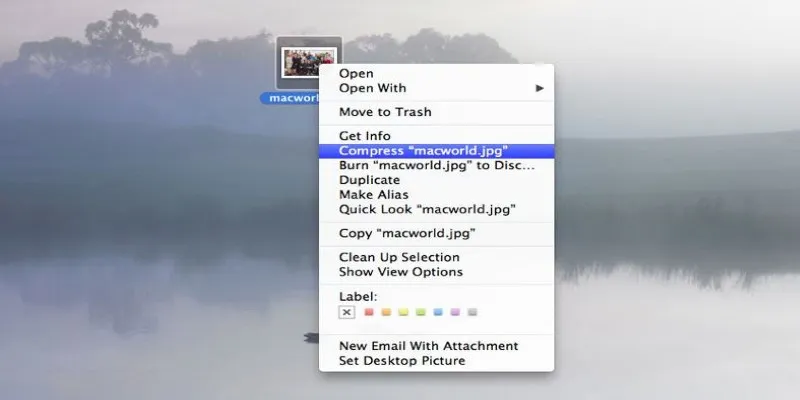
To compress a file or folder, simply select it, right-click, and choose “Compress.” A .zip file will appear next to the original item. The ZIP format is efficient, universally accepted, and integrated into the system. Unzipping is just as easy—double-click the .zip file to expand it.
While convenient, the built-in tool lacks options for compression levels, formats, or password protection—features available in third-party apps. However, for basic tasks like quick file compression for emailing or backing up, the built-in feature is sufficient, operating smoothly without additional software.
Third-Party Compression Tools for Advanced Users
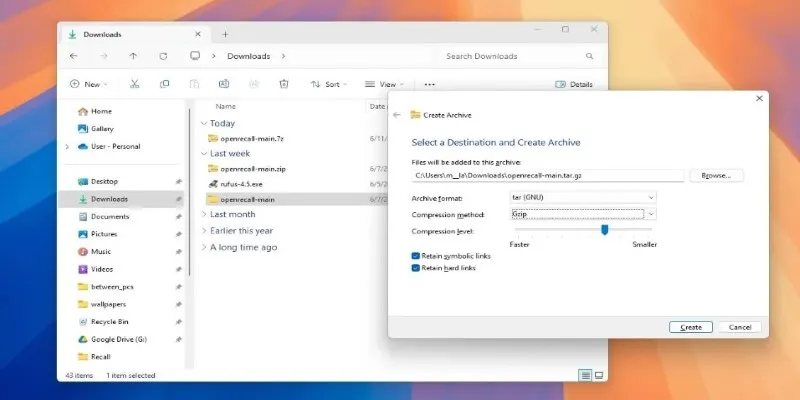
For advanced compression needs, macOS’s native utility might not suffice. Third-party tools are ideal for using formats like RAR or 7z and for features like password protection.
Keka is a popular choice, supporting multiple formats like ZIP, 7z, TAR, and RAR. It allows selection of compression levels, archive splitting, and password protection. Just drag and drop files into the app, choose your settings, and proceed. It also efficiently decompresses uncommon formats.
The Unarchiver focuses on extracting files and supports a wide range of formats, perfect for dealing with diverse file types.
For extensive control over compression tasks, tools like BetterZip and Archiver provide advanced features, including previewing archive contents before extraction, making them ideal for complex workflows.
For those comfortable with command-line utilities, options like zip, tar, and gzip offer flexibility and speed, ideal for automating tasks or handling large file batches.
Third-party tools provide flexibility, essential for power users needing more than basic compression.
Compression Tips for Different File Types
Not all files compress equally. Formats like JPEG images, MP4 videos, and MP3 audio files are already optimized, so basic ZIP compression won’t drastically reduce their size. Don’t expect major size reductions with media files using simple compression methods.
Text-heavy files like documents, spreadsheets, and PDFs compress more effectively. If compressing a folder of Word documents or Excel sheets, expect significant size reduction.
Compression results for folders with mixed content, like a project folder with images and text, can vary. For better compression, use formats like 7z for higher compression rates, though processing takes longer.
For speed, ZIP is a quick, efficient choice, especially since it’s integrated into macOS. For long-term storage where space is crucial, formats like 7z or TAR are preferable.
Always compare file sizes before and after compression to determine the best approach. For email or uploads, be mindful of size limits and test uploads first.
Conclusion
Compressing files on your Mac is an effective way to save space, streamline file transfers, and keep your digital workspace organized. Whether using built-in tools or exploring advanced third-party options, compression can enhance data management. By incorporating this practice, you’ll improve workflow speed, reduce clutter, and facilitate smoother file sharing. Make compression a routine to maximize your Mac’s storage and performance.
Related Articles
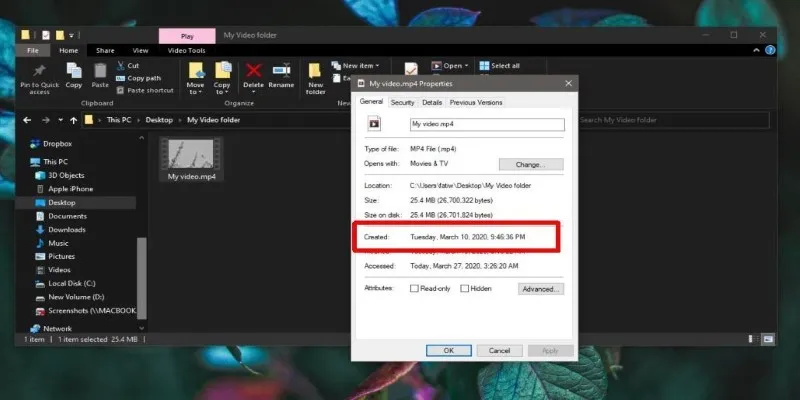
The Ultimate Guide to Changing Creation Dates for Files on Windows

Top FTP Software for Mac Users: Free and Reliable Options

How to Resolve 'Your Connection Is Not Private' Errors Securely

RAW vs. JPEG: The Photographer’s Guide to Choosing the Right File Format

Merging iPhoto Libraries on Mac: Easy Methods to Keep Your Photos Safe

The Beginner’s Guide to Changing WAV Files into MP3 Format
The Beginner’s Guide to Changing WAV Files into MP3 Format
Top AVI Converters for Mac: 7 Popular Tools to Try in 2025

Smooth Your Shaky Videos: 4 Best AI Stabilizers for macOS
Quick Guide: Change GIFs to MP4 for High Clarity and Speed
Convert DOCX to TXT Files in Batches Online with No Downloads
How to Convert Excel to Google Sheets for Free Using Top Tools
Popular Articles

Master Google Tasks: Organize Your Day Step-by-Step

Secure Your WordPress Site Against Password Sharing

How to Add Mailchimp Subscribers from a Webhook: A Step-by-Step Guide

The 8 Best Event Management Software Platforms to Simplify Your Planning

Play Any Video on Xbox: The Easiest Conversion Methods

Comprehensive Guide to Recording WhatsApp Audio and Video Calls on Mac and PC

Top 3 Video Meme Makers to Unleash Your Creativity Today

Top Desktop Apps for Smooth Slow and Fast Motion Effects
Make Your Own Music Videos: 8 Best Musically Makers

The 8 Best AI Image Generators in 2025 to Bring Your Ideas to Life

FilmoraGo Mobile Video Editor: Fast, Friendly, and Surprisingly Capable