 mww2
mww2
How to Convert TS to iPad Video Without Quality Loss
If you’ve ever tried playing a TS file on an iPad, you know it doesn’t work right out of the gate. TS, or Transport Stream, is mostly used for broadcasting and DVDs. Great for transmission but not so great for mobile compatibility. Apple’s native apps simply don’t support TS files, making it frustrating if you’re trying to enjoy saved videos from a TV recording or older disc. Even third-party players struggle with smooth playback.
Thankfully, converting the format is easier than it sounds. You don’t need fancy gear or deep technical knowledge—just the right software and a few smart settings to get your file iPad-ready without losing picture quality.
What Is a TS File and Why iPads Don’t Like It
TS files are often part of recorded TV programs or DVDs and are usually bundled with other files. That’s why when you try to open one on your iPad, you either get an error or nothing at all. iPads play best with formats like MP4 (H.264 or H.265), so unless you convert that TS file into something the iPad understands, it’s a no-go.
While you can use random apps from the App Store to try and play TS files directly, the experience isn’t great. There’s often lag, crashing, or quality issues. That’s why converting is the better route.
How to Convert TS to iPad Video Without Losing Quality
The idea here is to change the format without altering the video itself. So, instead of compressing it into a blurry mess, you’re basically putting the same content into a different container. This way, you don’t lose resolution or clarity. There are a few tools that get this done right:
Tool 1: HandBrake – Free, Fast, and Reliable
HandBrake is one of the most trusted open-source converters available. It’s been around for years and remains reliable through all updates.
Here’s how to use it:
- Install HandBrake on your Windows or Mac device.
- Open the app and drop in your TS file.
- In the “Format” section, choose MP4.
- Under “Video,” ensure the video codec is set to H.264.
- Hit “Start Encode.”
HandBrake also gives you control over resolution, bitrate, and frame rate, so you can fine-tune things. But if you’re looking for a quick convert with zero quality loss, leave most settings on default. It’s smart enough to handle the rest.
Bonus tip: If your TS file includes multiple audio tracks or subtitles, HandBrake can carry them over into the MP4 file—perfect if you’re converting a movie or a show.
Tool 2: VLC Media Player – Not Just for Watching Videos
VLC isn’t just a player—it actually has a decent converter built in. It’s not as customizable as HandBrake, but it gets the job done.
Here’s how:
- Launch VLC and go to Media > Convert/Save.
- Add your TS file.
- Click Convert/Save at the bottom.
- Choose the profile “Video - H.264 + MP3 (MP4).”
- Pick your destination folder and start the process.
This works well if you’re dealing with short clips or don’t want to install anything extra. Just note that VLC isn’t the best for batch converting or trimming files.
Tool 3: WinX HD Video Converter Deluxe – Great for Large Files
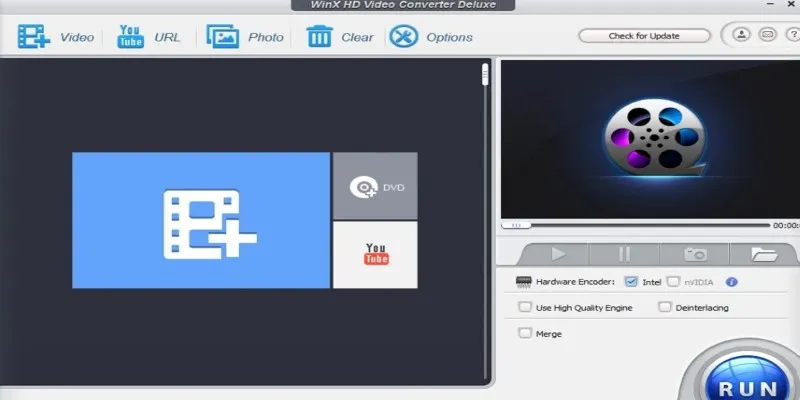
This tool isn’t free, but it offers a trial and is excellent for handling large or 4K TS files. It’s built for speed and keeps everything neat—even with longer videos.
Steps to follow:
- Download and install the converter.
- Import your TS file.
- Choose iPad Video (H.264) as your output.
- Hit convert.
This tool is particularly good at keeping the original quality intact. It even has GPU acceleration, so it’s noticeably faster if you have a newer machine.
Converting for iPad Playback—What Settings Work Best?
If you’re converting to MP4, make sure your video settings match what the iPad prefers. Here’s a safe combo that works on all models:
Format: MP4
Video Codec: H.264 (for older iPads) or H.265 (if your iPad supports HEVC)
Audio Codec: AAC
Resolution: Same as original, or max 1920x1080 for faster transfer
Bitrate: Keep it high enough (5,000–8,000 kbps for HD) to maintain detail
Most converters have presets labeled “iPad” or “Apple Device.” These usually work well, but it’s still good to double-check settings before hitting start.
How to Get the Converted Video Onto Your iPad
Once you’ve converted your video, the last step is moving it to your device. Here are a few quick methods:
AirDrop (Mac to iPad): Fast and wireless. Just right-click the file and select AirDrop. Accept it on your iPad, and it will land in the Photos app.
Files App (iCloud or USB): You can upload your video to iCloud Drive and then open it using the Files app. If you’re using a cable, just sync through Finder or iTunes.
Third-Party Apps: Apps like VLC for iOS let you transfer files directly via Wi-Fi. You just visit an IP address from your computer browser and upload the file.
Final Thoughts
Playing TS files on your iPad isn’t as tricky as it might seem. You don’t have to give up quality or deal with clunky apps that barely work. With tools like HandBrake, VLC, or WinX HD Video Converter, you can convert those files quickly and keep everything looking sharp. Whether you’re watching shows, movies, or recordings, it’s all about choosing the right format and using a transfer method that fits your setup. No more dead-end playback errors or pixelated screens. Just a clean, simple way to enjoy your videos on the go. Once you’ve done it once, future conversions will take no time at all.
Related Articles

How to Easily Convert AVI to MOV Using 4 Reliable Tools

MPEG to MP3 Conversion Made Easy: A Complete Guide

How to Convert MPEG to WAV: A Step-By-Step Guide

Best Practices for Converting AVI Files to JPG Format
How to Easily Convert AVI to MOV Using 4 Reliable Tools

From Video to Audio: 10 Top MP4 to MP3 Converters in 2025

Top 7 Methods for Effortless MP4 to MOV Conversion

Free Ways to Convert HEVC to MP4 Without Losing Quality
From Excel to JPG: Best Tools for Converting Charts into Images
Best Free PDF to Image Tools for Quick and Easy Conversion

Simple Methods to Convert ISO Files to MP4 for Beginners

Top 3 Simple Ways to Convert WMA to MP4 Easily
Popular Articles

How to Split Video Clips in iMovie: A Step-by-Step Guide
Smooth Slow Motion Editors: Top Tools for Phone and Computer

Elevating Speech Pacing Across All ElevenLabs Platforms

Bolt.new Introduces Advanced Supabase Integration for Real-Time App Development
5 Easy Ways to Repair Corrupted PDF Files Online for Free
Best Image to PDF Converters for Desktop: 6 Top Picks

MPG to DivX Conversion Made Simple: Best Tools for Every Platform
A Beginner’s Guide to Telecom Expense Management Software: All You Need to Know

Top 7 Online Tools to Convert MOV to WMV Effortlessly

Which Are The 5 Best Data Collection Tools to Streamline Your Research Process

Comprehensive Guide to Using Bandicam for Screen and Game Recording
