mww2
mww2
How to Easily Convert XCF Files to JPG: 7 Methods
If you’re a GIMP user, you’re likely familiar with the XCF file format. It’s great for saving layered, editable images, but unfortunately, it’s not the most accessible format for sharing or using your images in different applications. When you need to convert XCF files into a more universal format like JPG, you want a quick and simple solution.
Converting XCF to JPG is easier than it seems. Whether you’re an experienced graphic designer or a beginner, various simple methods are available to help you convert your files quickly and efficiently, making the process hassle-free for anyone.
Top 7 Ways to Convert XCF to JPG with Ease
Here are the top 7 easiest ways to convert XCF to JPG, including both online utilities and desktop applications. Discover the one that best suits your needs!
1. Direct Conversion Using GIMP
The simplest and most natural way to convert XCF to JPG is to utilize GIMP itself. Since XCF is GIMP’s native file format, the application contains inherent capabilities for saving your work into other formats, such as JPG. To achieve this, simply open your XCF document in GIMP, click on “File” from the menu, and then choose “Export As.”
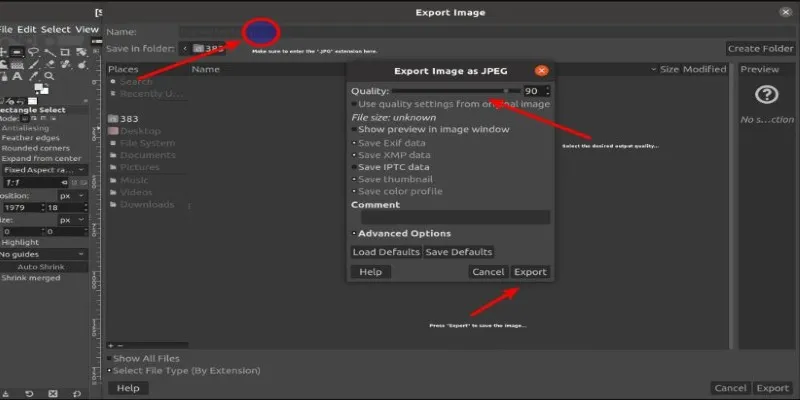
In the new window, select JPG from the available formats or manually type “.jpg” as the file extension. Click “Export” and set your desired quality settings. Save your conversion in seconds. Your JPG file will be ready to use, and the quality is entirely up to you.
2. Online XCF Conversion Services
Sometimes, you may not have GIMP installed or available. Fortunately, online conversion sites offer convenient alternatives. Sites like Convertio, CloudConvert, and Online-Convert are safe options. To convert your files, upload your XCF file to the site, choose JPG as your output format, and proceed with the conversion.
After a brief processing time, you’ll receive a download link to save your freshly converted JPG image. These online converters are excellent when you’re on the go, as no software installation is required, and most platforms support quick conversions of relatively large files.
3. Batch Conversion Tools
If you frequently convert multiple XCF files to JPG format, using batch conversion tools can drastically improve efficiency. Specialized batch converters like XnConvert or IrfanView provide straightforward methods for bulk processing. After installing your chosen software, select all the XCF files you want to convert, specify JPG as the output format, and start the conversion process.
Even large groups of files can be converted seamlessly within a few minutes. Batch converters save significant amounts of time, particularly for photographers or designers who regularly work on extensive projects involving multiple image files.
4. Utilizing Command Line Conversion
For more technically inclined users or those comfortable with command-line
interfaces, converting XCF to JPG using scripts and commands is an appealing
option. Tools like ImageMagick support command-line conversion and offer
robust performance. After installing ImageMagick, open your terminal, navigate
to the folder containing your XCF file, and input a simple command, such as
convert filename.xcf filename.jpg.
After executing this command, your JPG file appears in the same directory. Command-line conversions allow great flexibility, enabling automated scripts or batch conversions with customized settings. This approach is ideal for users familiar with scripting or those requiring advanced conversion options and automation.
5. Using Dedicated Desktop Converters
Aside from batch converters and online tools, standalone desktop applications dedicated solely to image format conversion exist. Software solutions such as Adapter or Pixillion Image Converter specialize in quick, efficient image conversions. These tools typically feature user-friendly interfaces, straightforward workflows, and multiple supported formats, including JPG.
After downloading and installing your chosen software, open the application, drag and drop your XCF files into the interface, select JPG as the output format, and initiate the conversion. The intuitive process ensures minimal confusion, and the software usually comes packed with adjustable quality settings, enabling you to tailor the results according to your specific requirements.
6. Adobe Photoshop Plugin Conversion
Though primarily associated with proprietary formats like PSD, Adobe Photoshop can also support XCF files via third-party plugins. Once you install a plugin like “GIMP XCF Plugin for Photoshop,” you can open and edit XCF files directly within Photoshop. After loading your XCF file into Photoshop, navigate to “File,” then “Save As,” select JPG from the format options, and save the file.
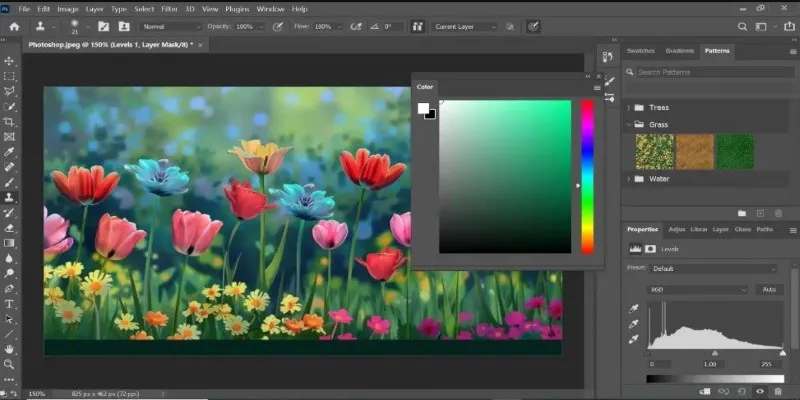
This plugin-based conversion is particularly beneficial for designers who regularly alternate between Photoshop and GIMP and wish to streamline their workflow without juggling multiple applications. Although it requires an initial setup, this method offers considerable convenience afterward.
7. Conversion Using Linux Tools
For Linux users, converting XCF files to JPG is simple, thanks to robust native tools available on most distributions. Linux comes equipped with command-line tools and GUI-based applications, such as XCF2PNG or Converseen, capable of handling XCF file conversions effortlessly. Converseen, in particular, provides a graphical interface that allows you to convert your images visually.
To begin, install the application through your software repository, launch the tool, and open your XCF file. After choosing JPG as the output format, initiate the conversion. For command-line lovers, Linux offers several scripts or tools that can achieve the task quickly and efficiently, ensuring you’re never short of choices.
Conclusion
In conclusion, converting XCF files to JPG is a simple yet essential task for anyone working with image editing. Whether you’re using GIMP’s built-in export function, relying on online converters, or exploring batch tools and command- line options, there’s a solution for every user. The key is to choose the method that best suits your needs, whether that’s quick one-off conversions or handling large volumes of files. With these 7 methods at your disposal, you can streamline your workflow and save valuable time. Ultimately, understanding your conversion options ensures that you maintain efficiency while preserving the quality of your images.
Related Articles

How to Convert MPEG to WAV: A Step-By-Step Guide
From Excel to JPG: Best Tools for Converting Charts into Images
Simple Methods to Convert ISO Files to MP4 for Beginners

How to Easily Convert AVI to MOV Using 4 Reliable Tools
Quick and Simple NEF to JPG Conversion: 3 Best Tools

Top 3 Simple Ways to Convert WMA to MP4 Easily

5 Simple Ways to Convert 3GP to MP4 Effortlessly

Best Practices for Converting AVI Files to JPG Format
How to Easily Convert HTML Files to JPG: 5 Methods

Fastest Method to Convert JPG to MP4 and Create Stunning Videos
Convert WebP to JPG on Windows: 7 Best Tools to Use
Fast & Easy AVIF to JPG Conversion: 5 Offline Converters
Popular Articles

The 7 Best Social Media Management Tools in 2025: Elevate Your Online Presence

How to Use AdRotate for Effective Ad Management

FerretDB 2.0 Launches as Open MongoDB Alternative with PostgreSQL

Top 5 4K Recorders You Should Try for Stunning Videos

Top Tools for Posting on Facebook Using Your RSS Feed

Data-driven techniques to improve search rankings and acquire qualified leads

Gmail vs Apple Mail: Which is the Best Choice for You in 2025

What Makes Generative AI by Getty Images The Best AI Image Generator for Businesses?
5 Easy Ways to Repair Corrupted PDF Files Online for Free

InShot Review: The Go-To Video Editor for Quick, Polished Social Content

MPG File Guide: How to Open, Play, and Convert MPG Videos Easily