Master Windows Movie Maker: Tips and Tricks for Stunning Videos
Windows Movie Maker is a timeless favorite for straightforward video editing, valued for its simplicity and accessibility. Perfect for editing vacation clips, school projects, or even professional-style videos on a budget, it offers all the essential tools you need. This guide covers everything from importing footage to producing a polished final product, helping you maximize the potential of Windows Movie Maker with ease.
What Is Windows Movie Maker?
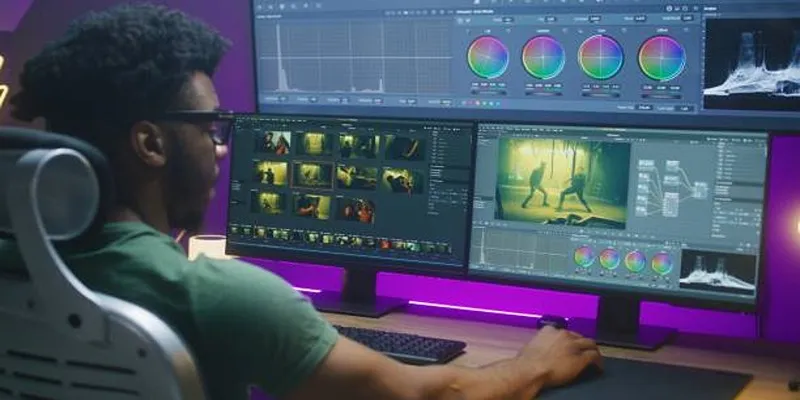
Windows Movie Maker is a video editing program created by Microsoft that helps users create and edit videos with ease. It features a drag-and-drop interface, making it beginner-friendly while still offering essential tools for editing. Although Microsoft officially discontinued support for Windows Movie Maker in 2017, you can still find safe versions of it online or use its successor, Windows Photos (with Video Editor).
Here’s why many still use Windows Movie Maker:
- Simple Interface: No prior experience in video editing is needed.
- Built-In Features: Add audio, effects, transitions, and titles effortlessly.
- Free to Use: Unlike many robust tools, Movie Maker provides practical editing capabilities at no cost.
Getting Started with Windows Movie Maker
Step 1: Install Windows Movie Maker
Since Windows Movie Maker is no longer officially supported by Microsoft, ensure you download the software from a trusted site to avoid malware. Once the file is downloaded:
- Open the installation file.
- Follow the on-screen instructions to complete the installation process.
- Launch the program after installation.
If you’re using Windows 10 or higher, consider using Video Editor, which comes pre-installed under the “Photos” app.
Step 2: Import Your Media
- Open Windows Movie Maker and click on the “Home” tab at the top of the screen.
- Select the “Add Videos and Photos” option.
- Browse your computer to find the videos and images you want to work with.
- Click “Open” to import them into the project window.
Keep your media organized in a single folder to make locating files easier.
Step 3: Arrange Your Clips
Once you’ve imported your media, you’ll see your files displayed as thumbnails. Here’s how to arrange them:
- Drag and drop your clips in the desired order on the storyboard at the bottom of the screen.
- Split longer clips into smaller segments by clicking Edit > Split when the clip is selected.
Arrange your clips thoughtfully by starting with a hook to grab attention early.
Step 4: Add Audio
Audio can transform your video and make it more engaging. Here’s how to add background music or voiceovers:
- Click on “Add Music” from the toolbar (under the “Home” tab).
- Browse and select your music file.
- It will appear as a green line below your video timeline.
- Adjust the placement by dragging the audio to align perfectly with your visuals.
You can also fade in and fade out the audio using the “Music Tools” > “Options” tab.
Step 5: Apply Effects and Transitions
No great video is complete without smooth transitions and visual effects. To add flair:
Transitions:
- Go to the “Animations” tab.
- Choose from a variety of transitions like fades, wipes, or slides.
- Click your desired transition, and it will automatically apply it to the selected clip.
Visual Effects:
- Navigate to the “Visual Effects” tab.
- Experiment with filters like sepia, grayscale, or pixelation to change the clip’s look.
Remember to keep transitions subtle and cohesive for a professional look.
Step 6: Add Titles, Captions, and Credits
Adding text can provide valuable context to your video. Here’s how:
- Go to the “Home” tab, then select “Title” to insert text before your video starts.
- Click “Caption” if you want to overlay text on specific clips.
- Use “Credits” for rolling text at the end of your video.
- Customize text size, font, and color by using the “Text Tools” tab.
Use readable fonts like Arial or Calibri for captions to ensure clarity.
Step 7: Preview Your Video
Before finalizing, preview your project to make sure everything flows smoothly:
- Click on the play button under the preview screen on the right-hand side of the editor.
- Watch for timing issues, abrupt cutoffs, or mismatched audio.
Make any necessary tweaks. This is your chance to perfect your video!
Step 8: Save and Export Your Project
Once satisfied with your video, it’s time to save and export it:
- Click on “Save Movie” in the top-right corner.
- Choose from pre-set export options like “For Computer” or “For High-Definition Display.”
- Rename your file and choose a destination folder.
- Click “Save.”
Your video will be exported in an MP4 or WMV format, ready for sharing on platforms like YouTube, Facebook, or via email. If you plan to upload your video online, use the HD presets for better quality.
Why Choose Windows Movie Maker?
If you’re wondering whether this software is worth your time, here’s why many users still love it:
- Ease of Use: Movie Maker is ideal for beginners who feel intimidated by advanced editing tools like Adobe Premiere Pro.
- Customizability: From titles to transitions, you can add your personal touch to every video.
- Time-Saving: Its intuitive drag-and-drop system simplifies the editing process.
Creative Ideas for Your Projects

Not sure where to start? Here are a few ideas to try with Windows Movie Maker:
- Travel Montages: Combine vacation photos or footage with upbeat background music.
- Family Memories: Create a heartfelt video for special occasions like birthdays.
- Promotional Content: Perfect for small businesses looking to showcase their products or services.
Final Thoughts
Windows Movie Maker is the ultimate beginner-friendly video editor, but it’s just the first step in your editing journey. Once you’ve mastered the basics, you might consider trying advanced tools like DaVinci Resolve or Adobe Premiere Pro for more complex projects. For now, open Windows Movie Maker, start exploring, and bring your creative vision to life one clip at a time!
Related Articles

LightCut 2025 Review: The Best Video Editor for Android and iPhone

Free Video Editing Software for Mac OS X: 10 Excellent Choices

Steps to Download Movie Maker Free and Start Creating

Top Live Video Mixing Software for Creators

PowerDirector: A Fast and Accessible Video Editing Tool for Everyone

The Best 7 Movie Makers for Mac Users in 2025

How to Easily Edit Videos for Free Using Windows Movie Maker

Fix the Windows Movie Maker Black Screen Problem
Top Video Editing Tools with a Wide Range of Free Sound Effects
10 Best Free Video Editing Tools to Make Social Media Videos Stand Out
How to Edit and Merge GoPro Videos on Your Windows PC

What is HitFilm Express? A Beginner's Guide for Mac Users
Popular Articles
Top 3D Model Converters to Change STL Files into OBJ Format Fast

How to Use Browse AI to Scrape Data from Any Website: A Step-by-Step Guide

How to Add Facebook-Style Autocomplete for WordPress Posts: A Guide

5 Best Tools to Transfer and Convert AVCHD Videos to Your iPod

How to Use Feathery for Better No-Code Forms and Workflows: A Complete Guide

Top Desktop Video Editors for Background Removal

How to Create Google Calendar Events from Microsoft To Do Tasks: A Guide

How Can You Automate To-Do List Apps to Save Time?

How to Use Inspect Element in Chrome, Safari, and Firefox: A Beginner's Guide

Top 3 Video Meme Makers to Unleash Your Creativity Today

VS Code Online, Replit and More: Top IDEs to Code Directly in Your Browser

 mww2
mww2