mww2
mww2
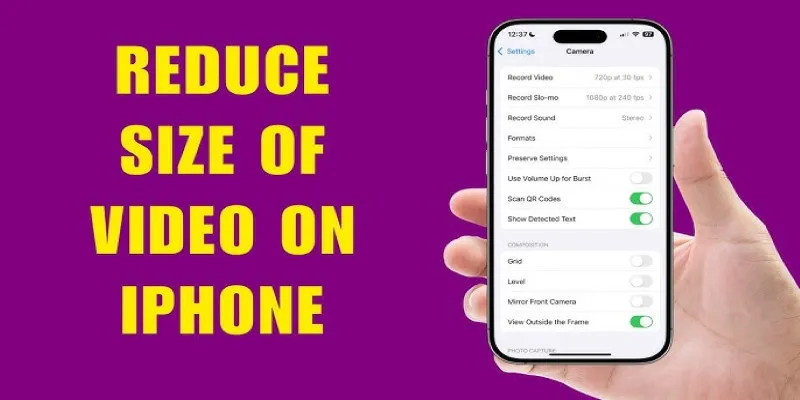
Quick Fixes for the Black Screen in Windows Movie Maker
If you’re a Windows Movie Maker user, you’ve probably encountered the frustrating black screen issue where your video plays, but all you see is a blank screen. While this problem might seem alarming, the good news is that it’s typically easy to resolve with a few steps. This guide will walk you through simple solutions that will get your videos running smoothly and save you time troubleshooting.
Understanding the Black Screen Issue

The black screen in Windows Movie Maker usually happens when there’s a problem rendering your video. Common causes include:
- Outdated or missing codecs
- Corrupt or incompatible video files
- System performance issues
- Problems with project settings in Movie Maker
How to Fix the Windows Movie Maker Black Screen Issue
Update Your Graphics Drivers
One of the easiest ways to address the black screen problem is by ensuring your drivers are up to date.
-
Check for Updates: Windows Movie Maker relies heavily on your graphics card. Outdated drivers can cause playback issues. To check for updates:
- Right-click on “Start” and go to Device Manager.
- Expand the Display Adapters section.
- Right-click your graphics card and select Update Driver.
-
Restart After Installation: After updating, restart your computer and check if your video plays correctly.
Convert Your Videos to a Supported Format
Windows Movie Maker works best with specific file formats like WMV, MP4, or AVI. If your video file is in an unsupported format, the software may display a black screen.
How to Use HandBrake to Convert Video Formats
- Download and Install HandBrake: Visit the HandBrake official website and download the version compatible with your operating system. Follow the installation instructions provided.
- Open the Video File: Launch HandBrake and click on the File option under the Source Selection section. Browse and select the video file you want to convert.
- Choose an Output Format: Under the Summary tab, select a supported format like MP4 from the drop-down menu.
- Adjust Settings (Optional): You can tweak settings such as resolution, bitrate, and audio tracks to optimize the video for Windows Movie Maker if needed.
- Select a Destination: Click on the Browse button to choose where you want the converted file to be saved.
- Start the Conversion: Press the Start Encode button, and HandBrake will begin converting your video. Once completed, check the destination folder for your newly converted file.
How to Use Any Video Converter
- Download and Install the Software: Begin by downloading Any Video Converter from its official website. Install the program by following the on-screen instructions.
- Launch the Application: Open Any Video Converter and familiarize yourself with its user interface to ensure smooth navigation.
- Add Your Video File: Click on the Add Video(s) or Add or Drag File(s) button to import the video you want to convert. You can also drag and drop the file directly into the application window.
- Choose the Output Format: Select your desired output format from the dropdown menu on the right side of the application. If you’re customizing the video for a specific platform or software, ensure you pick the corresponding preset.
- Adjust Optional Settings: If needed, customize settings such as resolution, codec, or frame rate to suit your preferences or compatibility needs.
- Set the Output Directory: Specify where you want the converted file to be saved by setting the output folder in the application.
- Begin Conversion: Click the Convert Now! button to start the process. Allow the program a few moments to complete the conversion. Once done, your converted file will be available in the output folder you’ve chosen.
Install Missing Codecs
Codecs are essential for decoding video files. Without the appropriate codec, Movie Maker may struggle to process your video.
- Install a Codec Pack: Download and install a codec pack like K-Lite Codec Pack. This software contains most codecs you’ll need to work with Windows Movie Maker.
- After installation, restart your system and import your video to see if the issue is resolved.
Adjust Hardware Acceleration Settings
Hardware acceleration settings can interfere with video rendering in Windows Movie Maker, causing the black screen.
- Open Your System Display Settings: Right-click on your desktop and select “Display settings.”
- Access Advanced Graphics Settings: Navigate to Advanced display settings and look for graphics or video settings.
- Turn Off Hardware Acceleration: Disable unnecessary hardware acceleration to optimize playback within Movie Maker.
Check and Repair Corrupted Files
Corrupted video files can also trigger the black screen issue. Running a quick integrity verification or repair may fix this.
- Verify File Integrity: Some tools like VLC Media Player can help identify problems with your files.
- Repair Video Files: Use free tools like Stellar Repair for Video or Digital Video Repair to fix file corruption.
- Reimport to Windows Movie Maker: Once repaired, try importing the cleaned file into your project.
Adjust Windows Movie Maker Settings
Sometimes, mismatched settings within Movie Maker itself can cause playback issues.
-
Change Preview Settings:
- Go to “Options” under the “File” menu.
- Lower the preview quality to see if performance improves.
-
Enable Compatibility Mode:
- Right-click on the Windows Movie Maker shortcut.
- Select Properties > Compatibility Mode.
- Run the program in an earlier compatibility mode like Windows 7 or 8.
-
Save Your Project and Restart: After tweaking these settings, save your project and relaunch the program.
Reinstall Windows Movie Maker
If all else fails, a reinstallation might fix underlying software issues.
-
Uninstall Movie Maker:
- Open Settings, go to Apps, and find Windows Movie Maker.
- Uninstall it and remove old project files if needed.
-
Reinstall the Software:
- Download a fresh version from a trusted source and reinstall.
-
Test a Sample Project:
- Import a small video file to test if the issue persists.
Practical Tips to Avoid Future Issues

- Keep your computer’s operating system up to date.
- Regularly check for updates on Windows Movie Maker and install them.
- Save projects frequently to avoid losing progress.
- Avoid running too many applications at once, as it can slow down the program.
- If possible, use a separate hard drive or external storage device for storing large video files used in Movie Maker.
- Close unnecessary programs before using Movie Maker to free up memory and reduce potential software conflicts.
- Check for missing or outdated drivers that could potentially affect the performance of Movie Maker.
Conclusion
Fixing the Windows Movie Maker black screen issue is simpler than it might seem. By updating your drivers, converting files, adjusting hardware acceleration, or reinstalling the software, you can resolve the issue and return to editing without interruptions. Still having trouble? Consider upgrading to professional video editing software like Adobe Premiere Pro or DaVinci Resolve if Windows Movie Maker doesn’t meet your needs anymore.
Related Articles

LightCut 2025 Review: The Best Video Editor for Android and iPhone
Top 5 Split Screen Video Editors for Windows 10 and Mac Users

Top Live Video Mixing Software for Creators

Free Video Editing Software for Mac OS X: 10 Excellent Choices

PowerDirector: A Fast and Accessible Video Editing Tool for Everyone
Top Video Editing Tools with a Wide Range of Free Sound Effects
10 Best Free Video Editing Tools to Make Social Media Videos Stand Out
How to Edit and Merge GoPro Videos on Your Windows PC
Top Free Software to Convert MKV to AVI for Windows Users
Top 4 Vertical Video Editors to Edit Vertical Videos Quickly

Top 5 Free Video Enhancers to Instantly Boost Video Quality

What is HitFilm Express? A Beginner's Guide for Mac Users
Popular Articles
Simple and Effective Ways to Convert MTS Files for Your iPad

How to Use iMovie for Mac to Add Picture-in-Picture Effects Easily

Essential AI Sales Tools to Elevate Your Sales Strategy

6 Document Management Mobile Apps Users Love For Seamless Organization
Easy Ways to Edit QuickTime Videos on Windows and Mac

Password Manager Not Autofilling? Here’s How to Fix It Securely

VS Code Online, Replit and More: Top IDEs to Code Directly in Your Browser

The Best Webinar Software for Marketers in 2025 to Grow Your Audience and ROI

The Ultimate Guide to HR Mobile Apps for Simplifying Workforce Management

Best Methods to Convert MKV to WAV Without Audio Quality Loss

How To Add Custom Search Engines To Chrome—Try These 7 Search Engines