mww2
mww2
Turn Videos into iPad-Compatible Files in a Few Steps
Watching videos on an iPad is a seamless way to enjoy movies, TV shows, or personal clips wherever you go. However, sometimes a video may not play because it’s not in the right format. Don’t worry — converting a video to an iPad-friendly format is straightforward if you know what steps to take. In this guide, we’ll explain everything in simple steps, so even if you’re not a tech expert, you’ll be able to solve the problem easily.
What Video Formats Work Best on an iPad?
Before discussing conversion, it’s essential to know which video file types iPads prefer. iPads generally play videos saved in formats like MP4, MOV, and M4V. These formats are smooth because they use encoding methods (such as H.264 or HEVC) that Apple devices understand well.
If your video is in a different format, like MKV, AVI, WMV, or FLV, your iPad may not open it at all. Sometimes, it might attempt to play but end up freezing or showing an error. That’s where video conversion comes in. Changing the format makes the file easier for the iPad to read without significantly compromising quality.
Different generations of iPads might support slightly different versions of video formats. For example, older iPads prefer H.264 videos, while newer models like the iPad Air or iPad Pro can also handle HEVC (H.265) formats, which are smaller in size but still look great. Knowing these basics helps you choose the right settings when you’re ready to convert a video.
Best Tools to Convert Videos for iPad Viewing
There are many tools available to help you change your video format. Some are free, while others are paid, and some are available online without needing installation.
Free Software:
HandBrake: This open-source app works on Windows, Mac, and Linux. It’s popular because it’s free and comes with built-in presets for devices like iPads.
VLC Media Player: Although VLC is mainly used for playing videos, it can also convert them. It’s simple and free to use.

Paid Software:
Wondershare UniConverter: This user-friendly tool supports numerous formats and provides fast conversions with minimal quality loss. It offers special settings tailored for Apple devices.
Movavi Video Converter: Another paid option suitable for beginners. It has a clean layout and includes small editing features like trimming and cropping before conversion.
Online Converters:
CloudConvert: This website allows you to upload a video and convert it to an iPad-friendly format without downloading a special app. It’s ideal for small files.
Zamzar: Easy to use and perfect for one-time conversions. You just upload, select your output format (like MP4), and download the new file.
How to Convert Video Files for Your iPad?
Now that you know which formats to use and which tools you can utilize, let’s walk through the process of converting a video. Here’s a step-by-step method using HandBrake as an example, but the concept is similar for other tools.
Step 1: Download and Install HandBrake
Visit HandBrake’s official website and install the version for your computer. It’s free and safe to use.
Step 2: Open Your Video
Launch HandBrake and click on “Open Source.” Locate the video file you want to convert from your folders.
Step 3: Pick a Preset for the iPad
Once your video is loaded, navigate to the “Presets” sidebar. There’s usually a category called “Devices,” where you can find options like “iPad” or “iPhone/iPad.” Choose the one that fits your iPad model.
Step 4: Choose Output Settings
Ensure your output format is set to MP4. You can adjust other options like video quality, resolution (choose 1080p for full HD), and framerate if desired.
Step 5: Pick Save Location
Click “Browse” to select where you want your new video to be saved.
Step 6: Start the Conversion
Finally, click the green “Start Encode” button. HandBrake will now convert your video into an iPad-compatible format.
Step 7: Transfer to Your iPad

Once your video is ready, you can use iTunes (or Finder on newer Macs) to move the file to your iPad. Connect your iPad with a cable, open iTunes or Finder, select your device, and move the video to the TV app or Files app.
Common Problems and How to Fix Them
Problem 1: Converted Video Still Won’t Play
If your video still doesn’t play after conversion, double-check that you selected the correct settings. Ensure the video codec is H.264 or HEVC, and the file format is MP4, MOV, or M4V. Some apps might be particular about the file extension.
Problem 2: Video Quality Looks Bad After Conversion
If the video appears blurry or grainy, it might be because the settings were too low. Try increasing the bitrate or selecting a better-quality setting in the converter.
Problem 3: File Size Is Too Big
Higher quality usually results in a larger file size. If you need to reduce it, adjust the resolution (for example, 720p instead of 1080p) or use HEVC encoding, which saves space without compromising too much quality.
Problem 4: Online Converter Limitations
Websites that convert videos online usually have limits on file size (like 100MB or 200MB). If your video is large, it’s better to use software on your computer.
Problem 5: Audio Sync Issues
Sometimes, the video and audio don’t match up after conversion. If that happens, try using a different converter tool or manually adjust the framerate and audio settings.
Conclusion
Converting videos for your iPad isn’t complicated once you understand the right formats and know which tools to use. Whether you’re using free software like HandBrake or an online tool like CloudConvert, the process follows the same basic steps: pick the right format, adjust your settings, and transfer the file to your iPad. Once you’ve done it a few times, it becomes second nature. Now, you’ll be able to watch any of your favorite videos on your iPad anytime you want, without any playback errors.
Related Articles
The Easiest Way to Convert Video to Apple TV: Free, Paid, and Online Options

9 Free Tools to Speed Up a Video Online (No Downloads Needed)

Magisto: The Simplified Approach to Video Editing for Quick and Effective Content

Effortless Steps to Convert and Upscale Video to 4K Resolution

LightCut 2025 Review: The Best Video Editor for Android and iPhone

How to Convert MKV to MP4 with a Fast and Powerful Converter
Top Free Software to Convert MKV to AVI for Windows Users
How to Quickly Convert 4K UHD to 1080p HD Without Losing Quality
How to Edit and Merge GoPro Videos on Your Windows PC
Prep Camcorder MTS/M2TS Footage for Smooth Final Cut Pro Editing

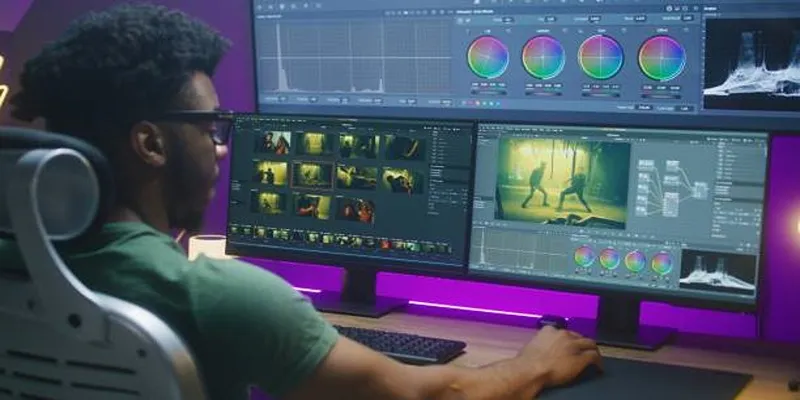
How to Make Your Videos Look Stunning: 3 Simple Ways to Optimize Video Quality

7 Best Online Tools to Create Picture and Video Collages
Popular Articles

Understanding YouTube Demonetization Rules in 2025

How to Make a Funny Video: 6 Steps That Actually Work
How to Integrate Google Sheets with Mailchimp: A Step-by-Step Guide
Top 5 Effective Methods to Convert M4V to FLV Easily

How to Add an 'Email This' Option to Your WordPress Posts: A Step-by-Step Guide

The 10 Best Email Drip Campaign Software in 2025 to Automate Your Outreach

Which Are The 5 Best Calendar Apps for Mac to Organize Your Life in 2025

Top Development Software for Programmers and Coders 2025
Discover the Best 7 Alternatives To Use Instead of Microsoft Project in 2025

Easy Ways to Record PowerPoint Slideshows as Videos with Narration

6 Best Tools to Create Stunning Animated Videos with Ease