 mww2
mww2
Best Ways to Record Skype Calls Without Glitches
Recording a Skype call seems straightforward—until the audio stutters, someone’s face freezes, or you end up with a blurry mess. Whether it’s a team meeting, a podcast interview, or a virtual class, having a clear and complete recording is crucial. While Skype offers a built-in recording option, it doesn’t always guarantee the best quality, especially if your internet connection falters or someone joins late. However, achieving a clean, reliable recording is possible without technical stress. You just need to set things up correctly from the start.
Use Skype’s Built-In Recording—But Know Its Limits
Skype provides a one-click recording option, perfect for quick recordings without any setup. It captures video and audio for all participants, uploads it to the cloud, and allows you to download it within 30 days.
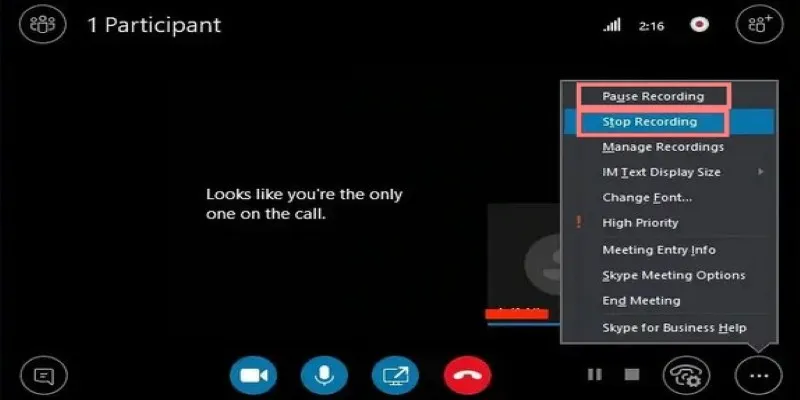
However, many people don’t realize that the recording quality depends on the connection quality at the time of the call. If someone’s audio cuts out or their camera becomes fuzzy due to poor bandwidth, that’s exactly how it will be saved. The built-in recorder doesn’t enhance quality—it simply records what happens in real time.
Additionally, the recording is saved as an MP4 file with a fixed layout. You can’t separate audio tracks or adjust camera feeds afterward. For casual chats, that’s fine, but for important conversations—like client meetings, remote training, or interviews—you might want more control.
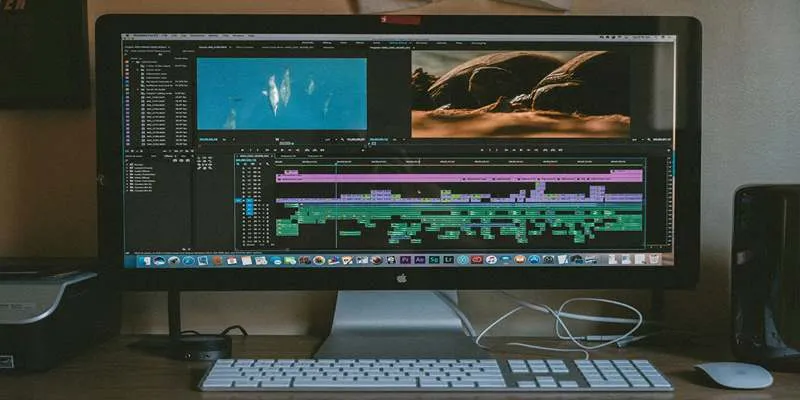
External Recording Tools: A Better Option for Quality
For clearer video and audio, third-party software can be a smarter choice. These tools record each participant’s stream separately, sometimes in higher resolution than Skype displays. They often let you choose the format, audio bitrate, and resolution, so you’re not stuck with compressed files that sound low-quality.
Here are a few popular options:
OBS Studio (Open Broadcaster Software): Free, open-source, and widely used for both streaming and recording. With OBS, you can capture the entire Skype window, individual speakers, or even overlay names and custom graphics. It saves high-quality recordings directly to your computer, and you can choose your preferred format (like MKV, FLV, or MP4) and resolution settings.
Ecamm Call Recorder (Mac only): This integrates directly with Skype and gives you separate audio tracks for each speaker. This is incredibly useful during editing, especially if one person has background noise or echo that you want to reduce without affecting the rest.
MP3 Skype Recorder (Windows): A lightweight tool that records Skype calls automatically and saves them as MP3 files. While it doesn’t record video, it’s a reliable choice if you’re mainly focused on voice clarity.
Before using any third-party tool, ensure it’s permitted under Skype’s policies and that all participants agree to be recorded. This is both ethical and, in many cases, legally required.
Keep Audio Quality Clear with a Few Simple Fixes
Bad audio is harder to fix than bad video. You can improve video during editing, but once someone’s words are distorted or missing, there’s no recovery. Therefore, it’s crucial to address a few small details before starting the call.
Use Headphones with a Mic: This prevents echo and background noise from built-in speakers and mics. Wired headphones often work better than Bluetooth for consistency.
Turn Off Notifications and Background Apps: These can cause lag or interfere with the connection. Close unnecessary apps, especially those using the internet.
Ask Everyone to Mute When Not Speaking: This reduces background sounds like typing, barking dogs, or traffic noise. A little reminder goes a long way.
Choose a Quiet Room: It seems obvious, but recordings are often ruined by a noisy fan or an open window.
If using an external recorder, ensure it captures at least 128kbps for audio. That’s usually enough for natural, full-sounding speech without creating unnecessarily large files.
Save and Export the Recording without Losing Quality
Once the recording is complete, the final step is saving and exporting it correctly. Many unknowingly lose quality during this process. Re-saving a file in the wrong format, compressing it too much, or editing with software that reduces resolution can quietly ruin your hard work.
Avoid Re-Encoding More than Once
Each time you convert a video to a new format (like MP4 to AVI or vice versa), there’s a risk of compression. If your software allows, choose “Same as source” or “Do not re-encode.”
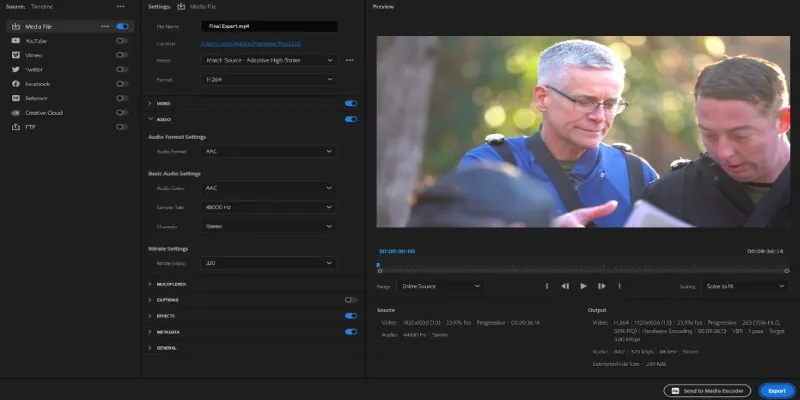
Use Editing Software That Preserves Quality
Tools like Adobe Premiere Pro, DaVinci Resolve (free version), or even iMovie let you trim, split, and export recordings without altering the resolution or bitrate, provided you select the right export settings.
Store the File Safely
Save the final recording on a reliable hard drive or cloud storage with version control. Especially for important recordings like client meetings or legal discussions, having a backup is wise.
Label It Clearly
It may sound trivial, but file names like “Skype_call_final2_EDIT.mp4” accumulate quickly. Include the date and a short description, like “Team_Meeting_2025-04-25_HQ.mp4.” This saves time when searching for it later.
Closing Thoughts
Recording a Skype call without losing quality isn’t about using fancy gear or over-complicating things. It’s about setting yourself up correctly, using the right tools for your needs, and not leaving things to chance. Whether you’re using Skype’s built-in recorder or a more advanced external option, the goal is to capture what matters clearly so it’s useful afterward. When done well, a recorded call can be a reliable reference, a shareable resource, or just a solid backup for peace of mind.
Related Articles

Easy and Effective Ways to Erase Unwanted Text from Your Video Content

Different Ways to Repeat and Loop a Video on iPhone
Archiving Backtrack Call Recordings Automatically

How to Edit a PDF on Windows Like a Pro: The Ultimate Step-by-Step Guide

How to Combine Photos and Video Clips in a TikTok Post: A Complete Guide
How to Play a Video Backwards: 6 Easy Methods Anyone Can Use

How to Reverse a Video on Snapchat Using the Built-In Filter

Step-by-Step Guide to Reversing Videos on Android Easily

Top 8 Free Video Editors Reviewed and Compared in Detail
How to Use Browse AI to Scrape Data from Any Website: A Step-by-Step Guide

How to Add Mailchimp Subscribers from a Webhook: A Step-by-Step Guide

Turn Web Pages into PDF Documents with These Simple Online Tools
Popular Articles

Best Camcorders of 2025: Create Stunning Home Videos with Ease
The 8 Best Event Management Software Platforms to Simplify Your Planning
Best Tools and Methods to Convert M4V to AVI

Revolutionize Your SEO Strategy with the 9 Best Audit Tools in 2025

The Ultimate Guide to Blurring Your Background on Zoom
Use PowerToys Run to Mimic Mac's Spotlight in Windows
Top Sprite Animation Tools for Game Development
How to Convert OGV to MP4: 3 Fast and Easy Methods
Syncing Apple Reminders with Microsoft To Do

about sub

Step by Step Guide to Creating Slideshows with iPhoto
