mww2
mww2
Beyond Spring Cleaning: Effective Strategies for Managing WordPress Plugins
Keeping your WordPress site running smoothly requires regular maintenance, with plugin management being a crucial task. Outdated or unused plugins can slow down your website, cause security vulnerabilities, and create compatibility issues. By regularly auditing and optimizing your plugins, you ensure optimal performance, enhanced security, and a seamless user experience.
The Importance of Plugin Management
1. Optimizing Speed and Performance
When you add a plugin to your site, it can potentially slow things down. It’s important to install only the ones you really use. Slow performance can be due to outdated or poorly programmed plugins that increase load, slow database requests, and consume server resources. Since slower pages frustrate visitors and rank lower in search engines, performing regular audits and deleting unnecessary plugins will speed up your site and enhance user experience.
2. Strengthening Security
Outdated plugins are among the top vulnerabilities for WordPress sites, often targeted by hackers to gain unauthorized access. Unused or neglected plugins are especially vulnerable, potentially compromising sensitive data or taking your site offline. Security should always be a top priority. Maintaining an updated and minimal plugin list is crucial for protecting your site. Additionally, consider using a security plugin that monitors vulnerabilities and alerts you to potential issues.
3. Ensuring Compatibility
As WordPress releases core updates, not all plugins keep pace. Compatibility issues can arise, leading to broken functionality or conflicts with themes and other plugins. This can disrupt usability and cause downtime, harming your reputation and user trust. To avoid such issues, monitor plugin updates, test compatibility in staging environments, and ensure all plugins are actively maintained by their developers.
Step 1: Backup Before You Begin

Before making any changes, perform a complete backup of your site using a reliable backup plugin or your hosting provider’s tools. This ensures you can restore your site if anything goes wrong during the cleaning process.
Step 2: Audit Your Current Plugins
Review Installed Plugins
Navigate to your WordPress dashboard and go to Plugins > Installed Plugins. Review each item and consider:
- Do I still use this plugin?
- Is there another plugin offering similar functionality?
- Has this plugin been updated recently?
- Is it compatible with my WordPress version?
Identify Redundant Plugins
Multiple plugins with overlapping features can strain site resources. For example, you don’t need multiple contact form plugins or caching solutions. Choose the best-performing one and deactivate the others.
Step 3: Remove Unused or Outdated Plugins
Deactivate Before Deleting
Never delete a plugin while it’s still active. Deactivate it first, then remove it to ensure no remnants are left in your WordPress database or settings.
Clean Up Database Tables
Some plugins leave behind database tables or entries after deletion. Use database optimization plugins like WP-Optimize or Advanced Database Cleaner to remove orphaned tables and settings.
Step 4: Update Essential Plugins
Keep Core Plugins Up to Date
After removing unnecessary plugins, ensure the remaining ones are up to date. This helps keep your website running smoothly and securely. Updated plugins often include performance optimizations, bug fixes, and security patches. Regularly check for updates to avoid missing out on these benefits.
Check Compatibility
Before updating, verify that the plugin is compatible with your current WordPress version and other major plugins. This is crucial for plugins related to eCommerce, forms, or SEO. Check the update changelog for details on what’s been improved. It’s also wise to create a backup before updating to resolve any compatibility issues.
Step 5: Replace Heavy Plugins with Lightweight Alternatives
Look for Performance-Friendly Plugins
Some plugins are resource-intensive. Evaluate your list and search for lighter alternatives. For instance:
- Replace heavy page builders with block-based solutions like Gutenberg.
- Use caching plugins that minimize database usage.
- Opt for minimalistic SEO plugins that avoid unnecessary features.
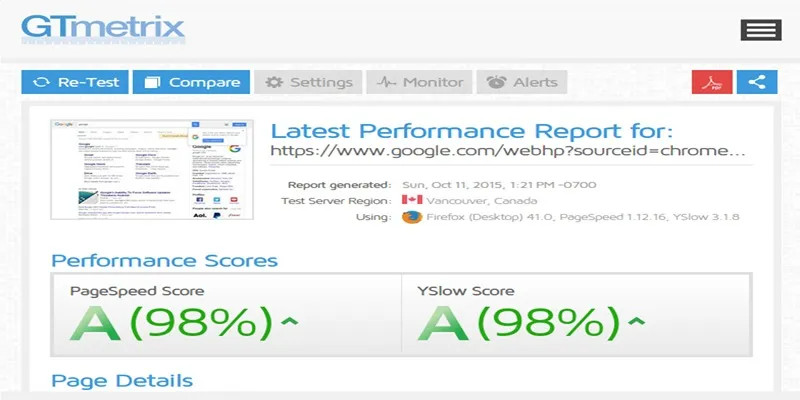
Evaluate with Performance Tools
Use tools like GTmetrix, PageSpeed Insights, or Query Monitor to see how each plugin affects your site speed. This helps identify performance bottlenecks.
Step 6: Automate Where Sensible, But Cautiously
Enable Auto-Updates for Trusted Plugins
For plugins with a solid track record and active support, enable auto-updates to keep your site secure without manual checks. However, always monitor changes after updates.
Avoid Auto-Updates for Critical Plugins
Avoid auto-updates for plugins affecting core functions like checkout pages or membership systems. Update these manually after testing on a staging site.
Step 7: Implement a Plugin Maintenance Schedule
Regular plugin maintenance keeps your site running smoothly year-round. Set a schedule to review plugins every 3–6 months.
Create a Plugin Inventory Sheet
Maintain a spreadsheet listing:
- Plugin name
- Functionality
- Last update date
- Notes on importance
This record makes future audits quicker and more organized.
Step 8: Use a Staging Environment for Testing
A staging environment lets you test changes without affecting your live site. Use it to:
- Test plugin updates or replacements
- Experiment with new tools
- Confirm that deleted plugins don’t break any site features
Most managed WordPress hosting providers offer built-in staging solutions. Alternatively, use plugins like WP Staging.
Step 9: Minimize Plugin Count with All-in-One Solutions
Consolidate functionality with all-in-one plugins when appropriate. For instance:
- Use Jetpack or Site Kit for combined analytics, social sharing, and performance tools.
- Select security plugins offering malware scans, firewalls, and login protection in one package.
However, avoid bloated “do everything” plugins if they impact speed or introduce complexity.
Step 10: Educate Team Members or Contributors

If multiple people manage your WordPress site, ensure they understand your plugin policy. Set permissions carefully to prevent unauthorized installations and limit administrative access to trusted users only.
Signs It’s Time for a Plugin Cleanup
Consider revisiting your plugins if:
- Your site speed has noticeably dropped.
- You receive alerts from security scans.
- You experience conflicts after theme or WordPress core updates.
- You can’t remember why a plugin was installed.
Common Mistakes to Avoid
1. Hoarding Plugins “Just in Case”
Plugins not actively used should be deleted. Keeping them “just in case” adds unnecessary risk and load.
2. Relying on Poorly Reviewed Tools
Always check plugin ratings, reviews, and active installations before installation. A flashy description isn’t enough—look for reliability and support.
3. Ignoring Premium Plugins That Offer Real Value
Sometimes, paying for a plugin provides better performance, support, and longevity. Don’t shy away from premium solutions when free versions fall short.
Conclusion
Managing your WordPress plugins isn’t a one-time task—it’s an ongoing process. By regularly auditing, updating, and optimizing your plugins, you’ll ensure a faster, more secure, and high-performing website. Start today by reviewing your plugin list, removing unnecessary ones, and configuring the remaining for peak efficiency.
On this page
The Importance of Plugin Management Step 1: Backup Before You Begin Step 2: Audit Your Current Plugins Step 3: Remove Unused or Outdated Plugins Step 4: Update Essential Plugins Step 5: Replace Heavy Plugins with Lightweight Alternatives Step 6: Automate Where Sensible, But Cautiously Step 7: Implement a Plugin Maintenance Schedule Step 8: Use a Staging Environment for Testing Step 9: Minimize Plugin Count with All-in-One Solutions Step 10: Educate Team Members or Contributors Signs It’s Time for a Plugin Cleanup Common Mistakes to Avoid ConclusionRelated Articles

The Ultimate Guide to the 10 Best WordPress Admin Dashboard Plugins

How to Develop a WordPress Plugin Using Best Practices

7 Best WordPress Help Desk Plugins for Superior Customer Support
The Ultimate Guide: 16 Best Plugins to Improve WordPress Comments (2025)

Best Free Slideshow Plugins for WordPress in 2025

A Step-by-Step Guide to Adding Google Authenticator 2FA to WordPress

How to Move Comments Between WordPress Posts: A Quick and Easy Guide

How To Add An Advanced Search Box In WordPress Using Facetious: A Guide

A Comprehensive Guide to Better Manage WordPress Pages with Nested Pages Plugin

Enable PHP in WordPress Posts and Pages Easily
Top 10 Tips to Optimize Your WordPress Site Using the GTmetrix Plugin
How to Stop WordPress from Sending Pings to Your Own Site
Popular Articles

Choosing the Right App: Web or Desktop

Top Desktop Apps for Smooth Slow and Fast Motion Effects

Discover the 6 Best Employee Management Software and Apps for 2025

How to Resolve Website Loading Issues in Chrome, Firefox & Safari

Effortless Ways to Place Videos Side by Side on Your Computer

Best Tools to Zoom in and Out of Videos on Your Computer

Top MKV Players for Mac 2025: Best for Smooth 4K Playback
How to Display Custom Taxonomy Terms in WordPress Sidebar Widgets: A Guide

Master Google Tasks: Organize Your Day Step-by-Step

Best Browser-Based IDEs for Web Developers

Which Are The 6 Best PDF Editor Apps To Simplify Your Workflow: A Guide