mww2
mww2
How to Add Google Authenticator for Enhanced WordPress Security
Two-factor authentication (2FA) adds an extra layer of security to your WordPress website, helping protect your account from unauthorized access. By integrating Google Authenticator, you ensure that only users with the correct password and a unique authentication code can log in. This guide walks you through the process of setting up Google Authenticator 2FA for a more secure WordPress login experience.
Step 1: Install a 2FA Plugin on WordPress

WordPress doesn’t have built-in 2FA features, so the first step is to install a reliable plugin. One of the most popular and trusted plugins is “Two Factor Authentication” by WP White Security. Other good options include MiniOrange, Google Authenticator, and WP 2FA.
How to Install
- To open your WordPress dashboard, enter your username and password. Everything you need to operate your website can be found here.
- To add a plugin, go to Plugins in the side menu and click Add New. This section helps you install plugins that increase the abilities of your website.
- Search in the Play Store for the keywords “Two Factor Authentication”. Check the available plugins and choose one that meets your needs. Carry out a rating and review check to see if a business is reliable.
- Press the Install Now key beside the plugin, after that, Activate it to use on your website. You are now able to turn on two-factor authentication to boost your site’s safety.
Make sure the plugin you choose supports TOTP-based apps like Google Authenticator.
Step 2: Set Up the Plugin
Once activated, you’ll see a new option in your WordPress menu, typically called Two Factor Auth, 2FA, or something similar, depending on the plugin.
Configuration Steps
- Go to the plugin’s settings.
- Select the Enable 2FA checkbox.
- You’ll be presented with a QR code and a secret key.
You’ll now need to configure your mobile device with the Google Authenticator app.
Step 3: Install Google Authenticator on Your Phone
Google Authenticator is a free app available for both Android and iOS. It generates time-based one-time passwords (TOTP) every 30 seconds.
Download and Install
- Android: Open the Google Play Store, search “Google Authenticator,” and install.
- iOS: Open the App Store, search for “Google Authenticator,” and install.
After installing, you can begin linking your WordPress account to the app.
Step 4: Connect Google Authenticator to WordPress
Once you’ve installed the app on your phone, follow these steps:
Scan the QR Code
- Open the Google Authenticator app.
- Tap the + icon and choose Scan a QR code.
- Point your phone’s camera at the QR code on your WordPress dashboard.
The app will now start generating 6-digit codes for your WordPress site.
If You Can’t Scan
Use the manual entry option in the app:
- Select Enter a setup key instead.
- Enter the account name and the secret key shown on the plugin page.
Step 5: Test the Two-Factor Authentication
Before enabling it fully for your user account or across the website, test if it’s working correctly.
Testing Procedure
- Log out of WordPress.
- Go to your WordPress login page.
- Enter your username and password.
- You’ll now be asked for a verification code.
- Open Google Authenticator and enter the current 6-digit code.
If successful, you’ll be logged in and redirected to your dashboard. If not, double-check the time sync on your device or re-scan the QR code.
Step 6: Enable 2FA for Other Users (Optional but Recommended)
If your website has multiple users (e.g., contributors, editors, admins), encourage them to activate 2FA as well.
How to Enable for Other Roles
- Some plugins allow forcing 2FA settings for specific user roles.
- Navigate to Settings > Two Factor Authentication > User Roles.
- Select the roles (e.g., Administrator, Editor, Author) you want to require 2FA for.
- Save the settings.
Each user will need to scan their own QR code and use their own Google Authenticator app.
Step 7: Backup and Recovery Options
One potential challenge with 2FA is what to do if you lose your phone or can’t access the app. It’s essential to set up backup options in advance.
Best Practices
- Backup Codes: Most 2FA plugins generate single-use backup codes you should download or print and keep in a secure location.
- Backup Authenticator Apps: Consider installing Google Authenticator on a second device.
- Admin Email Recovery: Ensure the administrator’s email address is up to date in case recovery steps are needed.
Failing to prepare backup options may lock you out of your website.
Step 8: Keep Everything Updated

Security is an ongoing process. Once 2FA is set up:
- Keep the plugin updated regularly.
- Check for compatibility issues after major WordPress updates.
- Update the Google Authenticator app on your phone when prompted.
These small steps can help ensure your 2FA continues working without disruption.
Why Use Two-Factor Authentication for WordPress?
A simple username-password login is not enough to keep intruders out. Passwords can be guessed, stolen, or cracked using automated tools. Two-Factor Authentication makes it much harder for unauthorized users to access your site by asking for a second verification code — one only available to your device.
Benefits of 2FA
- Enhanced security for WordPress logins
- Protection against brute-force attacks
- Peace of mind for site owners and users
Troubleshooting Common Issues
Even with careful setup, problems may arise. Here are a few common ones:
1. Codes Not Working
- Ensure your mobile device’s time is synchronized correctly by checking the date and time settings. If needed, enable the automatic time-sync option to avoid any discrepancies.
- Try removing and re-adding the account in Google Authenticator. First, delete the existing account from the app, then follow the setup instructions to re-add it using the QR code or manual key provided.
2. Lost Phone
- Use backup codes or log in with a backup method, such as an email link or authentication app, if you have these options set up. These methods provide an alternative way to access your account when your primary login method isn’t working.
- If you’re completely locked out, you can regain access by connecting to your site via FTP or using your hosting control panel to access the database. Once inside, locate the plugin folder and disable the plugin manually to restore site access. Be sure to troubleshoot the issue or reconfigure the plugin settings after regaining entry.
3. Plugin Conflicts
- Deactivate other security or login plugins one by one to identify any potential conflicts that might be interfering with the functionality of your current setup. After deactivating each plugin, test the system to check if the issue is resolved before moving on to the next one.
Conclusion
Implementing Google Authenticator-based Two-Factor Authentication is a practical and essential step toward securing your WordPress site. It’s straightforward to set up, free to use, and significantly strengthens your login security. By following this step-by-step guide, you can protect your site from unauthorized access and reduce the risk of data breaches. Whether you’re a solo blogger or managing a team, 2FA provides the peace of mind you need to focus on growing your site securely.
On this page
Step 1: Install a 2FA Plugin on WordPress Step 2: Set Up the Plugin Step 3: Install Google Authenticator on Your Phone Step 4: Connect Google Authenticator to WordPress Step 5: Test the Two-Factor Authentication Step 6: Enable 2FA for Other Users (Optional but Recommended) Step 7: Backup and Recovery Options Step 8: Keep Everything Updated Why Use Two-Factor Authentication for WordPress? Troubleshooting Common Issues ConclusionRelated Articles

7 Best WordPress Help Desk Plugins for Superior Customer Support

The Ultimate Guide: 16 Best Plugins to Improve WordPress Comments (2025)

The Ultimate Guide to the 10 Best WordPress Admin Dashboard Plugins

Best Free Slideshow Plugins for WordPress in 2025

How to Move Comments Between WordPress Posts: A Quick and Easy Guide

How to Import Post Ideas from CSV Spreadsheet in WordPress: A Guide

Restoring Your WordPress Database to Default State

A Step-by-Step Guide to Limiting File Upload Types in WordPress
How To Add An Advanced Search Box In WordPress Using Facetious: A Guide

How to Display Instagram Photos in WordPress Sidebar Widget: A Guide

How to Set Maximum Number of Tags for WordPress Posts in Simple Steps

A Comprehensive Guide to Better Manage WordPress Pages with Nested Pages Plugin
Popular Articles

Best Places to Submit Your New Software Project

Maximize Your Customer Understanding with User Personas: A Top Tool

Step-by-Step Tutorial for Live Blogging in WordPress
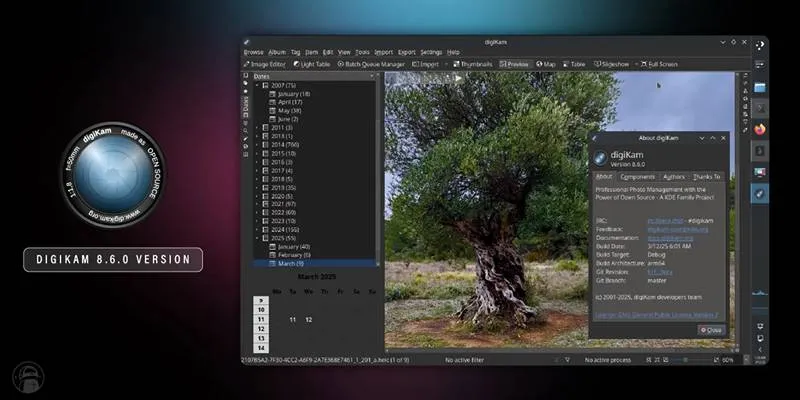
digiKam 8.6 Brings Smarter Face Recognition and Auto-Tagging Tools

How to Download and Use Windows Movie Maker on Windows 10

10 Essential Martech Tools for Building a Smart Martech Stack for Startups

Base64 Encoding and Decoding Made Easy with Free Online Tools

Best Linux Tools for Creating and Managing Storyboards

Flowframes Review: Revolutionizing AI Frame Interpolation for Videos

AMR to MP3 Made Easy: 8 Straightforward Ways to Do It

Improve Your Connectivity: 5 Best WiFi Analyzer Apps