Best 5 Screencast Software for Windows and Mac (Free & Paid Picks)
Recording your screen is no longer exclusive to gamers or tech enthusiasts. Whether you’re creating tutorials, developing online courses, or simply showing a colleague how to fix an issue, screencast tools make it easy. But with so many options—some free, some paid—how do you choose the best one for your needs?
Below are 5 solid options for screencasting, both free and paid. We’ve kept things simple, skipped the buzzwords, and explained what each one does so you can pick the one that fits your work.
Top 5 Best Free/Paid Screencast Software for Windows/Mac
OBS Studio (Free – Windows/Mac)
OBS Studio is the most popular free screencast software available. It’s used for everything from live streaming on YouTube and Twitch to recording software demos or online classes.
It’s open-source, meaning there are no hidden fees. You can record your screen, webcam, and audio simultaneously. It supports multiple scenes and transitions and lets you easily adjust audio levels.
The only catch is that the interface might seem technical at first. But after a while, it’s robust. OBS never adds watermarks, never restricts your recording time, and provides you with complete control over the output quality.
You can record in formats such as MP4 or MKV, with adjustable bitrates and resolutions.
Camtasia (Paid – Windows/Mac)
Camtasia is one of the easiest paid options available. You can capture your screen and camera and edit the video through the integrated editor. It’s ideal for cutting content, adding callouts, zoom effects, or captions—everything within a single application.
The interface is simple and beginner-friendly, yet robust enough for professionals making course material or YouTube tutorials. You don’t have to install additional editors as it combines recording and editing in one stop.
It supports high-resolution output, has numerous transitions and effects, and lets you import extra media to enhance your video.
However, it’s not cheap. The one-time license usually costs over $200, but many users find it worth it for the ease of use and features.
ShareX (Free – Windows)
If you’re on Windows and want a free tool that records your screen with depth, ShareX is a great pick.
ShareX allows full-screen recording and custom region capture, and it even lets you record GIFs. You can also set up hotkeys to trigger recordings instantly. It supports post-recording editing like adding arrows, text, or blurs.
One standout feature is its automation. You can set it to upload your videos to Google Drive, Dropbox, or even FTP servers right after recording.
However, it doesn’t support recording webcam and screen at the same time unless you tinker with custom settings.
Screencast-O-Matic (Free + Paid – Windows/Mac)
Screencast-O-Matic is made for simplicity. You just install a small launcher, hit “Record,” and you’re off. The free version gives you basic screen recording with a 15-minute limit and a watermark.
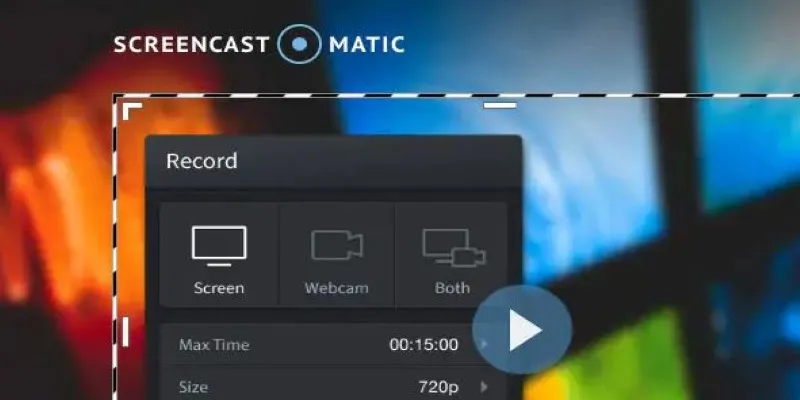
The paid plan removes those limits and adds editing tools like trimming, adding captions, and drawing on the video. It also supports cloud hosting, so you can share a link instead of downloading big files.
You can record your screen, webcam, or both, and save videos in MP4, AVI, or FLV format.
If you just want to make short tutorials or quick recordings, the free plan might be enough. The paid plan is affordable too—under $50/year.
Movavi Screen Recorder (Paid – Windows/Mac)
Movavi Screen Recorder is another paid tool with a beginner-friendly feel. You can record the screen, system audio, webcam, and microphone all at once. It supports scheduling recordings, too.
What makes Movavi special is how easy it is to trim videos, capture screenshots during recording, and export videos in popular formats like MP4, MOV, or GIF.
It’s not as full-featured as Camtasia when it comes to editing, but it’s faster to learn and cheaper. The price is usually around $40–$60, depending on the version.
One thing to know: the trial version puts a watermark on your recordings, and it has limited export options.
How to Record Your Screen Using OBS Studio?
If you’re just getting started with OBS Studio and feeling unsure about how to use it, here’s a simple guide in plain English. First, go to the official OBS website (obsproject.com), download the version for your system—Windows or Mac—and install it. Once installed, open the app.
On the main screen, look for a box labeled “Sources” at the bottom. Click the plus “+” button inside that box and choose “Display Capture” if you want to record the entire screen, or pick “Window Capture” if you only want to record one app or program window.
Next, check your audio. On the main interface, you’ll see an “Audio Mixer” with volume sliders for your microphone and desktop sound. Make sure your microphone is connected and selected correctly by going to Settings, then clicking on the Audio tab and picking the right input.
Now go to the Settings again and open the Output tab. Under the “Recording” section, set your file format (MP4 is usually a safe choice), decide where the video will be saved, and pick your desired recording quality.
Once all that is done, hit the “Start Recording” button. When you’re finished, press “Stop Recording,” and OBS will save the file to the folder you picked earlier. The first time might feel like a test run, but once you’ve used it a couple of times, OBS Studio becomes a fast and flexible way to capture your screen.
Conclusion
There’s no one-size-fits-all screencast tool. If you’re new and want something free and simple, start with Screencast-O-Matic or ShareX. If you’re ready to invest and want built-in editing, Camtasia and Movavi are strong picks. And if you’re looking for flexibility without spending anything, OBS Studio is the go-to choice. Test one or two based on your needs. Sometimes, free software is enough to get the job done. Other times, paying for extra polish and editing tools makes life easier. Either way, all five tools here have stood the test of time and are trusted by thousands.
Related Articles

Best Software Download Sites You Can Trust in 2025
Top Movie Making Tools for New Creators and Experienced Editors
Top Tools for Playing Windows Games on Linux 2025

The 8 Best To-Do List Apps for Android in 2025

Discover the Best Free and Paid 3D Video Makers for Windows
The SaaS Model: How Software Became a Service

The 6 Best Construction Management Software Options to Streamline Your Projects

Discover the Best Free and Paid 3D Video Makers for Windows
Top 10 Video Players for Windows and Mac in 2025
Top Antivirus Tools for Reliable Protection in 2025
Best PIM Software for Managing Product Information
5 Best Mac Screen Recording Tools to Elevate Your Recording Game
Popular Articles

Best Tools to Convert AVCHD Video Without Quality Loss
Top Tools to Convert MP4 to XviD Online and Offline
10 Creative Ways to Turn Your Videos into Stunning GIFs

Steps to Download Movie Maker Free and Start Creating
Step-by-Step Guide to Playing ARF Files on Your Windows PC
A Comprehensive Guide to Create Form Sections and Logic in Google Forms
Top 6 Screen Recorders for Firefox to Simplify Your Workflow

10 Best Meeting Scheduler Apps to Try in 2025

The Overall Introduction to 2X Videos: Features, Usages, and Creating

OCR Magic: Instantly Convert Scanned PDFs into Editable Text Online
Transform Your Presentations with These Free PPT Template Tools

 mww2
mww2