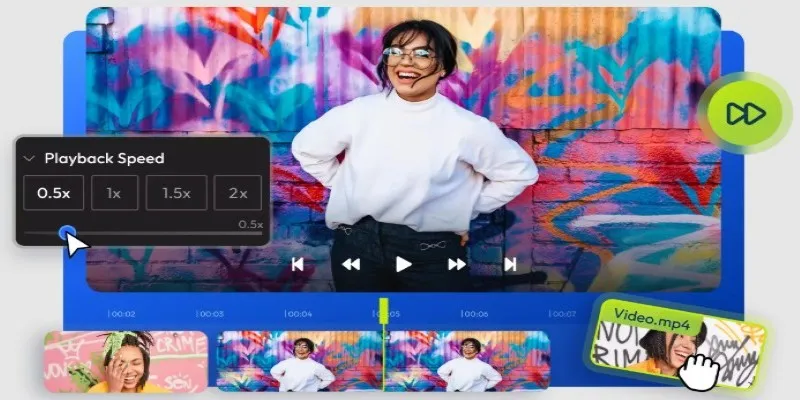
Combine Videos Like a Pro: High-Speed Video Editing Tools
Combining videos is essential for social media, corporate presentations, or personal projects. However, not all tools deliver the speed and efficiency you need. This guide highlights the best software to merge videos seamlessly and quickly, covering features, pros, and cons. Whether you’re a beginner or an experienced editor, find the perfect tool to match your needs and create polished, professional-quality videos in no time.
Why Speed Matters When Combining Videos

As a content creator, time is of the essence. Deadlines are tight, and efficiency is key to producing high-quality videos. Speed matters when merging or combining videos because it not only saves you time but also allows for quick revisions and adjustments.
In today’s fast-paced digital world, audiences have shorter attention spans. They expect videos to be engaging and concise, which means a faster turnaround time for video projects is crucial.
Features to Look for in a Video Combining Tool
Before we explore the tools, let’s establish some benchmarks for what makes a great high-speed video combining tool. Look for these features to ensure you’re choosing the right software for your demands:
- Ease of Use: A user-friendly interface that simplifies combining videos.
- High-Speed Rendering: Quick processing of large files in minimal time.
- File Compatibility: Support for a broad range of file formats, such as MP4, AVI, MOV, etc.
- Quality Preservation: Merges videos at high speed without compromising resolution.
- Cloud or Offline Use: Whether it allows usage via the cloud or requires installation.
- Additional Features: The ability to trim, add transitions, or apply basic edits during merges.
The Best Video Tools for Combining Videos
1. Movavi Video Editor
Movavi stands out for its speed and simplicity, offering a sleek, user-friendly interface that lets you combine videos effortlessly—perfect for anyone looking to edit without a steep learning curve.
Steps to Combine Videos in Movavi Video Editor
- Install and Launch the Software: Download the Movavi Video Editor from its official website and complete the installation process. Once installed, launch the application to get started.
- Import Your Video Files: Click on the “Add Files” button to import the videos you wish to combine. The imported files will be displayed in the media bin within the software.
- Drag and Arrange Videos on the Timeline: Drag the videos from the media bin onto the timeline. Arrange them in your desired sequence by clicking and dragging them to the correct order.
- Export Your Combined Video: Once satisfied with your video, click the “Export” button. Choose the desired format, resolution, and file location, then hit “Start” to save your completed video.
2. Adobe Premiere Pro
Industry professionals swear by Adobe Premiere Pro for its powerful functionality and precision. While it may take a little extra time to master, its legacy of delivering lightning-fast, high-quality results makes it worth the effort.
Steps to Combine Videos in Adobe Premiere Pro
- Launch Adobe Premiere Pro and create a new project.
- Import the videos you want to combine into your project by clicking on “File” > “Import” or using the shortcut (Ctrl+I).
- Drag and drop the video clips onto your timeline in the desired order. You can also rearrange them by clicking and dragging them to different positions on the timeline.
- Use the selection tool (V) to trim, cut, or adjust the length of each clip as needed.
- Go to “Effects” > “Video Transitions”, pick a transition, and drag it between two timeline clips.
- You can also add text, music, and other effects to your video by using the options in “Effects” tab > “Video Effects”, “Audio Effects”, or “Title Designer”.
- Once you have finished editing your video, click on “File” > “Save As…” to save it in your desired format (mp4, avi, etc).
3. iMovie (for Mac Users)
iMovie is the default video editor for Mac devices, designed to integrate smoothly and work effortlessly with macOS. If you own an Apple device, iMovie is a budget-friendly and speedy option for video merging.
Steps to Combine Videos in iMovie
- Open iMovie on your Mac and create a new project by clicking on “Create New” and selecting “Movie”.
- Click on the “Import Media” button to upload the video files you want to merge.
- Drag and drop your video clips into the timeline in the order you wish to combine them.
- Edit the transitions between clips by clicking on the “Transitions” tab to add smooth visual effects between each video.
- Once satisfied, go to “File” > “Share”, then choose “File…” to export your combined video in your preferred resolution and format.
4. Wondershare Filmora
Wondershare Filmora combines powerful features with user-friendly design, making it ideal for editors of all levels. Its high-speed mode stands out, allowing you to merge videos effortlessly and save valuable time.
Steps to Combine Videos in Wondershare Filmora
- Import Your Videos: Open Filmora and click on the “Import” button to add your video clips to the media library.
- Drag and Drop: Drag the video clips onto the timeline in the order you want them to appear.
- Trim and Arrange: Use the editing tools to trim, cut, or rearrange clips for seamless flow.
- Add Transitions: Access the “Transitions” tab and insert transitions between clips to enhance the video’s smoothness.
- Export the Final Video: Click “Export”, choose your preferred format and resolution, and save your combined video.
5. Online Video Cutter
Online Video Cutter offers fast, hassle-free video merging directly in your browser. With high-speed processing and no software downloads required, it’s the perfect solution for anyone looking to edit videos quickly and efficiently.

Steps to Combine Videos Using Online Video Cutter
- Upload Your Videos: Open Online Video Cutter in your browser and upload the videos you want to merge by selecting them from your device or dragging them directly into the interface.
- Arrange the Clips: Once uploaded, drag and organize the clips on the timeline in your desired order to create a seamless flow.
- Trim Videos if Necessary: Use the trimming tool to cut unwanted sections from individual clips, ensuring the final video is concise and polished.
- Merge the Videos: Preview your arrangement and confirm the merge process by clicking the relevant merging option.
- Download the Final Video: Save your combined video by downloading it in your preferred format, ready for sharing or further use.
Final Thoughts
Choosing the right video tool to combine your videos at super high speed depends on your specific needs. Whether you’re a professional looking for precision or a casual user seeking simplicity, the tools outlined here cater to a variety of requirements. Next time you’re on a deadline or looking to streamline your workflow, remember these video tools to save time without compromising quality.
Related Articles

LightCut 2025 Review: The Best Video Editor for Android and iPhone

Top Live Video Mixing Software for Creators

Top Video Editing Tools with a Wide Range of Free Sound Effects

Free Video Editing Software for Mac OS X: 10 Excellent Choices

CapCut, WeVideo & More: Tools That Simplify Video Editing

Best Free Video Splitters to Cut Your Clips Like a Pro

10 Best Free Video Editing Tools to Make Social Media Videos Stand Out

7 Best Online Tools to Create Picture and Video Collages

9 Free Tools to Speed Up a Video Online (No Downloads Needed)

Magisto: The Simplified Approach to Video Editing for Quick and Effective Content

PowerDirector: A Fast and Accessible Video Editing Tool for Everyone

What is HitFilm Express? A Beginner's Guide for Mac Users
Popular Articles

Quick and Easy Steps to Add Your Plugin to the WordPress Repository

The Best Team Collaboration Tools in 2025: Revolutionize Your Workflow

Top Robot Simulators for 2025 Development and Testing

Best Password Managers for Safari and macOS

Free Dxtory Alternatives to Record High-Quality Videos

How to Import Post Ideas from CSV Spreadsheet in WordPress: A Guide

Best Browser-Based IDEs for Web Developers

How Can You Merge Google Accounts? 3 Easy Ways to Combine Gmail, Calendar, and Contacts

Top DAT to DIVX Converters for Windows and Mac Users

Best Tools: 4 Video Players for Frame-by-Frame Analysis

Brevo vs. Mailchimp: Choosing the Right Email Marketing Tool

 mww2
mww2