mww2
mww2
Convert Images to STL: Creating Perfect Stereolithographs for 3D Printing
In the world of 3D printing, converting an image into a 3D model ready for printing is a captivating capability of this technology. Whether you’re a hobbyist or a professional, transforming an image into an STL file—especially for creating a high-quality stereolithograph—unlocks countless creative possibilities. The STL format is widely used in 3D printing, and converting your image correctly is crucial for achieving successful prints.
This article will guide you through the process of transforming an image into an STL file, providing tips to ensure the best quality results for your 3D printing projects. From the basics of image conversion to advanced techniques, we’ve got you covered.
Understanding STL Files and Stereolithography
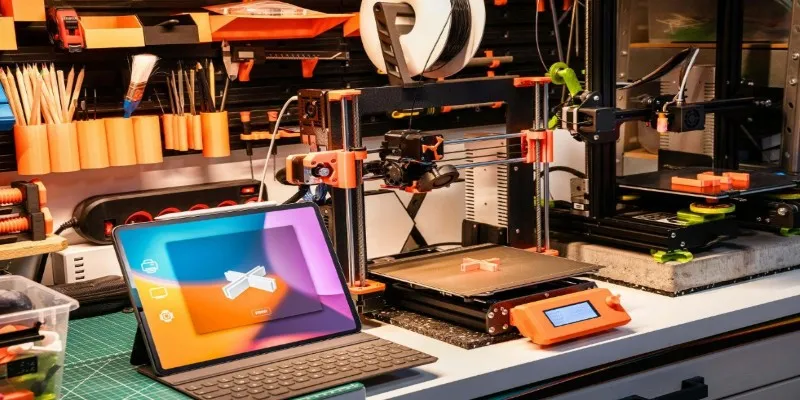
Before diving into the steps for converting an image to an STL file, it’s important to understand what an STL file is and its significance in 3D printing. STL stands for Stereolithography, a file type that defines the 3D shape of an object without any color, texture, or material details. This format breaks down 3D geometry into a mesh of tiny triangles that a 3D printer reads to build the object layer by layer.
Most 3D printers support the STL file format, making it a popular choice for 3D printing. Therefore, the STL file you generate from an image must be accurate, detailed, and optimized for printing. Essentially, you’re converting a 2D image into a 3D object. Whether you’re creating a model, design, or prototype, ensuring a high-quality stereolithograph is key to producing prints that are precise and detailed.
Step-by-Step Guide to Turning an Image into an STL File
Converting an image into an STL file is a detailed process, but with the right tools and techniques, it’s achievable for anyone. Below is a step-by-step guide to help you through the process:
Choose the Right Image
The first step in turning an image into an STL file is selecting the right image. For optimal results, choose a high-contrast image, such as a logo, silhouette, or simple graphic. Complex images with intricate details might be harder to convert and may not yield the desired outcome. Ensure that the image is in black and white or has a high contrast between elements you want to convert and the background.
Use a Vector Graphic Tool
Once you’ve chosen the image, the next step is to convert it into a format usable by 3D modeling software. This is where vector graphic tools like Adobe Illustrator or Inkscape come into play. Using these editors, you can trace the image to create clean, sharp lines that will later be converted into 3D geometry.
Convert to a 3D Model
With your vector graphic ready, import it into a 3D modeling software. Programs like Tinkercad, Blender, or Fusion 360 are excellent for beginners and professionals alike. These tools allow you to extrude the 2D shapes into 3D objects, adding depth to your design and turning your 2D graphic into a 3D model.
If desired, add depth or detail to your design for more dimension. However, keep in mind that complex designs might require more refinement to achieve a clean, print-ready STL file.
Export as STL
After finalizing your 3D model, the next step is to export it as an STL file. Most 3D modeling software offers an export option for STL files. Ensure the file is optimized for printing by checking aspects like mesh integrity and file size before proceeding.
Prepare the STL for 3D Printing
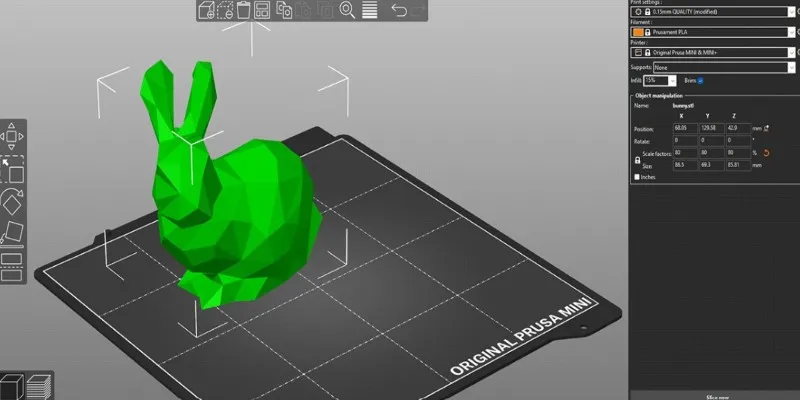
Before sending the STL file to your 3D printer, prepare it using slicing software. A slicer, such as Cura or PrusaSlicer, will convert your STL file into layers for the printer to use in building the object. This software also lets you adjust print settings like layer height, speed, and supports, ensuring your print comes out exactly as envisioned.
Tips for Achieving the Best Stereolithograph for 3D Printing
Turning an image into an STL file is just the first step in creating a successful 3D print. To obtain the best possible stereolithograph for 3D printing, consider the following tips:
-
Pay Attention to Resolution: High-resolution images ensure clarity in the 3D model. Low-resolution images can result in blurry or pixelated models, negatively affecting print quality. Always use clear, high-quality images for optimal results.
-
Simplify the Design: While intricate details can be tempting, keep designs simple to avoid printing issues. Complex models with small features may lead to failures. Start with basic shapes and gradually add complexity.
-
Test and Refine: Before finalizing, test printing your STL file to identify flaws and areas that need improvement. Based on the results, refine the model to ensure a more successful print with each test.
Conclusion
Transforming an image into an STL file for 3D printing opens up endless creative opportunities. By following the steps of selecting the right image, converting it to a 3D model, and exporting it as an optimized STL file, you can create high-quality prints. With attention to resolution, simplicity in design, and careful testing, you’ll ensure your 3D prints are precise and detailed. Mastering this process will enhance your 3D printing projects, offering endless possibilities for innovation and creation.
Related Articles

How to Convert MPEG to WAV: A Step-By-Step Guide
Best Practices for Converting AVI Files to JPG Format

How to Easily Convert AVI to MOV Using 4 Reliable Tools
How to Convert JPG to TIFF on Your Desktop: A Simple Guide
From Excel to JPG: Best Tools for Converting Charts into Images
Quick and Simple NEF to JPG Conversion: 3 Best Tools
How to Easily Convert HTML Files to JPG: 5 Methods

PowerPoint Image Compression: Reduce File Size Without Sacrificing Clarity

Best Free PDF to Image Tools for Quick and Easy Conversion
Effortless Image Conversion: 5 Best TIFF to JPG Converters

Simple Methods to Convert ISO Files to MP4 for Beginners

Top 3 Simple Ways to Convert WMA to MP4 Easily
Popular Articles
From ZIP to JPG – Your Go-To Guide for Quick Image Extraction

Boost Network Security Using a Free API Port Summary Tool

How to Edit a PDF on Windows Like a Pro: The Ultimate Step-by-Step Guide

The 8 Best HubSpot Alternatives in 2025 for Smarter Growth and Less Hassle

8 Best iPad Video Player Apps That Actually Work

Best AI Anime Upscalers Reviewed: Which One Stands Out?

Two Simple Ways to Add Watermarks to Your Videos

How to Turn On Subtitles on Apple TV Quickly

Best Free Slideshow Plugins for WordPress in 2025

Unify and Share Team Data Seamlessly with Ragic

The 8 Best Email Apps for iPhone in 2025 to Keep You on Top of Things