How to Turn Off Notifications in Chrome
In today’s digital age, notifications play a crucial role by providing real- time updates on news, emails, and messages from various platforms. However, irrelevant alerts can quickly become annoying, disrupting your workflow and online browsing. Google Chrome, a leading web browser, offers easy notification management features. This article provides step-by-step instructions to help you control notifications in Chrome across all and specific websites.
Introduction
Google Chrome is renowned for its speed, security, and user-friendly design. The browser allows users to receive notifications from websites, applications, and extensions. While these notifications are valuable, they can hinder user experience if not properly managed. This article explains how to manage notifications in Chrome and details the procedures to deactivate them for a smoother browsing experience.
Understanding Chrome Notifications

Chrome notifications appear as alerts in the bottom right corner, displaying updates from websites, applications, or extensions. They persist until your internet connection is restored. Chrome allows you to modify notification permissions, letting you decide which websites can send alerts.
There are two ways to disable Chrome notifications:
Windows users can easily deactivate Chrome notifications by following these simple steps:
- Open Google Chrome on your computer.
- Click the three dots in the top-right corner of the browser window.
- Select “Settings” from the dropdown menu.
- Navigate to “Privacy and security” within the Settings page.
- Click on “Site Settings.”
- Under “Permissions,” select “Notifications.”
Disabling All Notifications
To block notifications from all websites, follow these instructions:
- Select “Don’t allow sites to send notifications” in the Notifications settings.
This option stops all websites from delivering notifications.
Blocking Specific Sites
- Navigate to the Notifications section and find “Not allowed to send notifications.”
- Click the “Add” button next to this option.
- Enter the website URL you want to block in the designated field.
- Click “Add” again to confirm.
Allowing Specific Sites
To allow specific websites to send notifications, follow these steps:
- Go to the Notifications settings and find “Allowed to send notifications.”
- Click the “Add” function next to it.
- Enter the target website URL in the provided field.
- Click “Add” again to confirm.
Using Quieter Messaging
Chrome offers quieter messaging, allowing sites to request notification permissions without disruptive pop-ups. Instead, a bell icon appears next to the website address in the address bar, letting users grant permission later.
To enable quieter messaging:
- Enable “Use quieter messaging” in the Notifications settings.
- This setting prevents notification prompts from interrupting your browsing activities.
Managing Notifications in Google Workspace
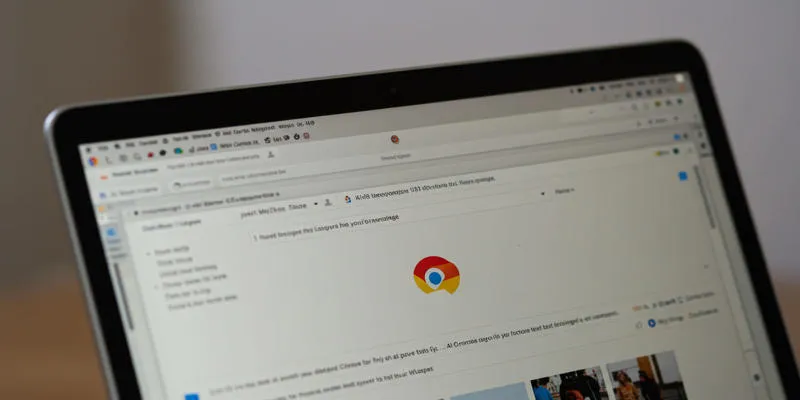
Organization administrators using Google Workspace can manage Chrome notifications through the admin console. This control is beneficial for educational or corporate settings.
To prevent Google Workspace users from receiving notifications, administrators should configure the following in the Google Workspace admin console:
- Access the Google Workspace admin console.
- Navigate to “Devices” from the menu panel, then select “Chrome” and access “Settings.”
- Under “User & Browser Settings,” go to the “Content” section.
- Modify the Notification settings to “Do not allow sites to show desktop notifications.”
- Save changes by clicking the “Save” button at the bottom of the interface.
Advanced Notification Management
Chrome allows users to set specific permission rules for each website. When a blocked site attempts to send notifications, a small bell icon appears in the address bar. Users can temporarily grant notification access by clicking this icon, maintaining the site’s blocked status.
Browser Extensions and Notifications
Third-party extensions can also activate notifications. Extension control
operates independently from Chrome’s built-in settings, focusing on website
behavior. To manage extension alerts, visit chrome://extensions/, enable
Developer mode, and inspect each extension’s permissions. Extensions like
email clients or chat apps need notification access to function correctly.
Disable or adjust settings for extensions that generate disruptive
notifications.
Mobile-Specific Considerations
Android users can view Chrome notifications through the notification shade. Mobile Chrome users can disable notifications via Android volume controls and notification settings. iOS device owners should access Chrome notifications through the Settings app by navigating to “Notifications > Chrome” to toggle alerts. Consistency across devices ensures effortless control from any platform.
Troubleshooting Persistent Alerts
If notifications persist after being blocked, check cached permissions and conflicting extensions. Clearing your Chrome cache via “Settings > Privacy and Security > Clear browsing data” often resolves the issue. Ensure your firewall and antivirus software aren’t blocking Chrome’s settings. Enterprise administrators should verify that Google Workspace policies don’t override or contradict device policies. Regularly review your allowed or blocked list to maintain your chosen settings.
Conclusion
Enhancing your Google Chrome browsing experience is simple when you control how notifications appear. The instructions in this guide enable you to deactivate all notifications or block specific websites, ensuring you receive alerts relevant to your needs. Chrome’s notification settings offer flexibility for both casual users and administrators, helping you stay productive and focused online.
Related Articles
Solving Grammarly Issues in Google Docs: Quick and Simple Fixes

9 Powerful Chrome Extensions for Effortless Screenshots

Resolving Google Classroom Submission Errors: Step-by-Step Guide

How to Automatically Save Gmail Attachments to a Google Drive Folder: A Complete Guide

Google Chat vs. Slack: Which Collaboration Tool Suits Your Business Best

Boost Your Productivity: The 10 Best Google Docs Add-Ons You Need

How to Integrate Google Sheets with Mailchimp: A Step-by-Step Guide

Top 5 Ways to Automate Google Analytics for Better Efficiency
Convert DOCX to TXT Files in Batches Online with No Downloads
How to Convert Excel to Google Sheets for Free Using Top Tools

5 Easy Ways to Repair Corrupted PDF Files Online for Free

The 9 Best Competitor Analysis Tools to Level Up Your Business Strategy
Popular Articles

FerretDB 2.0 Launches as Open MongoDB Alternative with PostgreSQL

Converting WMV to MOV on Mac Made Simple: Top 5 Solutions

5 Simple Ways to Convert FLV Files to MOV Format on Windows

AVS Video Editor: What It Does Well and What Others Do Better

The Best All-in-One Messaging Apps: Streamline Your Communication Today

Free Online Screen Recorders with Simple and Fast Export Options

Top 7 Best AI Image Pixel Resizers for Perfect Image Quality

GIF to WebM Conversion Made Easy: A Guide for PC and Mac Users

Different Ways to Repeat and Loop a Video on iPhone

The 10 Best Campaign Management Software Tools in 2025 for Effortless Marketing Success

Top Tools and Methods to Convert FLV to WMV Format

 mww2
mww2