mww2
mww2
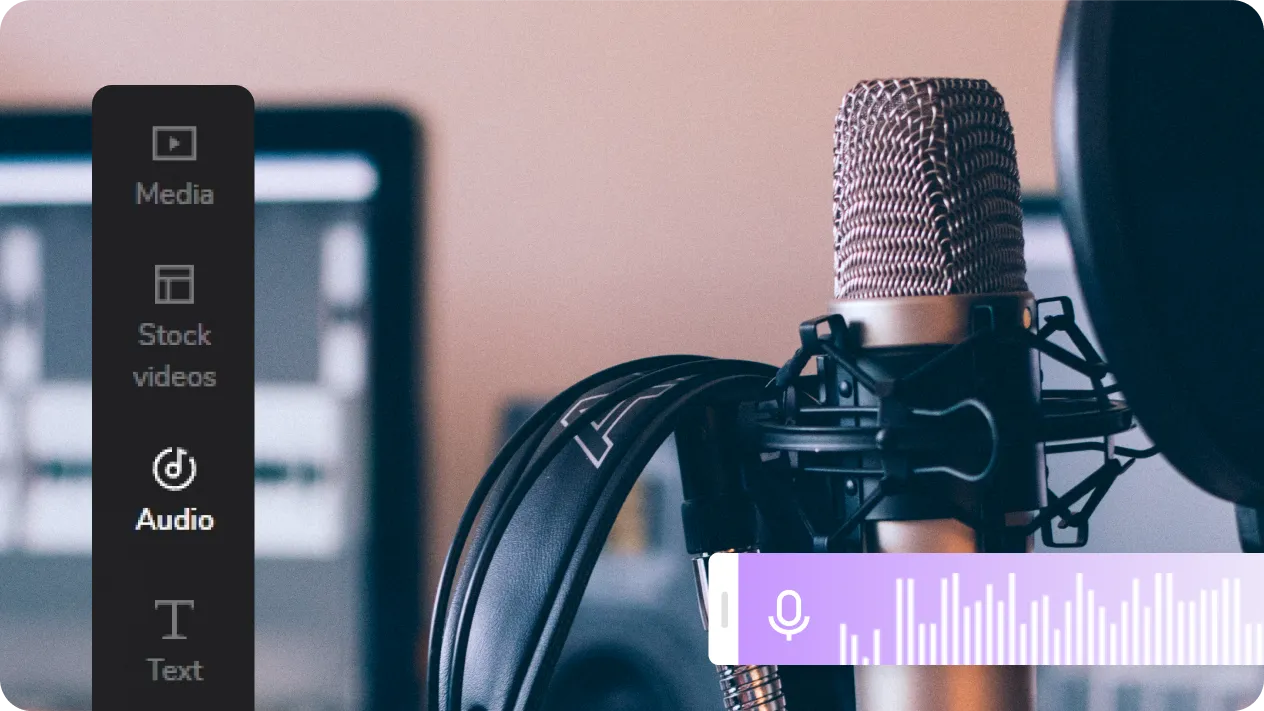
6 Practical Tips for Smoother Voice Over Video Editing
Voice over video editing isn’t just about trimming clips and adding voice. It’s about getting everything to sync naturally, so it sounds and feels right. When done well, the viewer doesn’t even notice the work behind it; it just clicks. But if there’s a mismatch, even by a second, it throws the whole thing off. Whether you’re creating content for YouTube, presentations, tutorials, or marketing videos, the process of layering voice over on footage can be much smoother when you follow a few grounded and effective methods.
Here are six ways to help make that process less of a chore and more of a clear, manageable task.
6 Ways to Make Voice Over Video Editing Easier and Smoother
Write the Script Before You Start Editing
Start with a written script. Don’t try to improvise while editing the video. A structured script keeps everything on track – your tone, the flow, the duration, and the clarity of what you want to communicate. It’s easy to get lost in visuals and forget the point you’re trying to make, but a script keeps that focus in place. When you already know what needs to be said and when, it becomes much easier to match your voice to the video.
What’s more, a written script helps with pacing. You’ll naturally find yourself editing around that rhythm. Whether it’s a pause, a quick sentence, or a moment of silence to let the visuals speak, the script allows you to plan that out in advance rather than trying to fix it afterward.
Record the Voice Over in a Quiet and Consistent Setting
This step is where many people fall short. They record in different rooms, on different days, with different microphones – and the final product ends up sounding patchy. That’s because consistency matters more than high-end equipment. Use the same microphone throughout, record in the same environment, and speak in the same posture and distance from the mic.
Use headphones to monitor as you record. That way, you can hear small issues – background buzz, popping sounds, or muffled words – as they happen instead of discovering them during editing. A clean recording saves hours of cleanup.
Sync Audio to Video First – Not the Other Way Around
Many people make the mistake of editing the video completely first and then trying to fit the voice over to it. That rarely works well. A better way is to treat the voice over as the main track, then layer your visuals around it. This is especially helpful for explainers or tutorials, where the voice carries most of the message.
Once you’ve recorded your voice over, listen to it and identify natural breaks – places where it makes sense to switch visuals, zoom in, or highlight something. Those breaks serve as markers for your video edits. It’s a lot easier to trim video than it is to chop up and re-record the audio to make it fit.
Use Audio Markers to Line Things Up
This one’s simple but effective: insert audio markers into your timeline while editing. Most editing software, like Adobe Premiere Pro, Final Cut Pro, or DaVinci Resolve, allows you to place markers at certain timestamps. These markers act like mini Post-its that help you remember where transitions or cuts are meant to happen.
Let’s say your voice over says, “First, we’ll look at the dashboard.” Add a marker right there and line up your video transition to match. It’s a small habit that prevents you from scrubbing back and forth repeatedly to sync everything. It also makes revising and tweaking later on less frustrating.
Use Subtle Background Sound for a More Natural Feel
Dead silence behind the voice over doesn’t always feel clean—it can feel flat. Depending on the type of video, adding a low ambient track (like a subtle background hum or very soft instrumental) can help fill the gaps without distracting from the message.

This doesn’t mean turning your voice over into a podcast-style mix. It just means using soft layers to smooth the audio. Be careful, though – the background sound should always sit behind the voice. If you have to compete with it to hear the narration, it’s doing more harm than good.
A bonus of adding ambient audio is that it can help mask tiny inconsistencies in your voice over, like breaths or slight mic variations that happened between takes.
Watch the Full Video with Fresh Ears Before Final Export
When everything feels done, take a break. Step away for at least an hour, or even longer if you can. Come back and watch the full video with fresh ears. Don’t just scan it. Watch it from start to finish, and this time, pretend you’ve never seen it before. That’s how your audience will experience it.
You’ll notice things you didn’t hear earlier – a word that sounds rushed, a clip that feels out of sync, or a moment where the background noise spikes. These are small adjustments that often get missed when you’re deep in the editing. Watching it once as a viewer gives you a clearer sense of how well the voice and video work together.
What Makes Voice Over Editing Work?
It’s the attention to small choices. Not flashy effects. Not fancy equipment. It’s things like scripting ahead, avoiding choppy cuts, respecting pacing, and keeping audio clean. When the voice and visuals feel like they belong together, it holds attention better and keeps your message clear.
If you’re doing all of this solo, the process can seem a bit technical at first. But with a method that makes sense and tools that work with you (not against you), editing voice over videos stops feeling like guesswork.
Whether it’s your first project or your hundredth, the difference is always in the details.
Related Articles

The 8 Best To-Do List Apps for Android in 2025

8 Best To-Do List Apps for Mac in 2025

Top 9 Apps to Effortlessly Add Text to Your Videos in No Time

How to Easily Convert AVI to MOV Using 4 Reliable Tools

MPEG to MP3 Conversion Made Easy: A Complete Guide

3 Best AI Voice Generators to Enhance Your Content in 2025

How to Convert MPEG to WAV: A Step-By-Step Guide

LightCut 2025 Review: The Best Video Editor for Android and iPhone
How to Easily Convert AVI to MOV Using 4 Reliable Tools

Free Video Editing Software for Mac OS X: 10 Excellent Choices

Zendesk vs. Intercom: A Clear Comparison for 2025
5 Simple Ways to Convert FLV Files to MOV Format on Windows
Popular Articles

How to Use Camtasia for Screen Recording
How to Automate Recurring Tasks in Notion: A Step-by-Step Guide
Best 3D Animation Tools for Beginners and Experts Alike

10 Game-Changing VS Code Extensions Every Developer Should Install

How to Convert and Transfer Videos to Your iPad Air from a Mac

Step-by-Step Guide to Creating and Presenting Slideshows on iPad

How to Make Viral YouTube and TikTok Reaction Videos: Step-by-Step Guide

The Complete Guide to the iPod Family: Devices That Shaped Portable Music
Top 5 Effective Methods to Convert M4V to FLV Easily

Set Up Media Streaming with DLNA in Windows

Top Cloud Storage Solutions for Secure Online File Management