Easy Ways to Transfer Videos to PSP Using a PSP Video Converter
The PlayStation Portable (PSP) isn’t just for gaming—it’s your go-to for multimedia like music, photos, and videos. Want to enjoy movies or shows on your PSP? You’re not alone. Whether you love classic films or recent releases, this guide will show you how to convert and transfer videos using a PSP video converter. Let’s dive into optimizing your PSP’s multimedia features!
Why Convert Videos for Your PSP?
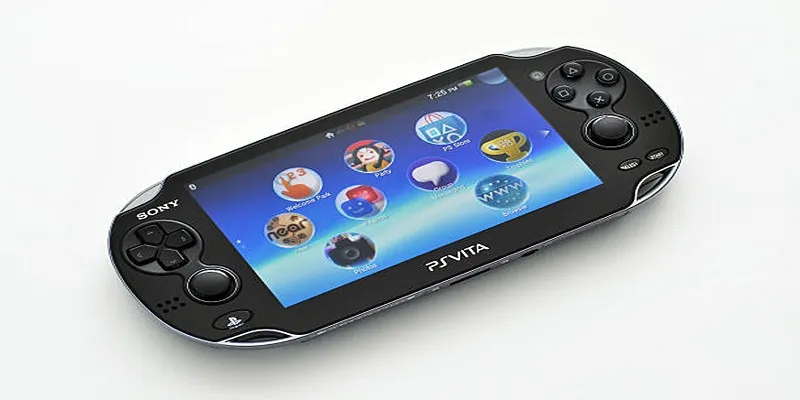
The PSP can play videos, but there’s a catch: it only supports specific formats such as MP4, AVI (encoded as MP4), and certain MPEG-4 formats. If your video file isn’t compatible, your PSP won’t play it. This is where a PSP video converter comes in handy—it allows you to adapt almost any video file to a PSP-compatible format, so you can enjoy your favorite content seamlessly.
Supported Video Formats for PSP
- MP4 (H.264/AVC encoding)
- Motion JPEG (AVI)
These formats ensure smooth playback on your PSP without glitches or support issues.
What Do You Need to Get Started?
Before jumping into the step-by-step process, gather the following tools and resources:
- A PSP console and a USB cable: Your PSP will be the destination for the converted video files.
- A Memory Stick Duo or Memory Stick Pro Duo: Store your videos here. Ensure it has enough space.
- A PSP-compatible video converter: Tools like HandBrake, Format Factory, or Freemake Video Converter are excellent. Download one beforehand.
- Video files you want to convert: These can be in formats like AVI, MKV, MOV, or WMV.
- A functional computer (Windows or Mac): You’ll need this for processing the conversion and transferring files to your PSP.
Step-by-Step Guide to Put Videos on PSP
Step 1: Set Up Your PSP
Before converting, prepare your PSP and memory stick:
- Insert the Memory Stick Duo into your PSP.
- Turn on your PSP and go to the Settings menu.
- Select USB Connection to enable USB mode.
Step 2: Connect Your PSP to Your Computer
Plug your PSP into your computer using a USB cable. Your PSP should appear as a removable storage device. Open the device and locate the folder directory.
File path for videos: Navigate to the VIDEO folder on your PSP’s memory stick. If the folder doesn’t exist, create one named VIDEO (in all caps).
Step 3: Download and Install a PSP Video Converter
Choose a reliable PSP video converter. Here are three excellent options:
- HandBrake (Free): A popular open-source video converter supporting PSP-compatible formats.
- Freemake Video Converter: User-friendly with preset profiles for PSP.
- Any Video Converter (AVC): Versatile with extensive file format support.
Download and install your chosen software before proceeding.
Step 4: Convert the Video Using a PSP Video Converter
With your PSP set up and a converter chosen, it’s time to convert.
How to Use HandBrake
- Open HandBrake: Launch after installation.
- Select a Source File: Click “Open Source” and browse for the video file. Load it into the software.
- Choose the Destination Folder: Under “Save As,” click “Browse” to select where the converted video will be saved.
- Set the Output Format: Choose MP4 from the “Format” dropdown. Ensure the codec is set to H.264.
- Adjust Resolution and Settings: In the “Dimensions” tab, set the width to 480 pixels for PSP. Explore other tabs to fine-tune quality.
- Start the Conversion: Click “Start Encode” to begin. Conversion time depends on file size.
HandBrake’s features make it reliable for converting videos for a wide range of devices, including the PSP.
How to Use Any Video Converter (AVC)
- Download and Install AVC: Get it from the official website.
- Add Video Files: Launch and click “Add Video(s)” or drag files into the application for batch conversion.
- Choose the Output Format: Select the desired output format from the dropdown. Options are available for PCs, mobile devices, and gaming consoles.
- Adjust Settings: Customize resolution, frame rate, and bitrate. The program offers presets for common devices.
- Start the Conversion: Click “Convert Now” to begin. The progress bar will show time remaining.
- Save Your Files: Converted files are saved to the output folder, ready for transfer.
Step 5: Transfer the Converted Video to Your PSP
Once conversion is complete, transfer the file:
- Locate the converted video on your computer.
- Copy it to the VIDEO folder on your PSP’s memory stick. Drag and drop if connected via USB.
- Safely eject the PSP from your computer to avoid file corruption.
Step 6: Play the Video on Your PSP
Now the fun part! Disconnect your PSP from the computer and head over to the Video section in the PSP menu. Navigate to the VIDEO folder and select your newly transferred video to start playback.
Tips for the Best Viewing Experience

- Use Headphones: Enhance audio with quality headphones.
- Organize Your Files: Label videos clearly to easily find them in the PSP menu.
- Check for Storage Space: Regularly clean up unnecessary files to maintain sufficient space.
- Experiment with File Settings: Test different bitrates and resolutions to find the right balance between quality and file size.
Final Thoughts
Adding videos to your PSP is easier than you think with the right tools and steps. By using a reliable PSP video converter, you can unlock the full potential of your device as a portable multimedia center. Download a PSP video converter today and start creating your personalized media library. Whether it’s movies, tutorials, or music videos, your PSP is ready to bring your content to life.
Related Articles
The Easiest Way to Convert Video to Apple TV: Free, Paid, and Online Options

5 Ways to Convert Videos to MP4 on Mac OS X Effortlessly

LightCut 2025 Review: The Best Video Editor for Android and iPhone

A Guide to Converting and Editing Videos for Pocket PCs

Free Video Editing Software for Mac OS X: 10 Excellent Choices

Top Video Editors for Android – Best Alternatives to iMovie
Simple Guide to Converting and Editing Videos for BlackBerry Phones

Discover the Top 5 Tools for Effortless AVI Video Conversion

5 Simple Methods to Convert MP4 to MPEG on Your Mac

The Best 7 Movie Makers for Mac Users in 2025

Simple Ways to Convert Your Favorite Videos for Xbox Playback

Top 5 Cross-Platform VR Video Players You Should Try Today
Popular Articles

The 7 Best PDF Editor Apps in 2025 for Clean, Hassle-Free Document Control
Top Free Online Tools to Convert WEBP Images to JPG Format Easily

The Best WebM Players for iPhone, Android, Windows, and Mac
Why Wondershare RepairIt Stands Out as the Best Video Repair Tool
Simplify Your Life in 2025 with These Top Calendar Apps for iPhone

How to Train ChatGPT on Your Own Data: A Step-by-Step Guide for Beginners

How to Add Social Media Icons to WordPress Menus in a Few Easy Steps

Step-by-Step Guide to Allow Users to Submit Posts in WordPress

Find the Right Pomodoro Timer App to Maximize Your Work Sessions
How to Capture Your Best CSGO Gameplay: A Simple Guide for Players

5 Best Mac Screen Recording Tools to Elevate Your Recording Game

 mww2
mww2