mww2
mww2
Full Guide: Record Your Teams Meeting with or without Teams’ Own Feature
Recording a Teams meeting is an excellent way to capture important conversations, lectures, or project updates for future reference. Whether you’re a student trying to catch every detail of an online class or a professional keeping track of project discussions, knowing how to record a meeting can be invaluable. Microsoft Teams has a built-in recording feature, but sometimes alternative methods are necessary. Let’s explore both options in a straightforward and easy-to-follow manner.
How to Use the Built-in Recording Feature in Microsoft Teams
If you use Microsoft Teams and want the simplest method to record a meeting, the built-in recording tool is your best option. It’s integrated into the app, requiring no additional installations. However, not everyone can access it anytime—appropriate permissions are necessary.
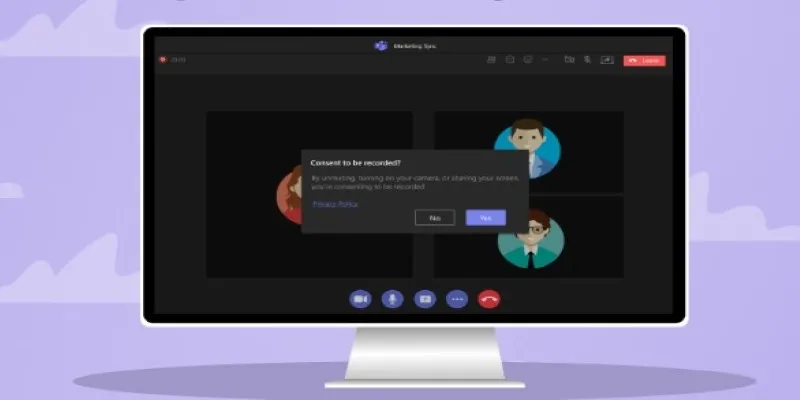
To start recording during a Teams meeting, you must be the meeting organizer or part of the same organization. If eligible, locate the three dots (…) on the meeting control bar. Click them, then select “Start Recording.” A notification will alert all participants that the recording has begun. Teams will automatically save the recording to OneDrive or SharePoint, depending on your account setup.
Stopping the recording is just as simple. Click the three dots again and select “Stop Recording.” After the meeting concludes, you can find the recording link in the meeting chat, allowing you to watch, download, or share the video.
Keep in mind that Teams won’t record breakout rooms separately; it only captures the main meeting window. Also, if your organization’s admin has disabled recording, you won’t see the option.
What to Do If You Can’t Use Teams’ Built-in Recording
Sometimes, you might find there’s no option to start recording. This could be due to using a personal account, having the recording feature disabled by your school or company, or being a guest. In such cases, alternative methods are needed.
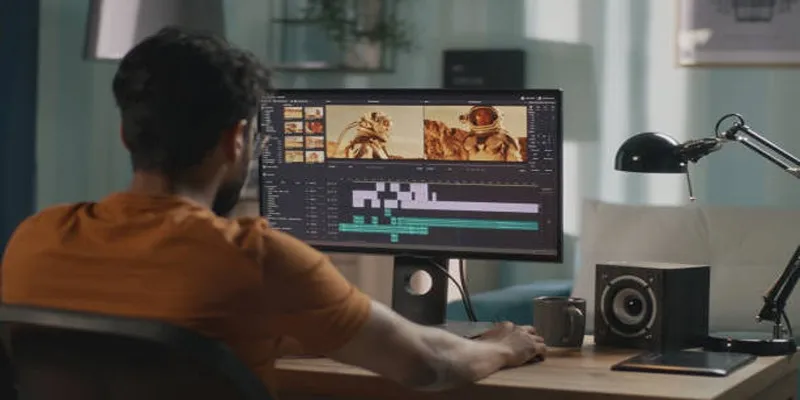
One solution is to use a screen recording program. Many free and paid options are available to capture your screen activity, including Teams meetings. Tools like OBS Studio (free), Xbox Game Bar (pre-installed on Windows 10 and 11), or online screen recorders like Screencast-O-Matic are effective choices.
Setting up a screen recorder is typically straightforward. With OBS Studio, for example, open the program, select “Display Capture,” and start recording before your meeting begins. For Xbox Game Bar, press the Windows key + G to open it, then hit the record button. It will save a video of your entire screen, including audio.
Remember, screen recorders won’t notify others that you’re recording. It’s good practice (and often required) to inform everyone before you start recording, especially if you plan to share the recording later.
Using a recorder gives you more control. You can select where to save your videos, edit them afterward, and capture elements that Teams normally doesn’t, such as breakout sessions or side chats.
Best Tools for Recording a Teams Meeting without Built-in Support
If you want to expand beyond Teams’ built-in recorder, several reliable tools are available. Some are free, while others offer additional features like editing or direct uploads to the cloud for a fee.
OBS Studio
OBS Studio is a popular choice because it’s free, open-source, and compatible with Windows, Mac, and Linux. While slightly more complex to set up initially, its power and flexibility make it worthwhile. It allows capturing your full screen, specific windows, or selected parts of your screen, and you can mix different audio sources if needed.
Xbox Game Bar
Xbox Game Bar is pre-installed on most Windows computers. It’s easy to open with a shortcut (Windows key + G) and requires no extra downloads. It’s suitable for basic recordings but may lack advanced features.
Screencast-O-Matic
Screencast-O-Matic is a lightweight online recorder that doesn’t require a download for the web version. You can record up to 15 minutes for free, and their paid version is affordable for longer videos. It also offers simple editing features, such as trimming and adding captions.
Camtasia
Camtasia is a paid tool frequently used by educators, YouTubers, and businesses due to its user-friendly editing tools. You can record a meeting, then easily cut out unnecessary parts, add highlights, or insert notes.
When choosing a tool, consider what matters most to you. Need something free and straightforward? Opt for Xbox Game Bar or OBS Studio. Prefer easy editing? Consider Camtasia or Screencast-O-Matic.
Tips for Better Recording Results (with or without Teams)
Recording a meeting involves more than just hitting a button. A little preparation can significantly enhance the quality of your recordings.
First, check your microphone settings. Ensure your mic functions properly and that your volume is clear but not too loud. If possible, use headphones with a built-in mic to minimize echo and background noise.
Second, tidy up your desktop. If you’re recording your screen, close unrelated tabs and programs to keep the meeting the focus. You don’t want distracting pop-ups or messages in your video.
Third, test your recorder ahead of time. If you’re using a new tool like OBS Studio or Screencast-O-Matic, run a quick test before the meeting to ensure it’s capturing the correct screen and recording sound properly.
Finally, inform participants that you’re recording. Even if your tool doesn’t announce it, it’s courteous—and sometimes legally necessary—to notify everyone at the start of the meeting. A simple statement like, “Hey everyone, just a heads-up, I’ll be recording today’s meeting for notes later” suffices.
Conclusion
Recording a Teams meeting is straightforward once you know how. If you can use the built-in feature, it only takes a few clicks. If not, screen recording tools like OBS Studio, Xbox Game Bar, or Screencast-O-Matic are excellent alternatives. Regardless of your recording method, a little preparation can ensure the best results. Quality recordings save time, help you review important details, and make your online meetings more valuable.
Related Articles

How to Record Your Gameplay on PC Like a Professional: Essential Tools & Tips for 2025

Top 8 Screen Recorder Apps for Effortless Video Recording

Master the Art of Recording Your League of Legends Gameplay

How to Easily Convert AVI to MOV Using 4 Reliable Tools

MPEG to MP3 Conversion Made Easy: A Complete Guide

How to Convert MPEG to WAV: A Step-By-Step Guide
How to Easily Convert AVI to MOV Using 4 Reliable Tools
How to Convert FLV to MP4 for Free: Top Tools and Easy Methods

Top 9 Apps to Effortlessly Add Text to Your Videos in No Time
A Step-by-Step Guide to Quickly Combine Video Clips in iMovie

Easy Ways to Automatically Upload Zoom Recordings to Google Drive

How Can You Automatically Send Emails for New Airtable Records?
Popular Articles

Pixel vs. Dot Explained: Mastering Photo Resolution for Printing

Which Are The Best Database-Powered App Builders for Seamless Development?

The Ultimate Comparison: Hootsuite vs. Buffer for Social Media Success

Step-by-Step Guide to Creating Canva Slideshows with Audio
AVS Video Editor: What It Does Well and What Others Do Better
Top Tools to Pull Accurate Data from Any Graph Image

Streamline Your Workflow with These 6 Jira Alternatives in 2025
Solving Grammarly Issues in Google Docs: Quick and Simple Fixes

Top 5 Deployment Automation Tools Developers Rely On
VivaVideo Review: A Mobile Editor That Actually Keeps Up With You
Git 2.49 Released: Faster Packing, Better Clones, and Rust Support