mww2
mww2
Quick and Simple Methods to Convert M2TS to MPEG
Converting M2TS files can be a bit of a puzzle, especially since they’re not always compatible with every device. Commonly used by cameras from brands like Sony, Panasonic, or Canon, M2TS files deliver excellent quality but can be tricky to share or edit. A reliable M2TS to MPEG converter can solve this issue, making your videos playable, editable, and easy to share. In this blog, we’ll explore why you should convert, the benefits of MPEG, and the best tools for quick and easy conversion.
What are M2TS and MPEG?
- M2TS stands for MPEG-2 Transport Stream. It’s a video container format often used for Blu-ray Discs and AVCHD camcorders.
- MPEG refers to a family of popular video compression standards (such as MPEG-1 and MPEG-2), known for high compatibility with devices, editing software, and online platforms.
Benefits of MPEG over M2TS
- Universal Compatibility: Most media players, video editors, and streaming services accept MPEG formats.
- Efficient Compression: Solid video quality with smaller file sizes.
- Easy Editing: MPEG files import and edit smoothly in major software like Adobe Premiere and Final Cut Pro.
- Simpler Sharing: Uploading or sending MPEG videos is much easier compared to M2TS.
Features to Look for in Video Conversion Software
With a sea of conversion tools out there, here’s what you should prioritize when choosing:
- Speed: Fast conversion to avoid wasting time.
- Output Quality: Look for tools that prevent quality loss during conversion.
- Batch Conversion: Convert multiple M2TS files to MPEG at once to save effort.
- Device Optimization: Preset profiles for different gadgets and platforms simplify the process.
- Editing Capabilities: Some converters offer trimming, cropping, merging, or adding effects before you convert.
- Ease of Use: An intuitive interface is especially helpful for beginners.
- Supported Formats: Choose software that also handles other formats like MP4, MOV, or AVI.
The Best Software for Converting M2TS to MPEG
Here’s a closer look at the top options, with pros, cons, and standout features for each.
1. HandBrake
HandBrake is a longtime favorite among video enthusiasts. It’s open-source, completely free, and works on Windows, Mac, and Linux.
How to Use HandBrake
Using HandBrake to convert M2TS to MPEG is straightforward. Follow these steps:
- Download and Install - Visit the official HandBrake website and download the appropriate version for your operating system. Install the software using the provided instructions.
- Open HandBrake - Launch the application, and you’ll be presented with the main interface.
- Load the M2TS File - Click on the “Open Source” button to browse and select the M2TS file you want to convert.
- Choose the Output Format - Under the “Summary” tab, select MPEG as the desired output format. You may need to select specific presets depending on your preferences.
- Adjust Additional Settings (Optional) - Tweak settings like resolution, bitrate, or subtitles if needed, using the various tabs for customization.
- Select Save Location - Choose the destination folder where the converted file will be saved by clicking on the “Browse” button at the bottom.
- Start Conversion - Click “Start Encode” to begin the conversion process. HandBrake will process the file and notify you when the conversion is complete.
Key Benefits
- Straightforward UI for basic conversions, with advanced settings for power users.
- Wide format support, including M2TS input and MPEG output (mostly via MP4 or MKV containers, but settings can be fine-tuned).
- Batch processing and device-optimized presets (like “Apple 1080p” or “Android tablet”).
- Regular updates and a supportive community.
Limitations
- Steeper learning curve for advanced options.
- Some output settings (like .mpeg extension) require manual adjustment.
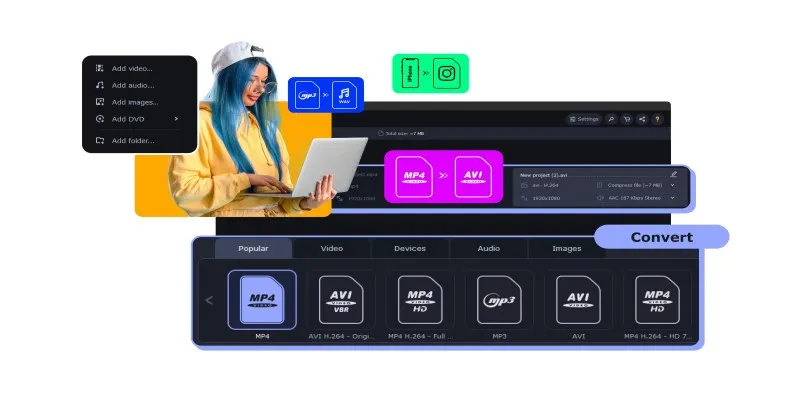
2. Wondershare UniConverter
UniConverter by Wondershare takes video conversion up a notch with its sleek interface and additional features.
How to Use Wondershare UniConverter
Using Wondershare UniConverter is straightforward, even for beginners. Follow these steps to get started:
- Download and Install: Visit the official Wondershare UniConverter website and download the software. Install it on your device by following the on-screen instructions.
- Add Files: Launch the program and click on the + Add Files button to import the video or audio files you want to convert. You can also drag and drop files directly into the interface.
- Choose Output Format: Select the target format by clicking the Output Format menu. You can choose from a variety of formats and device-specific presets.
- Adjust Settings (Optional): If needed, tweak advanced settings like bit rate, resolution, or codecs by clicking the Settings icon next to the selected output format.
- Start Conversion: Once everything is configured, click the Convert button (or Start All for batch processing). The progress bar will indicate the conversion status.
- Access Converted Files: After the conversion is complete, access your files in the output folder, which can be opened directly from the interface.
Key Benefits
- Intuitive drag-and-drop design ideal for beginners.
- High-speed batch conversions with hardware acceleration.
- Support for more than 1000 file formats (including M2TS and MPEG).
- Built-in editor for trimming, cropping, merging, and adding subtitles.
- Device-specific presets for quick optimization.
- Extra features such as DVD burning, screen recording, and video downloading.
Limitations
- Full feature set requires a paid license (though a free trial is available).
- Some features are locked in the free version.
3. Movavi Video Converter
Movavi Video Converter blends speed, ease, and versatility.
How to Use Movavi Video Converter
Using Movavi Video Converter is simple and intuitive. Follow these steps to get started:
- Download and Install: Download the software from the official Movavi website. Once downloaded, run the installer and follow the on-screen instructions to complete the installation process.
- Launch the Software: Open Movavi Video Converter and get ready to add your files.
- Add Files: Click the “Add Media” button and select “Add Video” or “Add Audio” depending on your needs. Navigate to your files and load them into the program.
- Choose the Output Format: Select the desired output format from the format menu. Movavi provides a wide range of formats and device-specific presets for easy optimization.
- Set the Output Folder: Choose where the converted file will be saved by setting the output folder path.
- Start the Conversion: Hit the “Convert” button to begin. The progress bar will display the status, and once completed, your file will be ready to use.
Key Benefits
- User-friendly dashboard with drag-and-drop functionality.
- Extremely fast conversion thanks to SuperSpeed mode.
- Basic editing features like trimming and rotating.
- Customizable output for dozens of devices.
- Clear preview of output quality and file size before you convert.
Limitations
- Watermark on output in the free trial version.
- Some advanced editing features are limited.
4. Freemake Video Converter
Freemake Video Converter is popular for its simple interface and broad format support.
How to Use Freemake Video Converter
- Download and Install: Visit the official Freemake website to download the software. Once downloaded, run the installer and follow the on-screen instructions to complete the installation process.
- Add Your Files: Open the software and click on the "+Video" button to add your video files. You can also drag and drop files directly into the program interface for convenience.
- Choose an Output Format: Select the output format you want from the formats displayed at the bottom of the interface, such as MP4, AVI, WMV, or others.
- Start the Conversion: Choose your output folder and click the Convert button to begin the process. The time required will depend on the file size and your system’s performance.
- Access Your Converted File: Once the conversion is complete, go to the output folder you selected to retrieve your final video file.
Key Benefits
- Supports over 500 formats and gadgets, making it a good choice for compatibility.
- Converts M2TS to MPEG and many other file types.
- Allows DVD burning and simple video edits.
- No tech experience needed.
Limitations
- Free version adds a watermark to videos.
- Windows only.
5. Any Video Converter (AVC)
Any Video Converter (AVC) is another well-regarded, free option with pro upgrades available.
How to Use Any Video Converter (AVC)
- Download and Install: Visit the official Any Video Converter website and download the software. Follow the on-screen instructions to install it on your computer.
- Launch the Program: Open Any Video Converter after installation. You’ll be greeted by a clean and intuitive interface.
- Add Files: Click the “Add Video(s)” button to import the files you want to convert. You can also drag and drop video files directly into the program.
- Choose an Output Format: Select the desired output format from the drop-down menu on the top right. AVC supports a wide range of formats, including MPEG, AVI, and MKV.
- Optional Editing: If needed, make simple edits to your video, such as trimming, cropping, or applying basic filters. These tools are easily accessible within the interface.
- Start the Conversion: Once everything is set, click the “Convert Now!” button to begin the conversion process. The program will save the converted video to the output folder you specified.
- Check the Output Folder: After the conversion is complete, locate your file in the designated output folder and enjoy your newly converted video.
Key Benefits
- Simple, clean layout with drag-and-drop conversion.
- Supports an impressive array of formats, including M2TS and MPEG.
- Bulk processing lets you convert entire batches of M2TS footage.
- Limited editing (trimming, cropping) included.
- No watermarks in the free version for most features.
Limitations
- Upselling for paid pro version can be intrusive.
- Customer support is better for premium users.
6. FFmpeg

FFmpeg isn’t just a converter; it’s the industry standard toolkit for handling virtually any audio or video file.
How to Use FFmpeg
Using FFmpeg may seem daunting at first, but with its command-line interface, it provides unmatched flexibility for experienced users. Here’s a simple guide to get started:
-
Download and Install FFmpeg: Visit the official FFmpeg website and download the appropriate version for your operating system. Follow the provided instructions to install and set up FFmpeg, ensuring the application is added to your system’s PATH variable for easy access.
-
Basic Command Structure
FFmpeg commands typically follow this format:
ffmpeg -i inputfile outputfileHere,
inputfileis the file you want to convert or process, andoutputfileis the name and format of the resulting file. -
Example Commands
-
Convert a video file:
ffmpeg -i input.mp4 output.aviThis command converts an MP4 video to AVI format.
-
Extract audio from a video:
ffmpeg -i input.mp4 -q:a 0 -map a output.mp3This saves the audio from a video file as an MP3.
-
Resize video dimensions:
ffmpeg -i input.mp4 -vf scale=1280:720 output.mp4This resizes a video to 720p resolution.
-
-
Explore More Commands: FFmpeg supports advanced features like batch processing, filters, and codecs. Consult the FFmpeg documentation to learn about commands tailored to your specific needs.
Key Benefits
- Free and open source; runs on every major OS.
- Maximum control over conversion parameters.
- Automates complex tasks via command-line scripting.
- Supports batch processing and powerful codecs.
Limitations
- No graphical interface by default; all commands are entered via Terminal or Command Prompt.
- Steep learning curve for new users.
Final Thoughts
Finding the right M2TS to MPEG converter depends on your needs. Opt for a free tool like FFmpeg for flexibility, a robust paid option like UniConverter, or a simple online solution for convenience. Upgrading your tools saves time and ensures your videos are preserved in future-proof formats. Start converting today for seamless viewing, sharing, and editing of your cherished memories and projects.
Related Articles

MPEG to MP3 Conversion Made Easy: A Complete Guide

How to Convert MPEG to WAV: A Step-By-Step Guide
Top Free Methods to Convert M2TS Files to QuickTime MOV

The 8 Best To-Do List Apps for Android in 2025

8 Best To-Do List Apps for Mac in 2025

How to Easily Convert AVI to MOV Using 4 Reliable Tools
How to Easily Convert AVI to MOV Using 4 Reliable Tools

Best Free Ways to Convert QuickTime MOV to MP4 for Any Device
Convert M2TS to AVI for HDTV: The Best Lossless Methods
Free Ways to Convert HEVC to MP4 Without Losing Quality
Simple Methods to Convert ISO Files to MP4 for Beginners
Top Tools and Methods to Convert FLV to WMV Format
Popular Articles

Ivory v2.3 Brings Key Improvements to Mac, iPhone, and iPad Apps
The Easiest Way to Make Any Video Work with iTunes
PicPlayPost Video Editor Review: Smart, Simple, and Creative

Top 10 Software for Easy Warehouse Management and Inventory Control
How to Easily Convert AVI to MOV Using 4 Reliable Tools

Top Static Site Generators That Require No Coding Knowledge

How to Use AdRotate for Effective Ad Management

How to Restore the Missing Link Title Field in WordPress 4.2 Easily
Master the Art of Stop Motion in iMovie Step by Step

Free and Powerful: 8 AI Image Enhancers to Boost Photo Quality

Step-by-Step Guide to Making a Stunning Travel Vlog