Simple Ways to Convert M4P to MP3 with and without iTunes
Are you stuck with an M4P file you can’t play on your devices? M4P, Apple’s protected audio format, works well within its ecosystem but can be frustrating on unsupported devices due to DRM restrictions. Converting M4P to the universally compatible MP3 format is the solution. This guide will show you the best tools, methods, and tips to convert your files effortlessly and enjoy your music anywhere.
What is an M4P File and How Does it Differ From MP3?
Understanding the difference between these two formats is crucial:
- M4P files are AAC (Advanced Audio Codec) files with DRM protection. This means they’re copy-protected and playable only on authorized devices. M4P files are commonly associated with older Apple iTunes purchases.
- MP3 files, on the other hand, are universally accepted, DRM-free, and compatible with almost all devices and media players.
Converting M4P to MP3 unlocks your music, giving you ultimate freedom for playback.
Considerations Before You Start Converting M4P Files
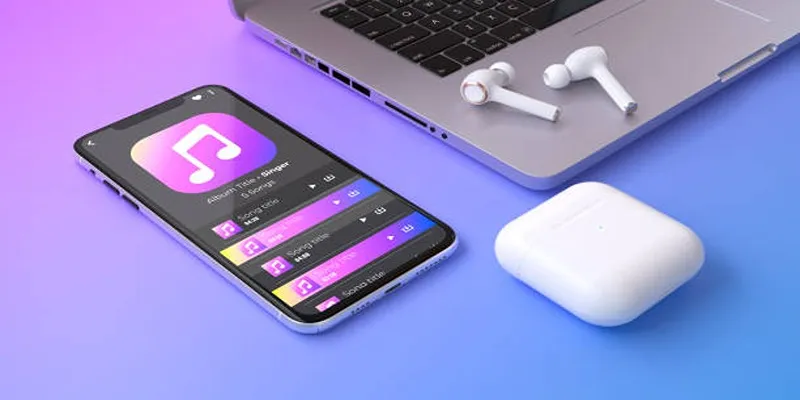
Although turning M4P files to MP3 is not hard, these steps ensure smooth conversions:
- Check DRM Restrictions: Ensure you have the legal right and authorization to convert M4P files. For example, if the files are from your iTunes library, you should be authorized to play them on your device.
- Quality Considerations: Converting to MP3 may slightly reduce audio quality depending on the bitrate you choose (128kbps, 256kbps, etc.). Opt for higher bitrates if maintaining sound quality is a priority.
- Choose the Right Tool: Some tools are free but may limit features or impose watermarks. Paid software often offers advanced functionality, better quality, and no restrictions.
Methods to Convert M4P Files to MP3
Method 1: Using iTunes (Built-in Functionality)
Apple’s iTunes provides an easy, accessible way to convert M4P files to MP3, provided the files are not DRM-protected.
Steps:
- Launch iTunes and ensure you’ve authorized your computer for your Apple ID (if the M4P files are tied to an account).
- Modify Import Settings:
- Go to Edit > Preferences.
- Under the General tab, select Import Settings.
- Choose MP3 Encoder from the Import Using dropdown menu.
- Locate Your Files:
- Navigate to your iTunes library.
- Right-click on the desired M4P file and choose Create MP3 Version.
- iTunes will create an MP3 copy of your track in your library.
Limitations:
- DRM-protected files cannot be converted directly within iTunes.
- You’ll need to use another method for older DRM-restricted songs.
Method 2: Using an Online Converter
Online converters are a great option for quick, small-scale conversions without downloading extra software.
Recommended Tools:
- CloudConvert (cloudconvert.com)
- Zamzar (zamzar.com)
Steps:
- Visit the tool’s official website.
- Upload your M4P file.
- Choose MP3 as the output format.
- Click Convert, then download the MP3 file.
Pros:
- Free and easy to use.
- No installations required.
Cons:
- File size limitations depending on the platform.
- Some platforms may compromise privacy if handling sensitive files.
Method 3: Using Third-Party Software

For batch conversions, advanced audio adjustments, or converting DRM-protected M4P files, dedicated third-party software is the best choice.
Popular Tools:
- TunesKit Audio Converter
- AudFree DRM Audio Converter
- NoteBurner Audio Converter
How to Use TunesKit Audio Converter
- Download and install TunesKit Audio Converter from the official website.
- Launch the software and import your M4P files by clicking the “Add” button.
- Choose an output format (e.g., MP3, AAC) from the dropdown menu in the settings.
- Adjust audio preferences such as bitrate or channel if necessary.
- Click the “Convert” button to start the conversion process.
- Once completed, locate your converted files in the output folder.
How to Use AudFree DRM Audio Converter
- Download and install AudFree DRM Audio Converter from the official website.
- Open the software and add your DRM-protected audio files by clicking the “+” or “Add” button.
- Select your desired output format, such as MP3, FLAC, WAV, or AAC, by navigating to the settings menu.
- Customize additional parameters like sample rate, audio codec, or bitrate according to your preferences.
- Hit the “Convert” button to begin removing DRM and converting the audio files.
- After the conversion is complete, find your DRM-free audio files in the designated output folder.
Method 4: Burn M4P Files to CD and Rip as MP3
If you’re dealing with older DRM-protected files and want an alternative, the CD-burning method might be your answer.
Steps:
- Create a Playlist with your M4P files in iTunes.
- Insert a blank CD and burn the playlist to it.
- Rip the CD back into iTunes, but select MP3 as the import format in preferences.
- Export the MP3 files to your desired location.
Method 5: For Mac Users Convert via Apple Music
If you’re using macOS Catalina or later, iTunes has been replaced by Apple Music. Conversion through Apple Music follows similar steps as iTunes but varies slightly.
Steps:
- Open Apple Music and add your M4P files to the library.
- Go to Music Preferences and set the import format to MP3.
- Right-click the M4P file and select Convert to MP3.
Limitations:
This method only works for non-DRM M4P files. For DRM-protected content, third-party tools are still required.
Tips for Ensuring a Smooth M4P to MP3 Conversion
- Backup Important Files: Be sure to create copies of your original M4P files before converting them.
- Choose the Right Bitrate: 256kbps is a suitable bitrate for balancing quality and file size.
- Test Before Large Scale Conversion: Convert one or two files first to ensure the process works flawlessly.
Final Thoughts
Unlock the full potential of your favorite tracks by converting restrictive M4P files into versatile MP3 formats. Whether you’re using iTunes, online tools, or third-party software, there’s a method to suit every need. Don’t let DRM restrictions hold you back from enjoying your music on any device. Take the first step by trying one of the suggestions above and enjoy your music hassle-free today!
Related Articles

How to Add Music to a Picture Slideshow Without Complicated Tools

Discover the Best Tools to Organize Your Music on Windows Today

8 Best To-Do List Apps for Mac in 2025
How to Play a DVD on Your Laptop: 2 Simple Ways to Watch Your Movies

MPEG to MP3 Conversion Made Easy: A Complete Guide

Step-by-Step Guide to Adding Music in iMovie

The 8 Best To-Do List Apps for Android in 2025

From Video to Audio: 10 Top MP4 to MP3 Converters in 2025

Best Methods to Add Music to Your Videos Quickly

Unleash Your Creativity: Top AMV Maker Apps for Anime Music Videos
The Simple Way to Get iMovie on Mac—and What to Use on Windows

How to Activate Subtitles on Plex for a Better Viewing Experience
Popular Articles

Best Tools to Access WTV Files on Both Mac and Windows
HubSpot vs. Marketo: Features, Benefits, and Drawbacks Explored

How to Make a DVD Photo Slideshow on Windows and Mac

Best Animation Software for Creative Work in 2025

The Top Tools to Edit and Convert MTS Videos Without iMovie

The Best CRM Software for Real Estate Agents: Top Picks for 2025
How to Fix Corrupted Videos on Windows: A Step-by-Step Guide

Which IRC Client Is Right for Windows? Here Are 10 Options

A Step-by-Step Guide to Creating a Split Screen Video with Movavi

Step-by-Step Guide to Converting FLV to 3G2 for Your Mobile Phone

The Best Screen Sharing Software in 2025 for Smooth, Lag-Free Collaboration

 mww2
mww2