mww2
mww2
The Best 10 Special Effects for Stunning Movie Maker Videos
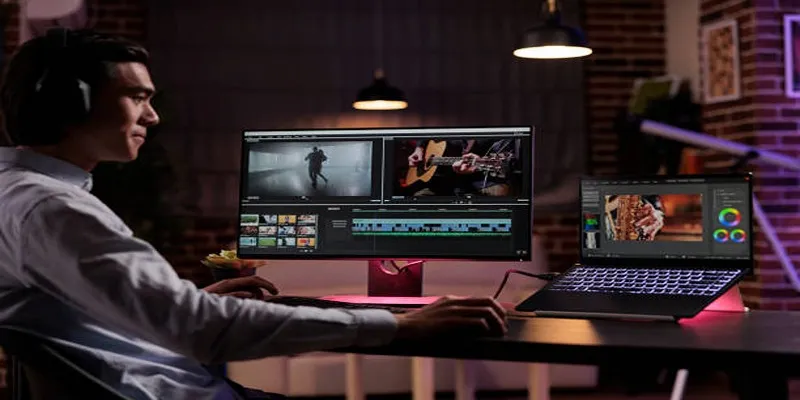
Standout visuals are the catalyst for attention in the era of video storytelling. Whether you’re enhancing your home videos or crafting a masterpiece, the right movie maker effects can make all the difference. This blog lists 10 must-have effects, explaining how they work and how to use them to give your next project a professional, captivating shine.
Why Movie Maker Effects Matter

Great video effects do more than beautify your content; they serve a purpose. They tell a story, evoke emotions, and set the overall mood. A slight vignette can create intimacy, while dramatic transitions might signify a critical turning point.
Choosing the right effects for the right moments is key. Overuse can make your visuals overwhelming, and underuse might make them feel flat. Use them wisely, and you’ll captivate your audience.
The Power of Video Effects
Here are a few reasons why video effects are essential for storytelling:
- Enhance engagement by keeping the viewer visually stimulated.
- Set the tone to align visuals with emotional beats.
- Increase professionalism , giving your work a polished, cinematic feel.
1. Cinematic Color Grading
Color grading is arguably one of the most impactful effects you can add to any video. This effect adjusts the tones, hues, and saturation to create a distinct mood. Want to emulate the gritty look of a noir film or the warmth of sunlight? Color grading makes it possible.
How to Use:
- Use cool hues (blues and greys) to create a somber or suspenseful scene.
- Opt for warm tones (oranges and yellows) to convey joy or nostalgia.
- Tools like Adobe Premiere Pro, DaVinci Resolve, and Final Cut Pro offer advanced color grading options to bring your vision to life.
2. Smooth Transitions
Awkward, jarring cuts between scenes can ruin even the most beautifully shot footage. Smooth transitions, like dissolves, wipes, or fades, give your video a professional flow and enhance the storytelling process.
How to Use:
- Use a crossfade for emotional moments or softer storytelling transitions.
- A swipe can add a techy or modern vibe, ideal for action or creative expressions.
Tools like Movavi or Filmora offer plenty of ready-to-use transitions to fit different styles.
3. Slow Motion
Sometimes, pausing to appreciate the details makes all the difference. Slow- motion effects breathe life into otherwise ordinary actions, enhancing drama and emotional resonance. Whether it’s a lingering look or dramatic action sequence, slowing it down adds depth.
How to Use:
- Use slow motion for moments of high emotion or to emphasize details.
- Adjust the frame rate during shooting (shoot above 60fps for smooth results).
Look for slow-motion effects in Lightworks or Adobe After Effects.
4. Lens Flares
Lens flares add a dynamic and polished look to outdoor or high-light situations. Commonly seen in Hollywood blockbusters, they create the illusion of intense light bouncing off the lens toward the viewer.
How to Use:
- Use during sunset scenes, intros, or techy, futuristic videos.
- Don’t overuse as it can become overwhelming or distract from the main action.
Both Final Cut Pro and After Effects include customizable lens flare effects.
5. Picture-in-Picture (PIP)
A highly useful effect for tutorials or commentary videos, the Picture-in- Picture effect allows you to overlay a smaller video onto your main screen. It’s a favorite for gaming, cooking, and educational content creators.
How to Use:
- Use for reaction videos or for adding emphasis during tutorials.
- Keep the size and placement non-intrusive to avoid crowding your frame.
Movie Maker software like Filmora makes this super easy to implement.
6. Vignette
Vignettes subtly darken the edges of your frame, focusing attention on the center of the shot. They add a note of nostalgia or intimacy, almost as if you’re gazing through a memory.
How to Use:
- Highlight the central action or subject in your video.
- Apply sparingly to avoid a heavy-handed look.
Popular editing tools like iMovie or Premiere Pro feature vignette options.
7. Time-Lapse
Time-lapse condenses hours or even days into mere seconds, revealing patterns or progress that would otherwise go unnoticed. It’s an amazing cinematic tool for travel, nature, or even DIY projects.
How to Use:
- Capture sunrise or sunset, bustling cityscapes, or creative processes like painting or building.
- Shoot footage over long durations (interval settings and manual adjustment may be needed).
GoPro footage or DSLR time-lapse clips can be edited easily in Camtasia or Adobe Premiere.
8. 3D Text Animation
Who says text has to be boring? With 3D animation, your titles and subtitles become part of the visual language of your video. They can set the tone, provide context, or even contribute to the visual storytelling.
How to Use:
- Try kinetic typography (moving letters) to match on-screen action or pulsating moments in music.
- Use a bold, legible font so your audience doesn’t miss key details.
Blender and Kinemaster are excellent tools for creating 3D text animation.
9. Chroma Key (Green Screen)
The chroma key effect, also known as green screen, allows you to superimpose your footage onto any background. From flying over mountain ranges to standing on a stage, the possibilities are endless.
How to Use:
- Use a solid green or blue backdrop when shooting.
- Replace your background with video editing software like OBS, CapCut, or VSDC.
10. Glitch Effect
A retro, techy aesthetic can set your video apart, and the glitch effect is perfect for doing just that. Mimicking video errors, glitches evoke a digital, edgy feel, especially useful for music videos or gaming content.
How to Use:
- Pair with upbeat background music or transitions for high energy.
- Avoid overdoing it; it’s best used as an accent rather than the main effect.
Try glitch effects in DaVinci Resolve or within YouTube Shorts editing tools.
How to Bring It All Together
Adding these effects individually can elevate your video quality, but the real magic lies in combining them seamlessly. Experiment with layering transitions, pairing a glitch effect with 3D text, or using slow motion followed by a lens flare.
Remember, the focus should always remain on your story or message. Effects enhance your video, but they shouldn’t overwhelm or distract your audience.
Final Thoughts
Your video editing options are limitless, and film-making tools continue to improve. By experimenting with these 10 movie maker effects, you can spark creativity, grab your audience’s attention, and turn an ordinary video into something truly spectacular. If you’re ready to get editing, try downloading the latest movie maker software (many of which offer free trials) to get started. The best videos are one click away from being created!
Related Articles

LightCut 2025 Review: The Best Video Editor for Android and iPhone

Free Video Editing Software for Mac OS X: 10 Excellent Choices

How to Effortlessly Combine MP4 Videos on Your Desktop

Top Video Editing Tools with a Wide Range of Free Sound Effects
Explore the 10 Best Video Editing Software for Creators

CapCut, WeVideo & More: Tools That Simplify Video Editing

Simple Methods to Convert VOB to WMV for Beginners
10 Best Free Video Editing Tools to Make Social Media Videos Stand Out

How to Effortlessly Create a Video Collage on Your iPhone

PowerDirector: A Fast and Accessible Video Editing Tool for Everyone

What is HitFilm Express? A Beginner's Guide for Mac Users

Top 8 Free Video Editors Reviewed and Compared in Detail
Popular Articles

The 10 Most Reliable Open Source Platforms for Online Assessments

How to Easily Convert AVI to MOV Using 4 Reliable Tools
Top ActiveCampaign Alternatives to Try in 2025 for Smoother Workflows

Top Free CRM Software in 2025 to Organize and Grow Your Business

Elevate Your Strategy with the Best Content Marketing Tools of 2025
Top 4 AMV Players to Seamlessly Play AMV Files on Your Computer

Convert Your Pictures for Free: 5 Reliable Tools
What is HitFilm Express? A Beginner's Guide for Mac Users

Top 6 Electronic Signature Apps in 2025 to Sign Documents with Ease
Jotform vs. Typeform: A Head-to-Head Comparison of the Best Form Builders

Unify and Share Team Data Seamlessly with Ragic