mww2
mww2
How to Convert QuickTime HD Files to MP4 for Free
QuickTime videos are known for their sharpness and clarity, but they don’t always play well on every device or application. You might try to open one on a phone or older PC and hit a wall—no playback, no sound, or weird lag. If you’ve encountered this, don’t worry. Converting your QuickTime HD video into a more versatile format like MP4 can solve the problem. And yes, you can do it without spending a dime. Below are a few free tools and methods to convert QuickTime HD files. No fluff, just the stuff that works.
How to Convert QuickTime HD Video for Free?
Convert QuickTime HD Video with VLC Media Player
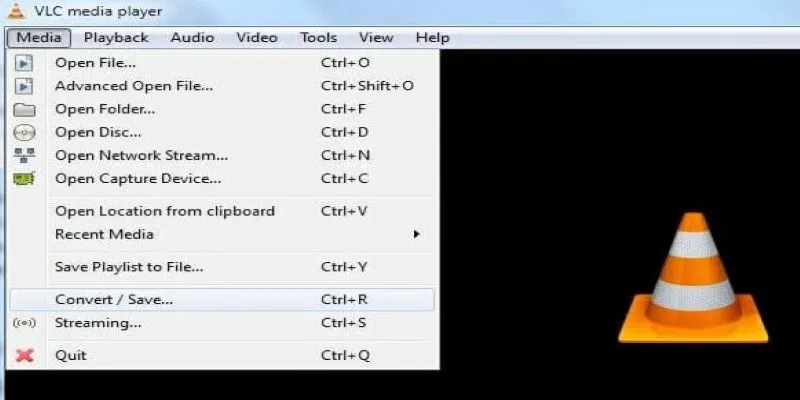
VLC is known for playing almost anything, but it can also convert videos. It’s free, cross-platform, and doesn’t install junk in the background.
- Open VLC and click on “Media” in the top bar.
- Select Convert / Save from the dropdown.
- Hit Add and load your QuickTime video (.mov file).
- Click Convert / Save again, and then pick MP4 (or another format) in the Profile section.
- Choose your destination file location and name it properly, making sure the extension is .mp4.
- Hit Start and wait a few minutes.
That’s it. VLC will encode the file and save the new one wherever you instructed. The speed is determined by how long your video is and at what resolution you’re exporting it.
VLC is best for simple conversions. If you want to trim or compress while converting, this tool can do that too, but its interface is a bit clunky for advanced edits.
Use HandBrake to Convert QuickTime HD Video
HandBrake is another free application, but this one is specifically designed for converting and compressing movies. It provides you with more leeway than VLC and is excellent for use with QuickTime files.
- Download and install HandBrake from its official site.
- Open the program and drag your QuickTime HD video into it.
- Choose a preset like Fast 1080p30 or HQ 720p, depending on what you want.
- Pick your output format. MP4 is usually the best choice for compatibility.
- You can adjust bitrate and resolution, add subtitles, or crop, if needed.
- Click Start Encode at the top.
HandBrake gives you a clean MP4 that works on almost anything—phones, tablets, and old laptops. It’s also good at shrinking the file size without killing the quality.
It’s a solid pick if you have more than one video to convert. Batch processing is simple: just add multiple files, set your settings once, and let it run.
Convert with FFmpeg
FFmpeg is powerful. It’s used behind the scenes by many other apps and works purely through the command line. It’s fast and efficient, but not for everyone, especially if you don’t like typing commands into a black box.
- Install FFmpeg based on your OS. On Mac, you can use Homebrew; on Windows, download the zipped build and add it to PATH.
- Open a terminal or command prompt.
- Use this command:
ffmpeg -i input.mov -vcodec libx264 -acodec aac output.mp4
Replace input.mov with your file name, and output.mp4 with what you want to name the new file.
That command does a basic conversion from QuickTime (.mov) to MP4 using common codecs.
FFmpeg is a beast. It can convert, trim, extract audio, batch process folders—you name it. But it assumes you’re comfortable with commands. If you’re not, maybe stick to VLC or HandBrake.
Try Online Converters to Convert
If you don’t want to install anything, use a browser-based converter. Just make sure the file size isn’t huge—most free sites limit uploads to 100MB or 500MB.
Here are a few that work:
- CloudConvert – Convert QuickTime HD files to MP4 or other formats online with customizable settings and no installation.
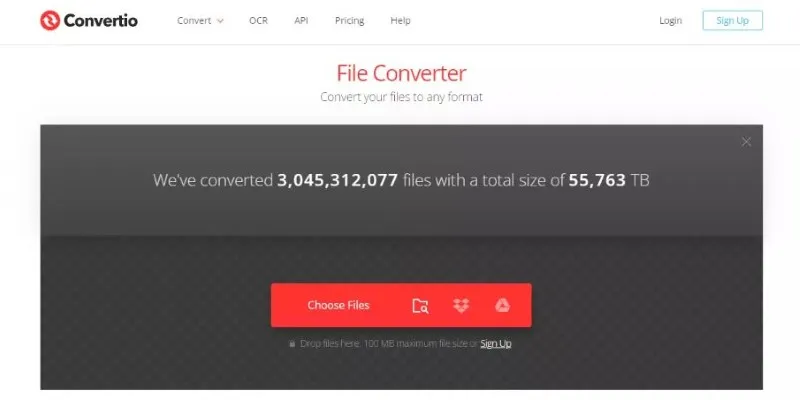
- Convertio – A fast online video converter that supports QuickTime to MP4 with a drag-and-drop interface and cloud-based processing.
- FreeConvert – Free and easy online tool to convert QuickTime videos with format options and size controls available.
- Online-Convert – Reliable web-based converter that handles QuickTime to MP4 with basic editing and format customization options.
Steps usually go like this:
- Visit the site.
- Upload your QuickTime file.
- Choose MP4 or another format as output.
- Start the conversion and download the result.
These tools are fine for quick jobs. They work well on small files but are not ideal for big videos or private footage, since you’re uploading to a third- party server.
Also, conversion speed depends on your internet connection. A slow upload means a long wait.
Use iMovie to Export as MP4
If you’re using a Mac, you already have iMovie. It works great with QuickTime videos since both are Apple-native formats.
Here’s how to use iMovie for conversion:
- Open iMovie and import your QuickTime HD video.
- Drag it into the timeline.
- Click the Share button in the top-right corner.
- Choose File.
- In the popup, adjust the resolution and quality if needed, and make sure the format is Video and Audio.
- Save it. iMovie will export it as an MP4.
This method is clean, simple, and works even for large files. The downside? You need a Mac. But if you’re already editing with iMovie, it’s a seamless way to convert.
Conclusion
QuickTime HD videos are sharp, but not always easy to play. Whether you’re trying to watch them on a phone or upload to a website that doesn’t accept MOV files, converting them makes life easier. VLC and HandBrake are great for most people. FFmpeg is fast if you know what you’re doing. Online tools are fine for short clips. And if you’ve got a Mac, iMovie gets the job done without extra software. All of these are free, simple, and work with just a few clicks or commands. So instead of letting your QuickTime files collect dust or frustration, pick one method and convert with ease.
Related Articles
Explore the 10 Best Video Editing Software for Creators
Top Free Methods to Convert M2TS Files to QuickTime MOV

Top Tools to Convert MXF Files for Seamless Sony Vegas Compatibility

The Best 4K Ultra HD TVs from LG, Samsung, VIZIO, Sony, and Seiki

The 8 Best To-Do List Apps for Android in 2025

12 Best Productivity Apps for Mac in 2025

Top 8 Video Converters for Mac and Windows in 2025

The 6 Best Construction Management Software Options to Streamline Your Projects

LightCut 2025 Review: The Best Video Editor for Android and iPhone

Best Free Video Splitters to Cut Your Clips Like a Pro

A Guide to Converting and Editing Videos for Pocket PCs

Best Free Methods to Convert AVI to MP4 Format for Your Kindle Fire
Popular Articles

How to Get Your Webflow Form Responses into Google Sheets — A Quick and Easy Guide
How to Stop QuickTime Screen Recording | Best Screen Recording Alternatives
Vmake AI Review & The Best Alternative for Superior Video Enhancement
Discover the Best Microsoft Teams Alternatives for Your Team's Needs
12 Best Productivity Apps for Mac in 2025
Converting MP4 to JPG: The Smarter Way to Capture the Perfect Frame
How to Convert JPG to Word for Text Editing: 4 Proven Techniques
Simple Ways to Transform MXF Files to ASF for Better Playback

Boost Trust for Free: Adding McAfee SECURE Seal to Your WordPress Site

Master Google Tasks: Organize Your Day Step-by-Step

Upgrade Your Email Experience: The 7 Best Email Clients for Windows